
|
sound_classification package from jsk_recognition repoaudio_to_spectrogram checkerboard_detector depth_image_publisher imagesift jsk_pcl_ros jsk_pcl_ros_utils jsk_perception jsk_recognition jsk_recognition_msgs jsk_recognition_utils resized_image_transport sound_classification |
ROS Distro
|
Package Summary
| Version | 1.2.19 |
| License | BSD |
| Build type | CATKIN |
| Use | RECOMMENDED |
Repository Summary
| Checkout URI | https://github.com/jsk-ros-pkg/jsk_recognition.git |
| VCS Type | git |
| VCS Version | master |
| Last Updated | 2025-12-15 |
| Dev Status | DEVELOPED |
| Released | RELEASED |
| Contributing |
Help Wanted (-)
Good First Issues (-) Pull Requests to Review (-) |
Package Description
Maintainers
- Naoya Yamaguchi
Authors
Sound Classification
ROS package to classify sound stream.
Contents
Setup
-
Install ROS. Available OS:
- Ubuntu 16.04 (?)
- Ubuntu 18.04
- Create workspace
    mkdir ~/sound_classification_ws/src -p
    cd ~/sound_classification_ws/src
    git clone https://github.com/jsk-ros-pkg/jsk_recognition.git
    rosdep install --from-paths . --ignore-src -y -r
    cd ..
    catkin build sound_classification
    source ~/sound_classification_ws/devel/setup.bash
- Install other packages.
- cuda and cupy are needed for chainer. See installation guide of JSK
- Using GPU is highly recommended.
Usage
- Check and specify your microphone parameters.
- In particular,
device,n_channel,bitdepthandmic_sampling_rateneed to be known. - The example bash commands to get these params are below:
- In particular,
        # For device. In this example, card 0 and device 0, so device:="hw:0,0"
        $ arecord -l
        \**** List of CAPTURE Hardware Devices ****
        card 0: PCH [HDA Intel PCH], device 0: ALC293 Analog [ALC293 Analog]
        Subdevices: 1/1
        Subdevice #0: subdevice #0
        # For n_channel, bitdepth and sample_rate,
        # Note that sources means input (e.g. microphone) and sinks means output (e.g. speaker)
        $ pactl list short sources
        1       alsa_input.pci-0000_00_1f.3.analog-stereo       module-alsa-card.c      s16le 2ch 44100Hz       SUSPENDED
- Pass these params to each launch file as arguments when launching (e.g., `device:=hw:0,0 n_channel:=2 bitdepth:=16 mic_sampling_rate:=44100`).
- If you use `/audio` topic from other computer and do not want to publish `/audio`, set `use_microphone:=false` at each launch file when launching.
- Save environmental noise to
train_data/noise.npy.- By subtracting noise, spectrograms become clear.
- During this script, you must not give any sound to the sensor.
- You should update noise data everytime before sound recognition, because environmental sound differs everytime.
- 30 noise samples are enough.
$ roslaunch sound_classification save_noise.launch
- Publish audio -> spectrum -> spectrogram topics.
- You can set the max/min frequency to be included in the spectrum by
high_cut_freq/low_cut_freqargs inaudio_to_spectrogram.launch. - If
gui:=true, spectrum and spectrogram are visualized.
- You can set the max/min frequency to be included in the spectrum by
$ roslaunch sound_classification audio_to_spectrogram.launch gui:=true
- Here is an example spectrogram at quiet environment.
- Horiozntal axis is time [Hz]
- Vertical axis is frequency [Hz]
|Spectrogram w/o noise subtraction|Spectrogram w/ noise subtraction|
|---|---|
|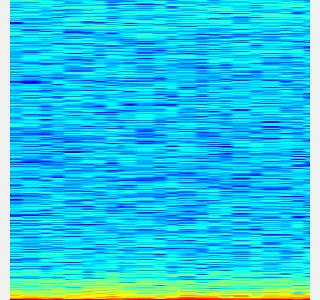|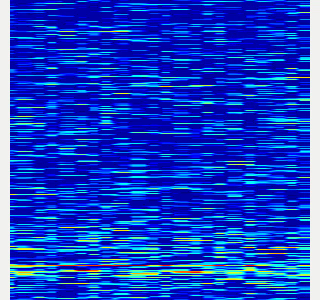|
-
Collect spectrogram you would like to classify.
- When the volume exceeds the
threshold, save the spectrogram attrain_data/original_spectrogram/TARGET_CLASS. - You can use rosbag and stream as sound sources.
- Rosbag version (Recommended)
- I recommend to use rosbag to collect spectrograms. The rosbag makes it easy to use
save_sound.launchwith several parameters. - In
target_class:=TARGET_CLASS, you can set the class name of your target sound. - By using
use_rosbag:=trueandfilename:=PATH_TO_ROSBAG, you can save spectrograms from rosbag. - By default, rosbag is paused at first. Press ‘Space’ key on terminal to start playing rosbag. When rosbag ends, press ‘Ctrl-c’ to terminate.
- The newly saved spectrograms are appended to existing spectrograms.
- You can change threshold of sound saving by
threshold:=xxx. The smaller the value is, the more easily sound is saved.
- I recommend to use rosbag to collect spectrograms. The rosbag makes it easy to use
- When the volume exceeds the
            # Save audio to rosbag
            $ roslaunch sound_classification record_audio_rosbag.launch filename:=PATH_TO_ROSBAG
            # play rosbag and collecting data
            $ export ROS_MASTER_URI=http://localhost:11311
            $ roslaunch sound_classification save_sound.launch use_rosbag:=true \
              filename:=PATH_TO_ROSBAG target_class:=TARGET_CLASS threshold:=0.5
- By setting `threshold:=0` and `save_when_sound:=false`, you can collect spectrogram of "no sound".
```bash
File truncated at 100 lines see the full file
Changelog for package sound_classification
1.2.19 (2025-05-14)
- Merge pull request #2879 from jsk-ros-pkg/add_license add LICENSE
- add LICENSE
- ad LICENSE
- Contributors: Kei Okada
1.2.18 (2025-05-10)
- fix for ROS-O (#2861)
- add std_mgs build_depends, to fix obase-build (maybe and others)
` 2025-01-03T00:50:28.1527201Z -- BUILD_SHARED_LIBS is on 2025-01-03T00:50:28.2543412Z -- Using these message generators: gencpp;geneus;genlisp;gennodejs;genpy 2025-01-03T00:50:28.2568008Z -- Could NOT find std_msgs (missing: std_msgs_DIR) 2025-01-03T00:50:28.2569369Z -- Could not find the required component 'std_msgs'. The following CMake error indicates that you\ either need to install the package with the same name or change your environment so that it can be found. 2025-01-03T00:50:28.2584407Z CMake Error at /usr/share/catkin/cmake/catkinConfig.cmake:82 (find_package): 2025-01-03T00:50:28.2585511Z Could not find a package configuration file provided by "std_msgs" with any 2025-01-03T00:50:28.2586306Z of the following names: 2025-01-03T00:50:28.2586595Z 2025-01-03T00:50:28.2586761Z std_msgsConfig.cmake 2025-01-03T00:50:28.2587107Z std_msgs-config.cmake 2025-01-03T00:50:28.2587292Z 2025-01-03T00:50:28.2587515Z Add the installation prefix of "std_msgs" to CMAKE_PREFIX_PATH or set 2025-01-03T00:50:28.2588032Z "std_msgs_DIR" to a directory containing one of the above files. If 2025-01-03T00:50:28.2588533Z "std_msgs" provides a separate development package or SDK, be sure it has 2025-01-03T00:50:28.2588941Z been installed. 2025-01-03T00:50:28.2589180Z Call Stack (most recent call first): 2025-01-03T00:50:28.2589472Z CMakeLists.txt:4 (find_package) 2025-01-03T00:50:28.2589660Z` - [ros-o] sound_classification: use Python3 and requirements.in.obase (#2853)
- Contributors: Kei Okada, Shingo Kitagawa, Yoshiki Obinata, Yuki Furuta
1.2.17 (2023-11-14)
1.2.16 (2023-11-10)
- [audio_to_spectrogram, sound_classification] Add data_to_spectrogram (#2767)
- use catkin_install_python to install python scripts under node_scripts/ scripts/ (#2743)
- [sound_classification] Update setup doc on READMEt( #2732)
- [sound_classification] Enable to pass all arguments of audio_to_spectrogram.launch from upper launches (#2731)
- [sound_classification] Fix pactl option to list up input devices (#2715)
- [sound_classification] set default as python2 in sound_classification (#2698)
- chmod -x sound_classification scripts for catkin_virtualenv (#2659)
- Add sound classification (#2635)
- Contributors: Iori Yanokura, Kei Okada, Naoto Tsukamoto, Naoya Yamaguchi, Shingo Kitagawa, Shun Hasegawa
1.2.15 (2020-10-10)
1.2.14 (2020-10-09)
1.2.13 (2020-10-08)
1.2.12 (2020-10-03)
1.2.11 (2020-10-01)
- add sample program to convert audio message to spectrogram
- [WIP] Add program to classify sound
- Contributors: Naoya Yamaguchi
1.2.10 (2019-03-27)
1.2.9 (2019-02-23)
1.2.8 (2019-02-22)
1.2.7 (2019-02-14)
1.2.6 (2018-11-02)
1.2.5 (2018-04-09)
1.2.4 (2018-01-12)
1.2.3 (2017-11-23)
1.2.2 (2017-07-23)
1.2.1 (2017-07-15 20:44)
1.2.0 (2017-07-15 09:14)
1.1.3 (2017-07-07)
1.1.2 (2017-06-16)
1.1.1 (2017-03-04)
1.1.0 (2017-02-09 22:50)
1.0.4 (2017-02-09 22:48)
1.0.3 (2017-02-08)
1.0.2 (2017-01-12)
File truncated at 100 lines see the full file
Package Dependencies
System Dependencies
Dependant Packages
Launch files
- launch/audio_to_spectrogram.launch
-
- device [default: hw:0,0]
- n_channel [default: 2]
- bitdepth [default: 16]
- mic_sampling_rate [default: 44100]
- use_rosbag [default: false]
- filename [default: /]
- use_microphone [default: true]
- high_cut_freq [default: 8000]
- low_cut_freq [default: 1]
- spectrogram_period [default: 1]
- gui [default: false]
- pause_rosbag [default: true]
- launch/classify_sound.launch
-
- device [default: hw:0,0]
- n_channel [default: 2]
- bitdepth [default: 16]
- mic_sampling_rate [default: 44100]
- use_rosbag [default: false]
- filename [default: /]
- use_microphone [default: true]
- high_cut_freq [default: 8000]
- low_cut_freq [default: 1]
- spectrogram_period [default: 1]
- pause_rosbag [default: true]
- gpu [default: 0]
- gui [default: true]
- launch/record_audio_rosbag.launch
-
- filename
- device [default: hw:0,0]
- n_channel [default: 2]
- bitdepth [default: 16]
- mic_sampling_rate [default: 44100]
- use_microphone [default: true]
- launch/save_noise.launch
-
- device [default: hw:0,0]
- n_channel [default: 2]
- bitdepth [default: 16]
- mic_sampling_rate [default: 44100]
- use_rosbag [default: false]
- filename [default: /]
- use_microphone [default: true]
- high_cut_freq [default: 8000]
- low_cut_freq [default: 1]
- spectrogram_period [default: 1]
- pause_rosbag [default: true]
- gui [default: true]
- save_data_rate [default: 10]
- launch/save_sound.launch
-
- device [default: hw:0,0]
- n_channel [default: 2]
- bitdepth [default: 16]
- mic_sampling_rate [default: 44100]
- use_rosbag [default: false]
- filename [default: /]
- use_microphone [default: true]
- high_cut_freq [default: 8000]
- low_cut_freq [default: 1]
- spectrogram_period [default: 1]
- pause_rosbag [default: true]
- gui [default: true]
- save_data_rate [default: 5]
- target_class [default: ]
- save_when_sound [default: true]
- threshold [default: 0.5]
Services
Plugins
Recent questions tagged sound_classification at Robotics Stack Exchange
|
|
sound_classification package from jsk_recognition repoaudio_to_spectrogram checkerboard_detector depth_image_publisher imagesift jsk_pcl_ros jsk_pcl_ros_utils jsk_perception jsk_recognition jsk_recognition_msgs jsk_recognition_utils resized_image_transport sound_classification |
ROS Distro
|
Package Summary
| Version | 1.2.19 |
| License | BSD |
| Build type | CATKIN |
| Use | RECOMMENDED |
Repository Summary
| Checkout URI | https://github.com/jsk-ros-pkg/jsk_recognition.git |
| VCS Type | git |
| VCS Version | master |
| Last Updated | 2025-12-15 |
| Dev Status | DEVELOPED |
| Released | RELEASED |
| Contributing |
Help Wanted (-)
Good First Issues (-) Pull Requests to Review (-) |
Package Description
Maintainers
- Naoya Yamaguchi
Authors
Sound Classification
ROS package to classify sound stream.
Contents
Setup
-
Install ROS. Available OS:
- Ubuntu 16.04 (?)
- Ubuntu 18.04
- Create workspace
    mkdir ~/sound_classification_ws/src -p
    cd ~/sound_classification_ws/src
    git clone https://github.com/jsk-ros-pkg/jsk_recognition.git
    rosdep install --from-paths . --ignore-src -y -r
    cd ..
    catkin build sound_classification
    source ~/sound_classification_ws/devel/setup.bash
- Install other packages.
- cuda and cupy are needed for chainer. See installation guide of JSK
- Using GPU is highly recommended.
Usage
- Check and specify your microphone parameters.
- In particular,
device,n_channel,bitdepthandmic_sampling_rateneed to be known. - The example bash commands to get these params are below:
- In particular,
        # For device. In this example, card 0 and device 0, so device:="hw:0,0"
        $ arecord -l
        \**** List of CAPTURE Hardware Devices ****
        card 0: PCH [HDA Intel PCH], device 0: ALC293 Analog [ALC293 Analog]
        Subdevices: 1/1
        Subdevice #0: subdevice #0
        # For n_channel, bitdepth and sample_rate,
        # Note that sources means input (e.g. microphone) and sinks means output (e.g. speaker)
        $ pactl list short sources
        1       alsa_input.pci-0000_00_1f.3.analog-stereo       module-alsa-card.c      s16le 2ch 44100Hz       SUSPENDED
- Pass these params to each launch file as arguments when launching (e.g., `device:=hw:0,0 n_channel:=2 bitdepth:=16 mic_sampling_rate:=44100`).
- If you use `/audio` topic from other computer and do not want to publish `/audio`, set `use_microphone:=false` at each launch file when launching.
- Save environmental noise to
train_data/noise.npy.- By subtracting noise, spectrograms become clear.
- During this script, you must not give any sound to the sensor.
- You should update noise data everytime before sound recognition, because environmental sound differs everytime.
- 30 noise samples are enough.
$ roslaunch sound_classification save_noise.launch
- Publish audio -> spectrum -> spectrogram topics.
- You can set the max/min frequency to be included in the spectrum by
high_cut_freq/low_cut_freqargs inaudio_to_spectrogram.launch. - If
gui:=true, spectrum and spectrogram are visualized.
- You can set the max/min frequency to be included in the spectrum by
$ roslaunch sound_classification audio_to_spectrogram.launch gui:=true
- Here is an example spectrogram at quiet environment.
- Horiozntal axis is time [Hz]
- Vertical axis is frequency [Hz]
|Spectrogram w/o noise subtraction|Spectrogram w/ noise subtraction|
|---|---|
|||
-
Collect spectrogram you would like to classify.
- When the volume exceeds the
threshold, save the spectrogram attrain_data/original_spectrogram/TARGET_CLASS. - You can use rosbag and stream as sound sources.
- Rosbag version (Recommended)
- I recommend to use rosbag to collect spectrograms. The rosbag makes it easy to use
save_sound.launchwith several parameters. - In
target_class:=TARGET_CLASS, you can set the class name of your target sound. - By using
use_rosbag:=trueandfilename:=PATH_TO_ROSBAG, you can save spectrograms from rosbag. - By default, rosbag is paused at first. Press ‘Space’ key on terminal to start playing rosbag. When rosbag ends, press ‘Ctrl-c’ to terminate.
- The newly saved spectrograms are appended to existing spectrograms.
- You can change threshold of sound saving by
threshold:=xxx. The smaller the value is, the more easily sound is saved.
- I recommend to use rosbag to collect spectrograms. The rosbag makes it easy to use
- When the volume exceeds the
            # Save audio to rosbag
            $ roslaunch sound_classification record_audio_rosbag.launch filename:=PATH_TO_ROSBAG
            # play rosbag and collecting data
            $ export ROS_MASTER_URI=http://localhost:11311
            $ roslaunch sound_classification save_sound.launch use_rosbag:=true \
              filename:=PATH_TO_ROSBAG target_class:=TARGET_CLASS threshold:=0.5
- By setting `threshold:=0` and `save_when_sound:=false`, you can collect spectrogram of "no sound".
```bash
File truncated at 100 lines see the full file
Changelog for package sound_classification
1.2.19 (2025-05-14)
- Merge pull request #2879 from jsk-ros-pkg/add_license add LICENSE
- add LICENSE
- ad LICENSE
- Contributors: Kei Okada
1.2.18 (2025-05-10)
- fix for ROS-O (#2861)
- add std_mgs build_depends, to fix obase-build (maybe and others)
` 2025-01-03T00:50:28.1527201Z -- BUILD_SHARED_LIBS is on 2025-01-03T00:50:28.2543412Z -- Using these message generators: gencpp;geneus;genlisp;gennodejs;genpy 2025-01-03T00:50:28.2568008Z -- Could NOT find std_msgs (missing: std_msgs_DIR) 2025-01-03T00:50:28.2569369Z -- Could not find the required component 'std_msgs'. The following CMake error indicates that you\ either need to install the package with the same name or change your environment so that it can be found. 2025-01-03T00:50:28.2584407Z CMake Error at /usr/share/catkin/cmake/catkinConfig.cmake:82 (find_package): 2025-01-03T00:50:28.2585511Z Could not find a package configuration file provided by "std_msgs" with any 2025-01-03T00:50:28.2586306Z of the following names: 2025-01-03T00:50:28.2586595Z 2025-01-03T00:50:28.2586761Z std_msgsConfig.cmake 2025-01-03T00:50:28.2587107Z std_msgs-config.cmake 2025-01-03T00:50:28.2587292Z 2025-01-03T00:50:28.2587515Z Add the installation prefix of "std_msgs" to CMAKE_PREFIX_PATH or set 2025-01-03T00:50:28.2588032Z "std_msgs_DIR" to a directory containing one of the above files. If 2025-01-03T00:50:28.2588533Z "std_msgs" provides a separate development package or SDK, be sure it has 2025-01-03T00:50:28.2588941Z been installed. 2025-01-03T00:50:28.2589180Z Call Stack (most recent call first): 2025-01-03T00:50:28.2589472Z CMakeLists.txt:4 (find_package) 2025-01-03T00:50:28.2589660Z` - [ros-o] sound_classification: use Python3 and requirements.in.obase (#2853)
- Contributors: Kei Okada, Shingo Kitagawa, Yoshiki Obinata, Yuki Furuta
1.2.17 (2023-11-14)
1.2.16 (2023-11-10)
- [audio_to_spectrogram, sound_classification] Add data_to_spectrogram (#2767)
- use catkin_install_python to install python scripts under node_scripts/ scripts/ (#2743)
- [sound_classification] Update setup doc on READMEt( #2732)
- [sound_classification] Enable to pass all arguments of audio_to_spectrogram.launch from upper launches (#2731)
- [sound_classification] Fix pactl option to list up input devices (#2715)
- [sound_classification] set default as python2 in sound_classification (#2698)
- chmod -x sound_classification scripts for catkin_virtualenv (#2659)
- Add sound classification (#2635)
- Contributors: Iori Yanokura, Kei Okada, Naoto Tsukamoto, Naoya Yamaguchi, Shingo Kitagawa, Shun Hasegawa
1.2.15 (2020-10-10)
1.2.14 (2020-10-09)
1.2.13 (2020-10-08)
1.2.12 (2020-10-03)
1.2.11 (2020-10-01)
- add sample program to convert audio message to spectrogram
- [WIP] Add program to classify sound
- Contributors: Naoya Yamaguchi
1.2.10 (2019-03-27)
1.2.9 (2019-02-23)
1.2.8 (2019-02-22)
1.2.7 (2019-02-14)
1.2.6 (2018-11-02)
1.2.5 (2018-04-09)
1.2.4 (2018-01-12)
1.2.3 (2017-11-23)
1.2.2 (2017-07-23)
1.2.1 (2017-07-15 20:44)
1.2.0 (2017-07-15 09:14)
1.1.3 (2017-07-07)
1.1.2 (2017-06-16)
1.1.1 (2017-03-04)
1.1.0 (2017-02-09 22:50)
1.0.4 (2017-02-09 22:48)
1.0.3 (2017-02-08)
1.0.2 (2017-01-12)
File truncated at 100 lines see the full file
Package Dependencies
System Dependencies
Dependant Packages
| Name | Deps |
|---|---|
| jsk_panda_teleop |
Launch files
- launch/audio_to_spectrogram.launch
-
- device [default: hw:0,0]
- n_channel [default: 2]
- bitdepth [default: 16]
- mic_sampling_rate [default: 44100]
- use_rosbag [default: false]
- filename [default: /]
- use_microphone [default: true]
- high_cut_freq [default: 8000]
- low_cut_freq [default: 1]
- spectrogram_period [default: 1]
- gui [default: false]
- pause_rosbag [default: true]
- launch/classify_sound.launch
-
- device [default: hw:0,0]
- n_channel [default: 2]
- bitdepth [default: 16]
- mic_sampling_rate [default: 44100]
- use_rosbag [default: false]
- filename [default: /]
- use_microphone [default: true]
- high_cut_freq [default: 8000]
- low_cut_freq [default: 1]
- spectrogram_period [default: 1]
- pause_rosbag [default: true]
- gpu [default: 0]
- gui [default: true]
- launch/record_audio_rosbag.launch
-
- filename
- device [default: hw:0,0]
- n_channel [default: 2]
- bitdepth [default: 16]
- mic_sampling_rate [default: 44100]
- use_microphone [default: true]
- launch/save_noise.launch
-
- device [default: hw:0,0]
- n_channel [default: 2]
- bitdepth [default: 16]
- mic_sampling_rate [default: 44100]
- use_rosbag [default: false]
- filename [default: /]
- use_microphone [default: true]
- high_cut_freq [default: 8000]
- low_cut_freq [default: 1]
- spectrogram_period [default: 1]
- pause_rosbag [default: true]
- gui [default: true]
- save_data_rate [default: 10]
- launch/save_sound.launch
-
- device [default: hw:0,0]
- n_channel [default: 2]
- bitdepth [default: 16]
- mic_sampling_rate [default: 44100]
- use_rosbag [default: false]
- filename [default: /]
- use_microphone [default: true]
- high_cut_freq [default: 8000]
- low_cut_freq [default: 1]
- spectrogram_period [default: 1]
- pause_rosbag [default: true]
- gui [default: true]
- save_data_rate [default: 5]
- target_class [default: ]
- save_when_sound [default: true]
- threshold [default: 0.5]
Services
Plugins
Recent questions tagged sound_classification at Robotics Stack Exchange
|
|
sound_classification package from jsk_recognition repoaudio_to_spectrogram checkerboard_detector depth_image_publisher imagesift jsk_pcl_ros jsk_pcl_ros_utils jsk_perception jsk_recognition jsk_recognition_msgs jsk_recognition_utils resized_image_transport sound_classification |
ROS Distro
|
Package Summary
| Version | 1.2.19 |
| License | BSD |
| Build type | CATKIN |
| Use | RECOMMENDED |
Repository Summary
| Checkout URI | https://github.com/jsk-ros-pkg/jsk_recognition.git |
| VCS Type | git |
| VCS Version | master |
| Last Updated | 2025-12-15 |
| Dev Status | DEVELOPED |
| Released | RELEASED |
| Contributing |
Help Wanted (-)
Good First Issues (-) Pull Requests to Review (-) |
Package Description
Maintainers
- Naoya Yamaguchi
Authors
Sound Classification
ROS package to classify sound stream.
Contents
Setup
-
Install ROS. Available OS:
- Ubuntu 16.04 (?)
- Ubuntu 18.04
- Create workspace
    mkdir ~/sound_classification_ws/src -p
    cd ~/sound_classification_ws/src
    git clone https://github.com/jsk-ros-pkg/jsk_recognition.git
    rosdep install --from-paths . --ignore-src -y -r
    cd ..
    catkin build sound_classification
    source ~/sound_classification_ws/devel/setup.bash
- Install other packages.
- cuda and cupy are needed for chainer. See installation guide of JSK
- Using GPU is highly recommended.
Usage
- Check and specify your microphone parameters.
- In particular,
device,n_channel,bitdepthandmic_sampling_rateneed to be known. - The example bash commands to get these params are below:
- In particular,
        # For device. In this example, card 0 and device 0, so device:="hw:0,0"
        $ arecord -l
        \**** List of CAPTURE Hardware Devices ****
        card 0: PCH [HDA Intel PCH], device 0: ALC293 Analog [ALC293 Analog]
        Subdevices: 1/1
        Subdevice #0: subdevice #0
        # For n_channel, bitdepth and sample_rate,
        # Note that sources means input (e.g. microphone) and sinks means output (e.g. speaker)
        $ pactl list short sources
        1       alsa_input.pci-0000_00_1f.3.analog-stereo       module-alsa-card.c      s16le 2ch 44100Hz       SUSPENDED
- Pass these params to each launch file as arguments when launching (e.g., `device:=hw:0,0 n_channel:=2 bitdepth:=16 mic_sampling_rate:=44100`).
- If you use `/audio` topic from other computer and do not want to publish `/audio`, set `use_microphone:=false` at each launch file when launching.
- Save environmental noise to
train_data/noise.npy.- By subtracting noise, spectrograms become clear.
- During this script, you must not give any sound to the sensor.
- You should update noise data everytime before sound recognition, because environmental sound differs everytime.
- 30 noise samples are enough.
$ roslaunch sound_classification save_noise.launch
- Publish audio -> spectrum -> spectrogram topics.
- You can set the max/min frequency to be included in the spectrum by
high_cut_freq/low_cut_freqargs inaudio_to_spectrogram.launch. - If
gui:=true, spectrum and spectrogram are visualized.
- You can set the max/min frequency to be included in the spectrum by
$ roslaunch sound_classification audio_to_spectrogram.launch gui:=true
- Here is an example spectrogram at quiet environment.
- Horiozntal axis is time [Hz]
- Vertical axis is frequency [Hz]
|Spectrogram w/o noise subtraction|Spectrogram w/ noise subtraction|
|---|---|
|||
-
Collect spectrogram you would like to classify.
- When the volume exceeds the
threshold, save the spectrogram attrain_data/original_spectrogram/TARGET_CLASS. - You can use rosbag and stream as sound sources.
- Rosbag version (Recommended)
- I recommend to use rosbag to collect spectrograms. The rosbag makes it easy to use
save_sound.launchwith several parameters. - In
target_class:=TARGET_CLASS, you can set the class name of your target sound. - By using
use_rosbag:=trueandfilename:=PATH_TO_ROSBAG, you can save spectrograms from rosbag. - By default, rosbag is paused at first. Press ‘Space’ key on terminal to start playing rosbag. When rosbag ends, press ‘Ctrl-c’ to terminate.
- The newly saved spectrograms are appended to existing spectrograms.
- You can change threshold of sound saving by
threshold:=xxx. The smaller the value is, the more easily sound is saved.
- I recommend to use rosbag to collect spectrograms. The rosbag makes it easy to use
- When the volume exceeds the
            # Save audio to rosbag
            $ roslaunch sound_classification record_audio_rosbag.launch filename:=PATH_TO_ROSBAG
            # play rosbag and collecting data
            $ export ROS_MASTER_URI=http://localhost:11311
            $ roslaunch sound_classification save_sound.launch use_rosbag:=true \
              filename:=PATH_TO_ROSBAG target_class:=TARGET_CLASS threshold:=0.5
- By setting `threshold:=0` and `save_when_sound:=false`, you can collect spectrogram of "no sound".
```bash
File truncated at 100 lines see the full file
Changelog for package sound_classification
1.2.19 (2025-05-14)
- Merge pull request #2879 from jsk-ros-pkg/add_license add LICENSE
- add LICENSE
- ad LICENSE
- Contributors: Kei Okada
1.2.18 (2025-05-10)
- fix for ROS-O (#2861)
- add std_mgs build_depends, to fix obase-build (maybe and others)
` 2025-01-03T00:50:28.1527201Z -- BUILD_SHARED_LIBS is on 2025-01-03T00:50:28.2543412Z -- Using these message generators: gencpp;geneus;genlisp;gennodejs;genpy 2025-01-03T00:50:28.2568008Z -- Could NOT find std_msgs (missing: std_msgs_DIR) 2025-01-03T00:50:28.2569369Z -- Could not find the required component 'std_msgs'. The following CMake error indicates that you\ either need to install the package with the same name or change your environment so that it can be found. 2025-01-03T00:50:28.2584407Z CMake Error at /usr/share/catkin/cmake/catkinConfig.cmake:82 (find_package): 2025-01-03T00:50:28.2585511Z Could not find a package configuration file provided by "std_msgs" with any 2025-01-03T00:50:28.2586306Z of the following names: 2025-01-03T00:50:28.2586595Z 2025-01-03T00:50:28.2586761Z std_msgsConfig.cmake 2025-01-03T00:50:28.2587107Z std_msgs-config.cmake 2025-01-03T00:50:28.2587292Z 2025-01-03T00:50:28.2587515Z Add the installation prefix of "std_msgs" to CMAKE_PREFIX_PATH or set 2025-01-03T00:50:28.2588032Z "std_msgs_DIR" to a directory containing one of the above files. If 2025-01-03T00:50:28.2588533Z "std_msgs" provides a separate development package or SDK, be sure it has 2025-01-03T00:50:28.2588941Z been installed. 2025-01-03T00:50:28.2589180Z Call Stack (most recent call first): 2025-01-03T00:50:28.2589472Z CMakeLists.txt:4 (find_package) 2025-01-03T00:50:28.2589660Z` - [ros-o] sound_classification: use Python3 and requirements.in.obase (#2853)
- Contributors: Kei Okada, Shingo Kitagawa, Yoshiki Obinata, Yuki Furuta
1.2.17 (2023-11-14)
1.2.16 (2023-11-10)
- [audio_to_spectrogram, sound_classification] Add data_to_spectrogram (#2767)
- use catkin_install_python to install python scripts under node_scripts/ scripts/ (#2743)
- [sound_classification] Update setup doc on READMEt( #2732)
- [sound_classification] Enable to pass all arguments of audio_to_spectrogram.launch from upper launches (#2731)
- [sound_classification] Fix pactl option to list up input devices (#2715)
- [sound_classification] set default as python2 in sound_classification (#2698)
- chmod -x sound_classification scripts for catkin_virtualenv (#2659)
- Add sound classification (#2635)
- Contributors: Iori Yanokura, Kei Okada, Naoto Tsukamoto, Naoya Yamaguchi, Shingo Kitagawa, Shun Hasegawa
1.2.15 (2020-10-10)
1.2.14 (2020-10-09)
1.2.13 (2020-10-08)
1.2.12 (2020-10-03)
1.2.11 (2020-10-01)
- add sample program to convert audio message to spectrogram
- [WIP] Add program to classify sound
- Contributors: Naoya Yamaguchi
1.2.10 (2019-03-27)
1.2.9 (2019-02-23)
1.2.8 (2019-02-22)
1.2.7 (2019-02-14)
1.2.6 (2018-11-02)
1.2.5 (2018-04-09)
1.2.4 (2018-01-12)
1.2.3 (2017-11-23)
1.2.2 (2017-07-23)
1.2.1 (2017-07-15 20:44)
1.2.0 (2017-07-15 09:14)
1.1.3 (2017-07-07)
1.1.2 (2017-06-16)
1.1.1 (2017-03-04)
1.1.0 (2017-02-09 22:50)
1.0.4 (2017-02-09 22:48)
1.0.3 (2017-02-08)
1.0.2 (2017-01-12)
File truncated at 100 lines see the full file
Package Dependencies
System Dependencies
Dependant Packages
Launch files
- launch/audio_to_spectrogram.launch
-
- device [default: hw:0,0]
- n_channel [default: 2]
- bitdepth [default: 16]
- mic_sampling_rate [default: 44100]
- use_rosbag [default: false]
- filename [default: /]
- use_microphone [default: true]
- high_cut_freq [default: 8000]
- low_cut_freq [default: 1]
- spectrogram_period [default: 1]
- gui [default: false]
- pause_rosbag [default: true]
- launch/classify_sound.launch
-
- device [default: hw:0,0]
- n_channel [default: 2]
- bitdepth [default: 16]
- mic_sampling_rate [default: 44100]
- use_rosbag [default: false]
- filename [default: /]
- use_microphone [default: true]
- high_cut_freq [default: 8000]
- low_cut_freq [default: 1]
- spectrogram_period [default: 1]
- pause_rosbag [default: true]
- gpu [default: 0]
- gui [default: true]
- launch/record_audio_rosbag.launch
-
- filename
- device [default: hw:0,0]
- n_channel [default: 2]
- bitdepth [default: 16]
- mic_sampling_rate [default: 44100]
- use_microphone [default: true]
- launch/save_noise.launch
-
- device [default: hw:0,0]
- n_channel [default: 2]
- bitdepth [default: 16]
- mic_sampling_rate [default: 44100]
- use_rosbag [default: false]
- filename [default: /]
- use_microphone [default: true]
- high_cut_freq [default: 8000]
- low_cut_freq [default: 1]
- spectrogram_period [default: 1]
- pause_rosbag [default: true]
- gui [default: true]
- save_data_rate [default: 10]
- launch/save_sound.launch
-
- device [default: hw:0,0]
- n_channel [default: 2]
- bitdepth [default: 16]
- mic_sampling_rate [default: 44100]
- use_rosbag [default: false]
- filename [default: /]
- use_microphone [default: true]
- high_cut_freq [default: 8000]
- low_cut_freq [default: 1]
- spectrogram_period [default: 1]
- pause_rosbag [default: true]
- gui [default: true]
- save_data_rate [default: 5]
- target_class [default: ]
- save_when_sound [default: true]
- threshold [default: 0.5]