
|
sciurus17_examples package from sciurus17 reposciurus17 sciurus17_bringup sciurus17_control sciurus17_examples sciurus17_gazebo sciurus17_moveit_config sciurus17_msgs sciurus17_tools sciurus17_vision |
|
|
Package Summary
| Tags | No category tags. |
| Version | 2.0.0 |
| License | Apache License 2.0 |
| Build type | CATKIN |
| Use | RECOMMENDED |
Repository Summary
| Checkout URI | https://github.com/rt-net/sciurus17_ros.git |
| VCS Type | git |
| VCS Version | master |
| Last Updated | 2023-12-26 |
| Dev Status | MAINTAINED |
| CI status | No Continuous Integration |
| Released | UNRELEASED |
| Tags | No category tags. |
| Contributing |
Help Wanted (0)
Good First Issues (0) Pull Requests to Review (0) |
Package Description
Additional Links
Maintainers
- RT Corporation
Authors
- Daisuke Sato
- Hiroyuki Nomura
sciurus17_examples
This package includes examples to control Sciurus17 using sciurus17_ros.
How to launch Sciurus17 base packages
- Connect cables of a head camera, a chest camera and a control board to a PC.
- Power on the Sciurus17 and the camera device names are shown in the
/devdirectory. - Open terminal and launch
sciurus17_bringup.launchofsciurus17_bringuppackage.
This launch file has arguments:
- use_rviz (default: true)
- use_head_camera (default: true)
- use_chest_camera (default: true)
Using virtual Sciurus17
To launch Sciurus17 base packages without Sciurus17 hardware, unplug the control board's cable from the PC, then launch nodes with the following command:
roslaunch sciurus17_bringup sciurus17_bringup.launch
Using real Sciurus17
Launch the base packages with the following command:
roslaunch sciurus17_bringup sciurus17_bringup.launch
Using without cameras
Launch the base packages with arguments:
roslaunch sciurus17_bringup sciurus17_bringup.launch use_head_camera:=false use_chest_camera:=false
Using without RViz
To reduce the CPU load of the PC, launch the base packages with arguments:
roslaunch sciurus17_bringup sciurus17_bringup.launch use_rviz:=false
Using Gazebo simulator
Launch the packages with the following command:
roslaunch sciurus17_gazebo sciurus17_with_table.launch

# without RViz
roslaunch sciurus17_gazebo sciurus17_with_table.launch use_rviz:=false
Run Examples
Following examples will be executable after launch Sciurus17 base packages.
- gripper_action_example
- neck_joint_trajectory_example
- waist_joint_trajectory_example
- pick_and_place_demo
- hand_position_publisher
- head_camera_tracking
- chest_camera_tracking
- depth_camera_tracking
- preset_pid_gain_example
- box_stacking_example
- current_control_right_arm
- current_control_left_wrist
gripper_action_example
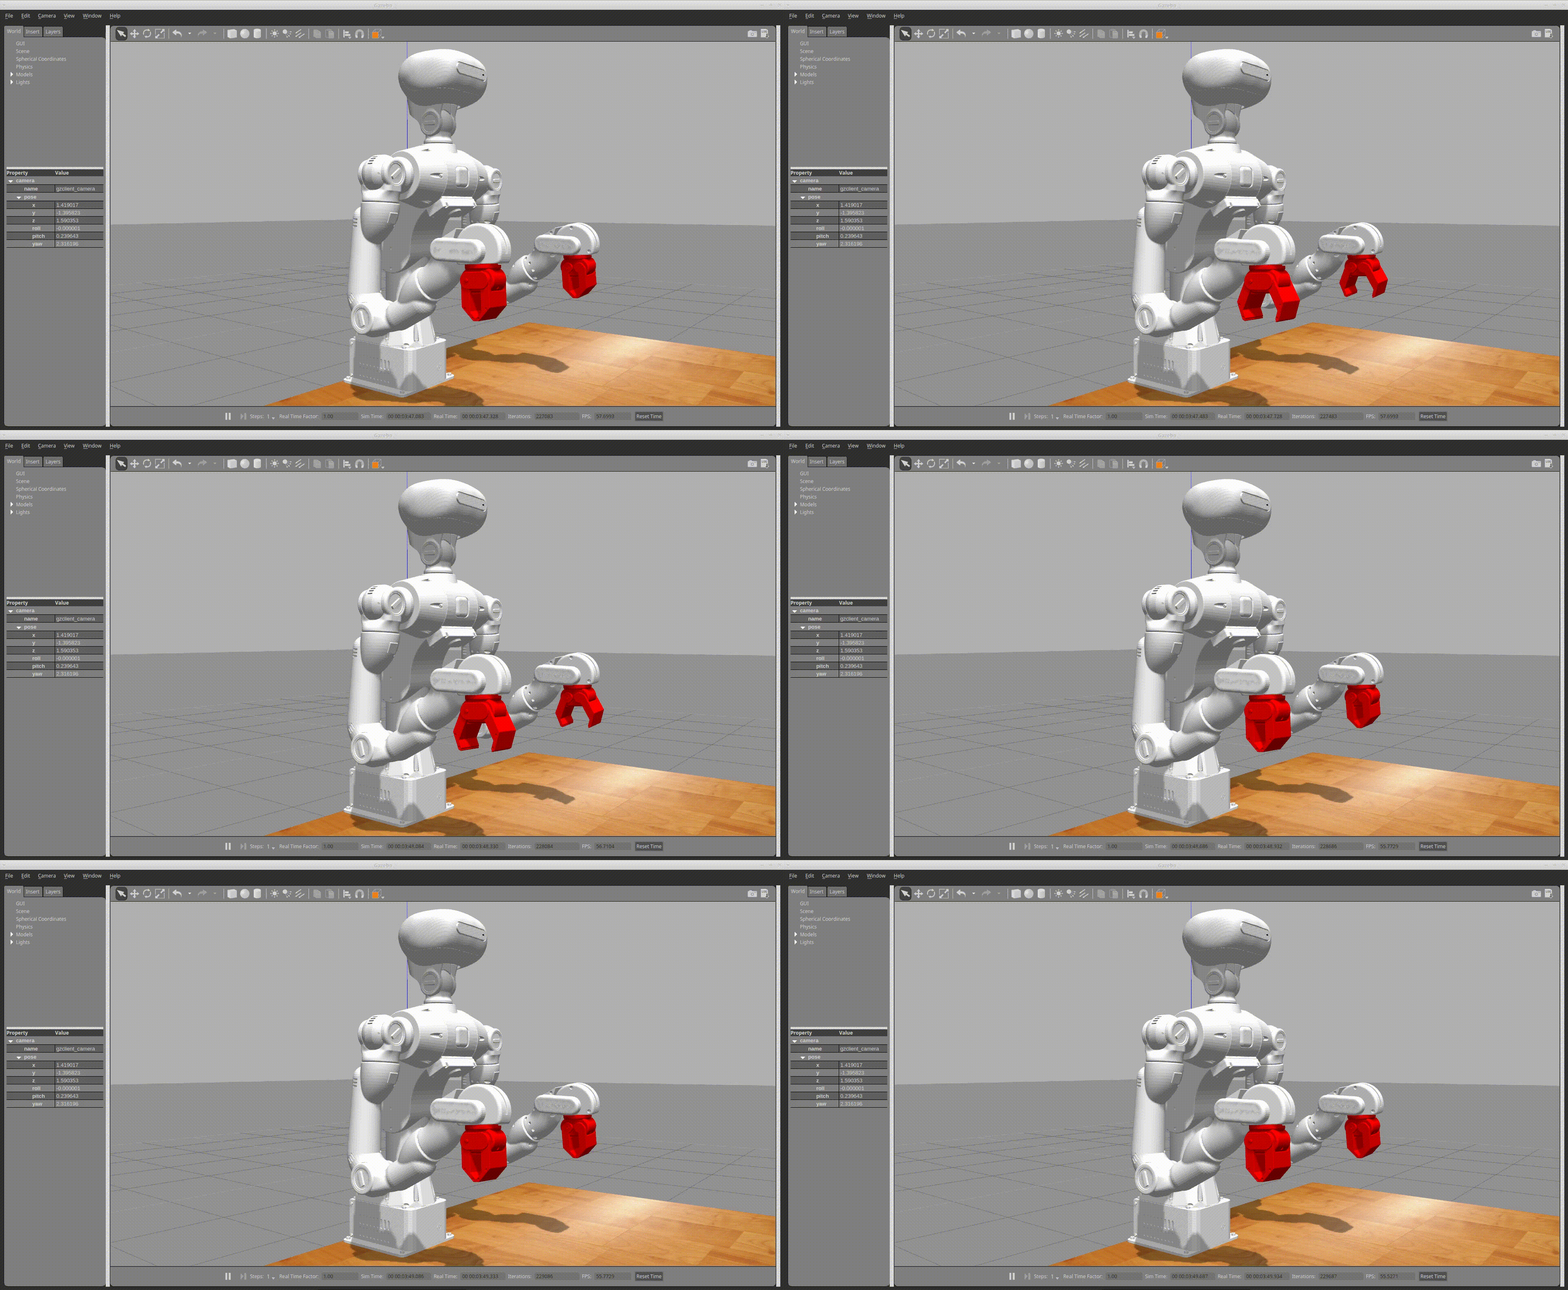
This is an example to open/close the grippers of the two arms.
Run a node with the following command:
rosrun sciurus17_examples gripper_action_example.py
Videos
neck_joint_trajectory_example
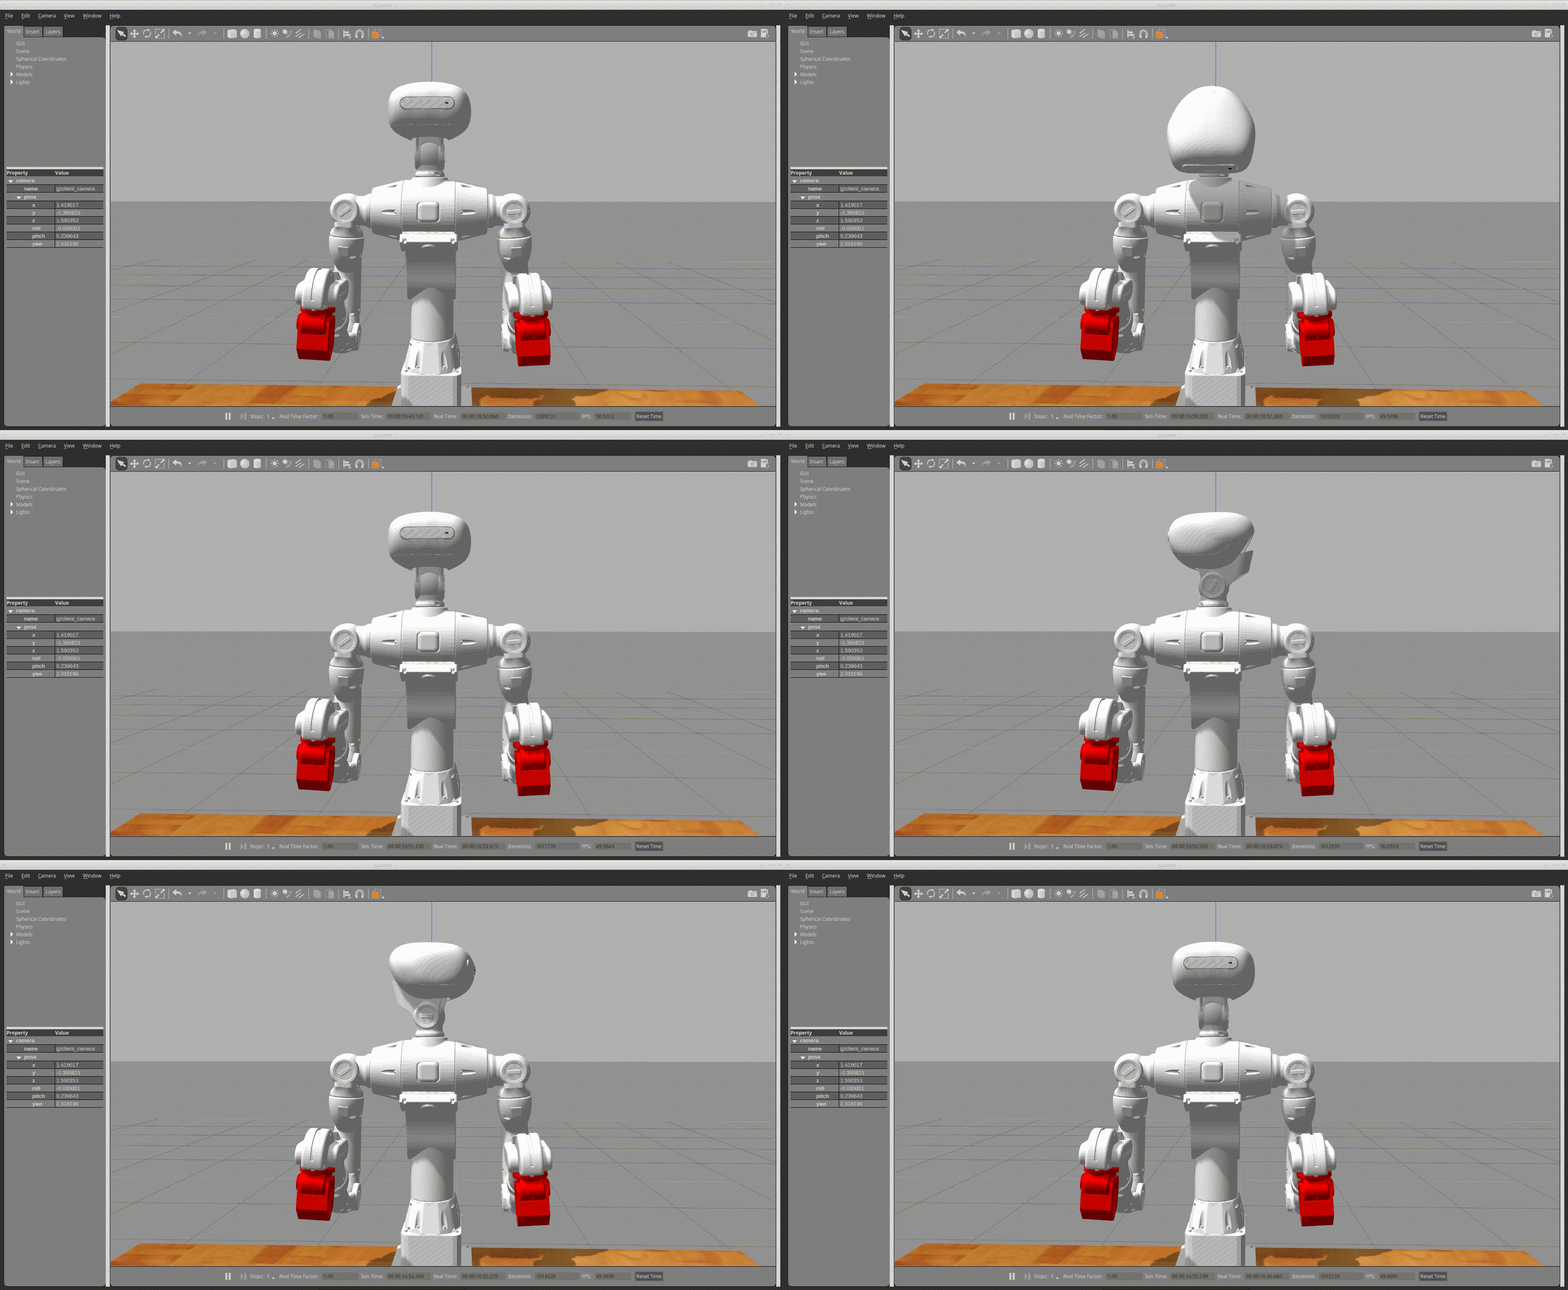
This is an example to change angles of the neck.
Run a node with the following command:
rosrun sciurus17_examples neck_joint_trajectory_example.py
Videos
waist_joint_trajectory_example
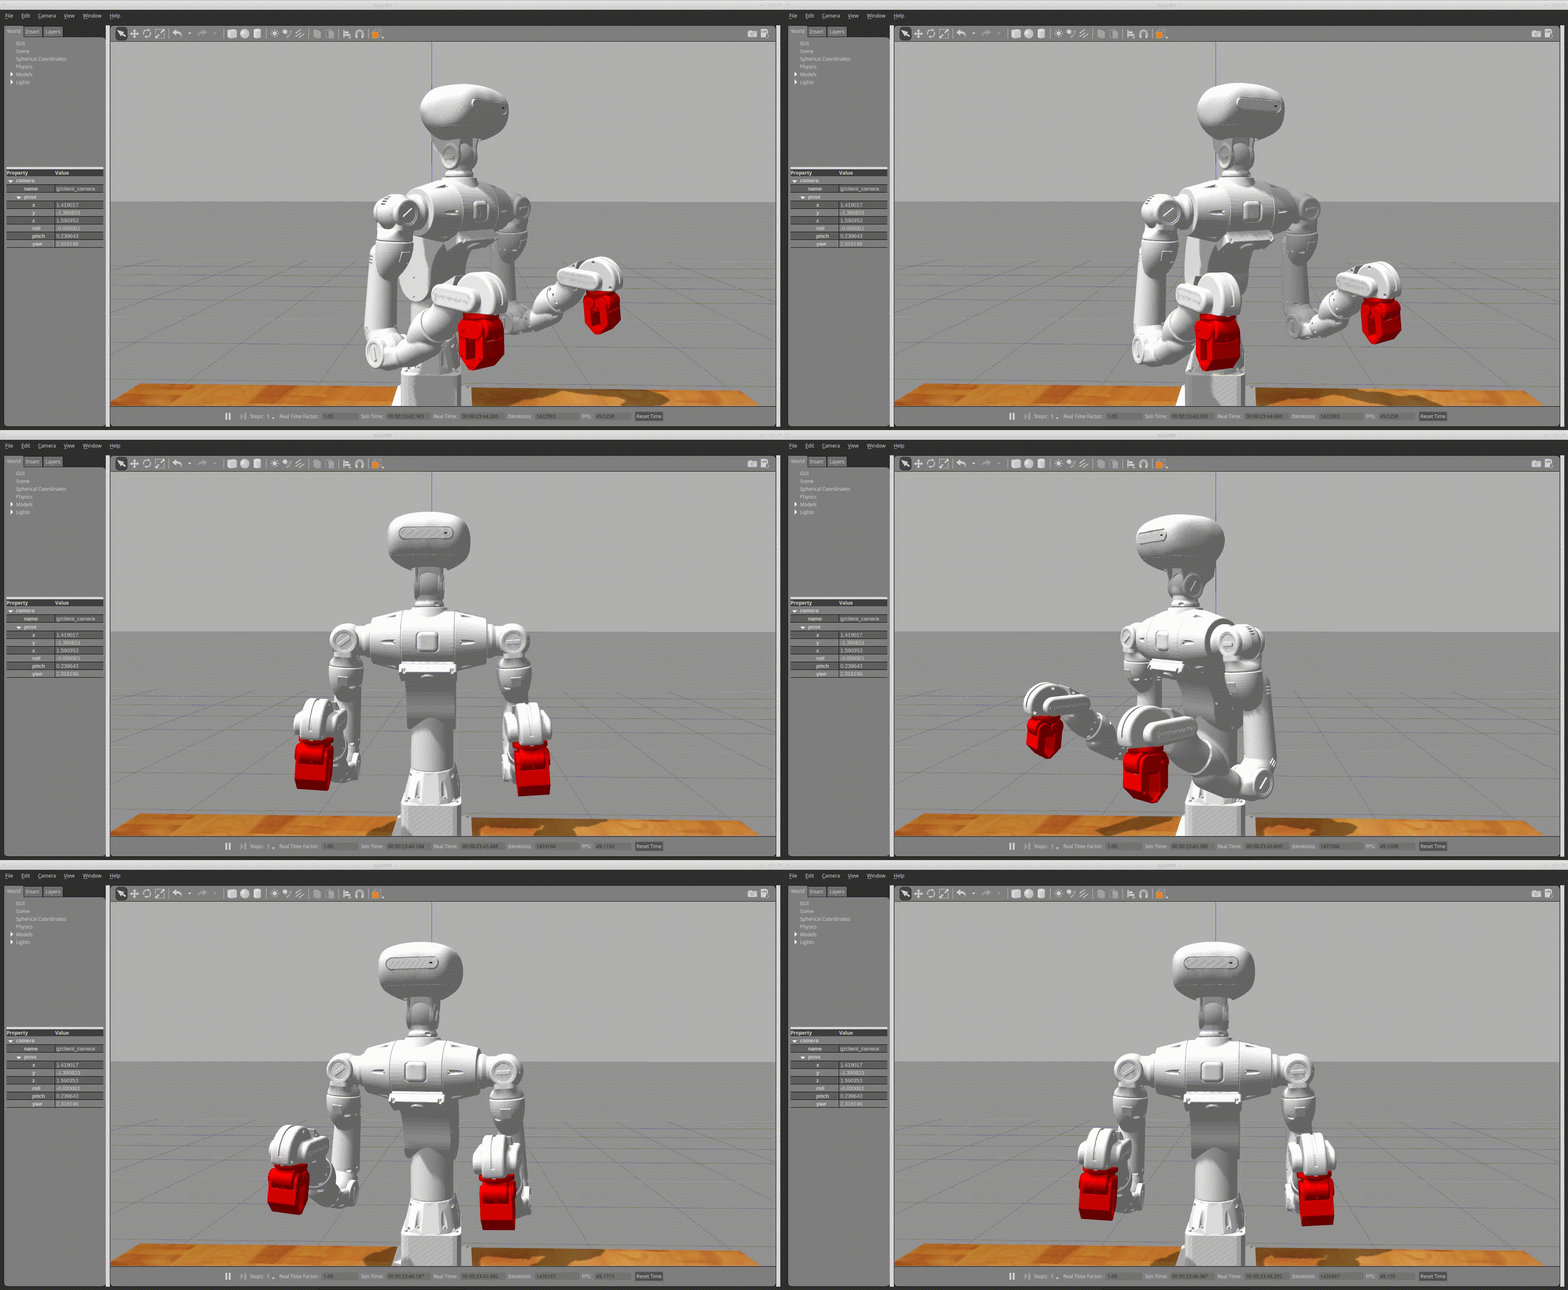
This is an example to change angles of the waist.
Run a node with the following command:
rosrun sciurus17_examples waist_joint_trajectory_example.py
Videos
pick_and_place_demo
This is an example to pick and place a small object with right hand while turning the waist.
Run a node with the following command:
rosrun sciurus17_examples pick_and_place_right_arm_demo.py
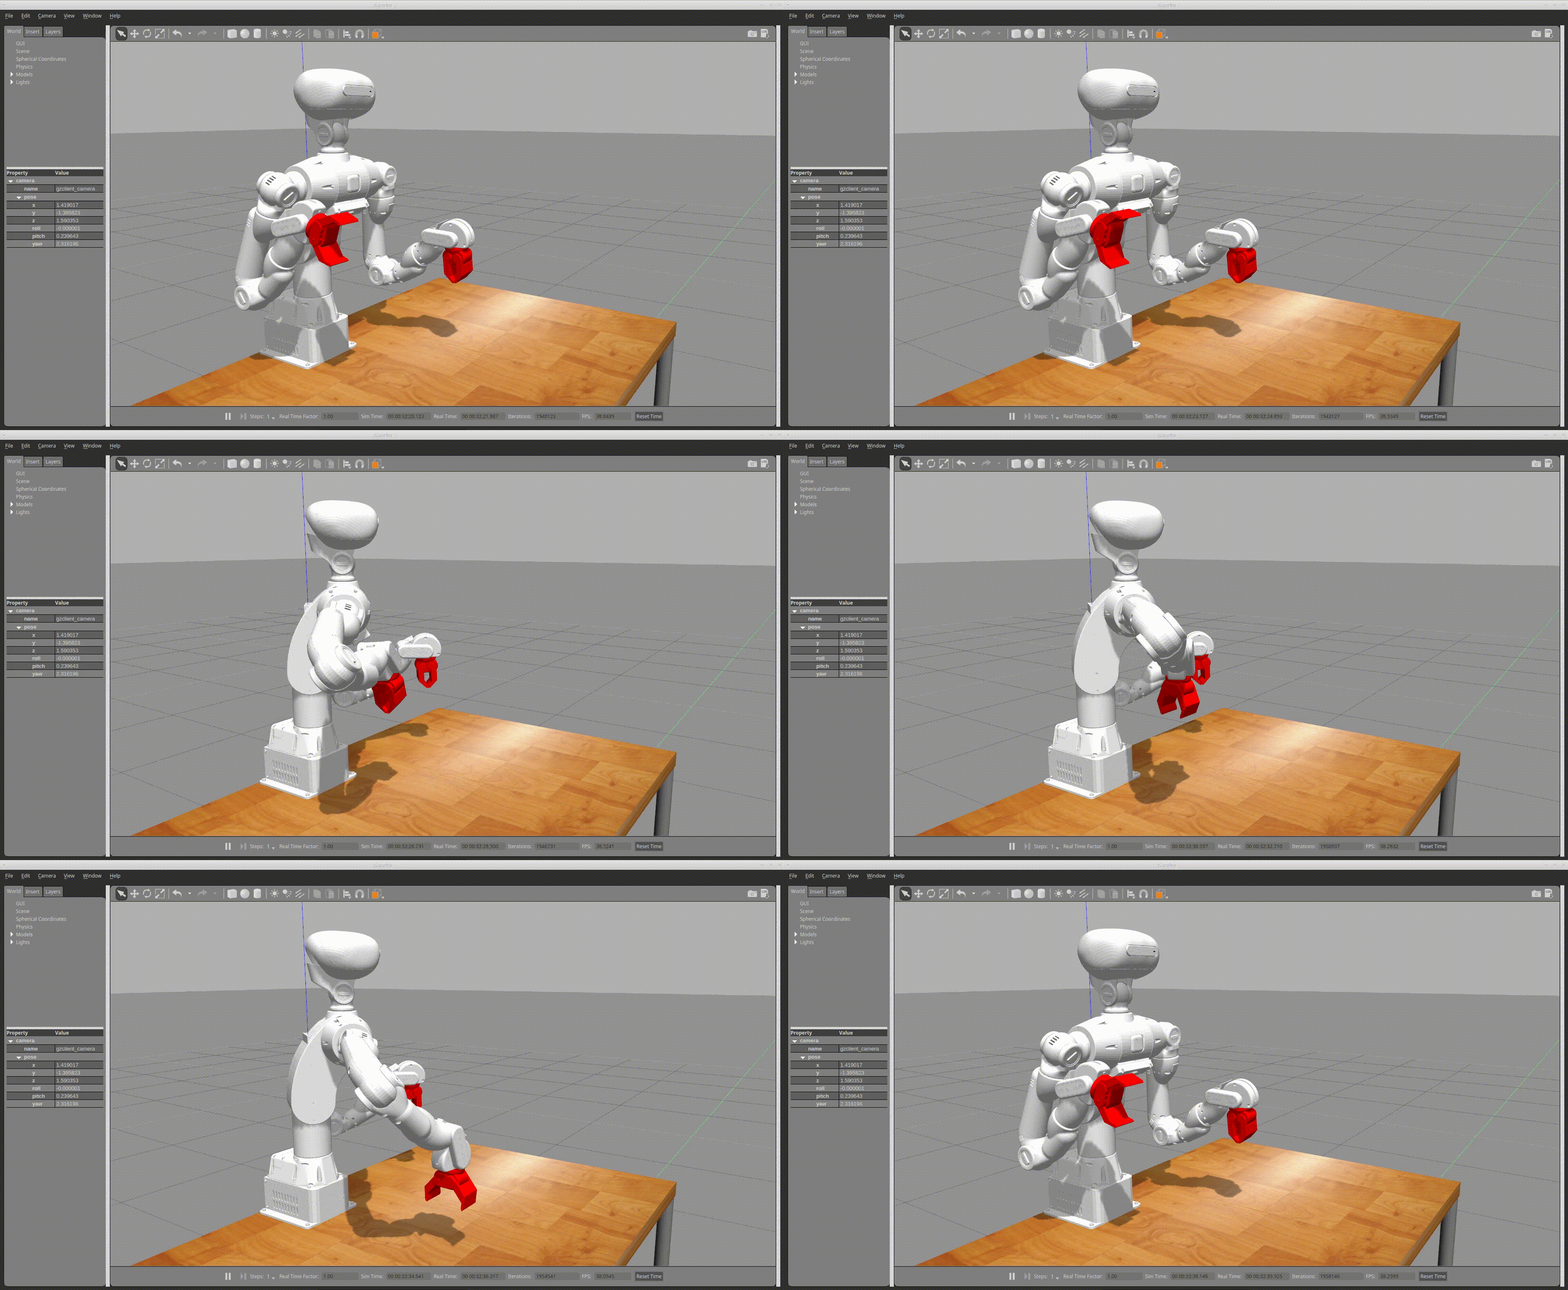
This is an example to pick and place a small object with left hand.
Run a node with the following command:
rosrun sciurus17_examples pick_and_place_left_arm_demo.py
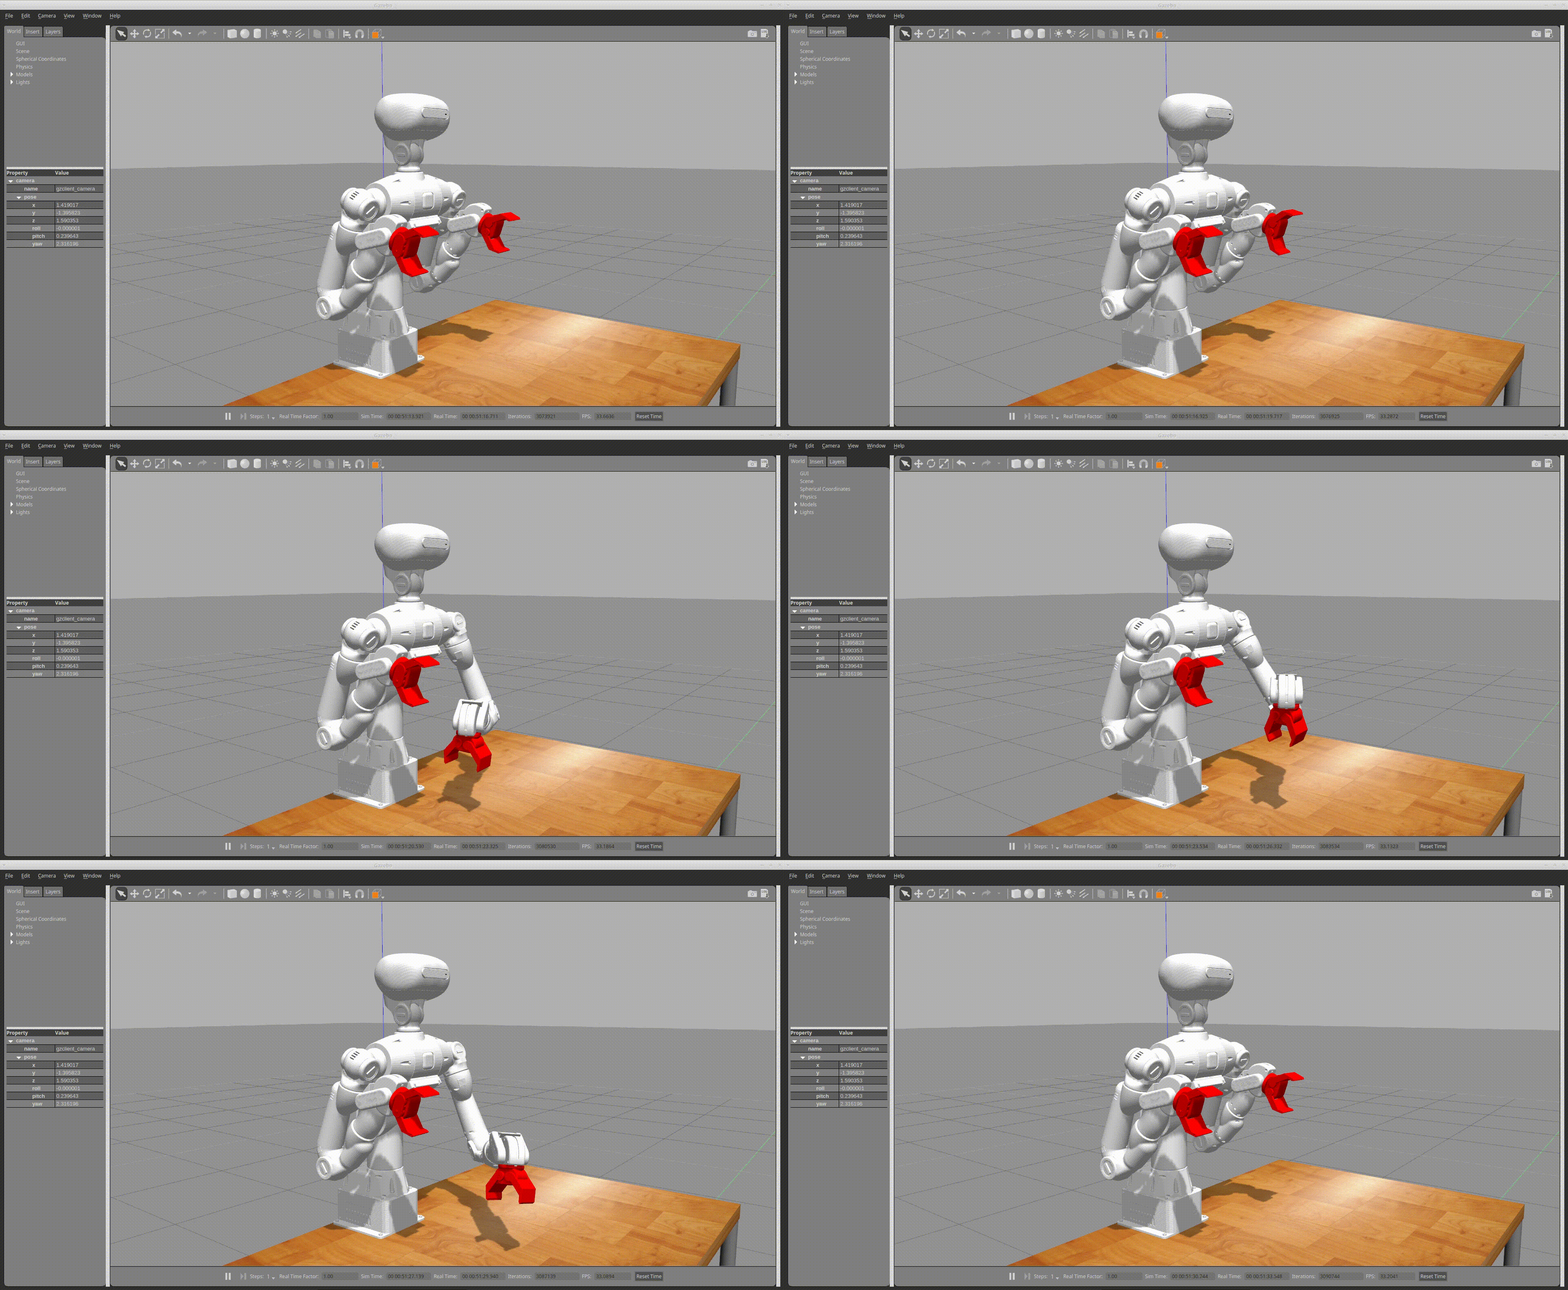
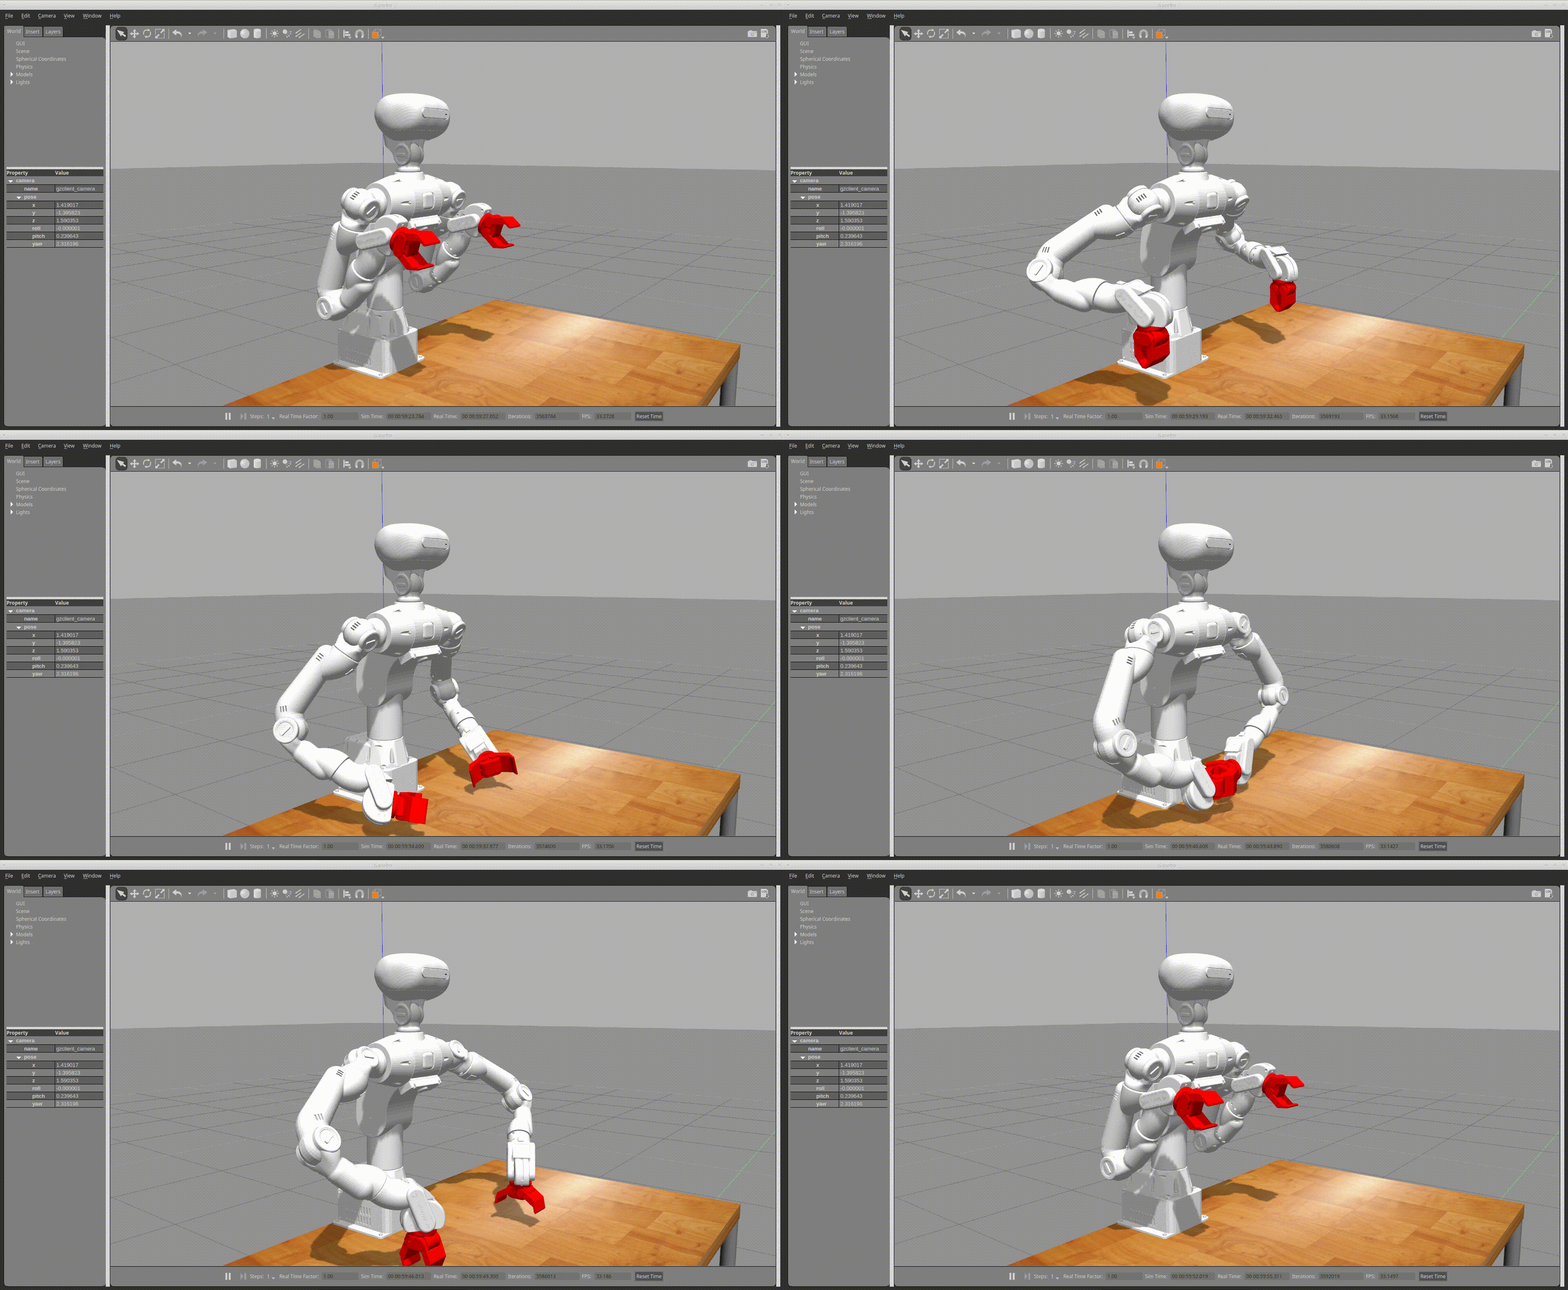
This is an example to pick and place a small object with both hands.
Run a node with the following command:
rosrun sciurus17_examples pick_and_place_two_arm_demo.py
Videos
hand_position_publisher
This is an example to receive link positions from tf server.
This example receives transformed positions l_link7 and r_link7 based on base_link
from tf server, then publishes these positions as topics named
/sciurus17/hand_pos/left and /sciurus17/hand_pos/right.
Run a node with the following command:
rosrun sciurus17_examples hand_position_publisher_example.py
head_camera_tracking
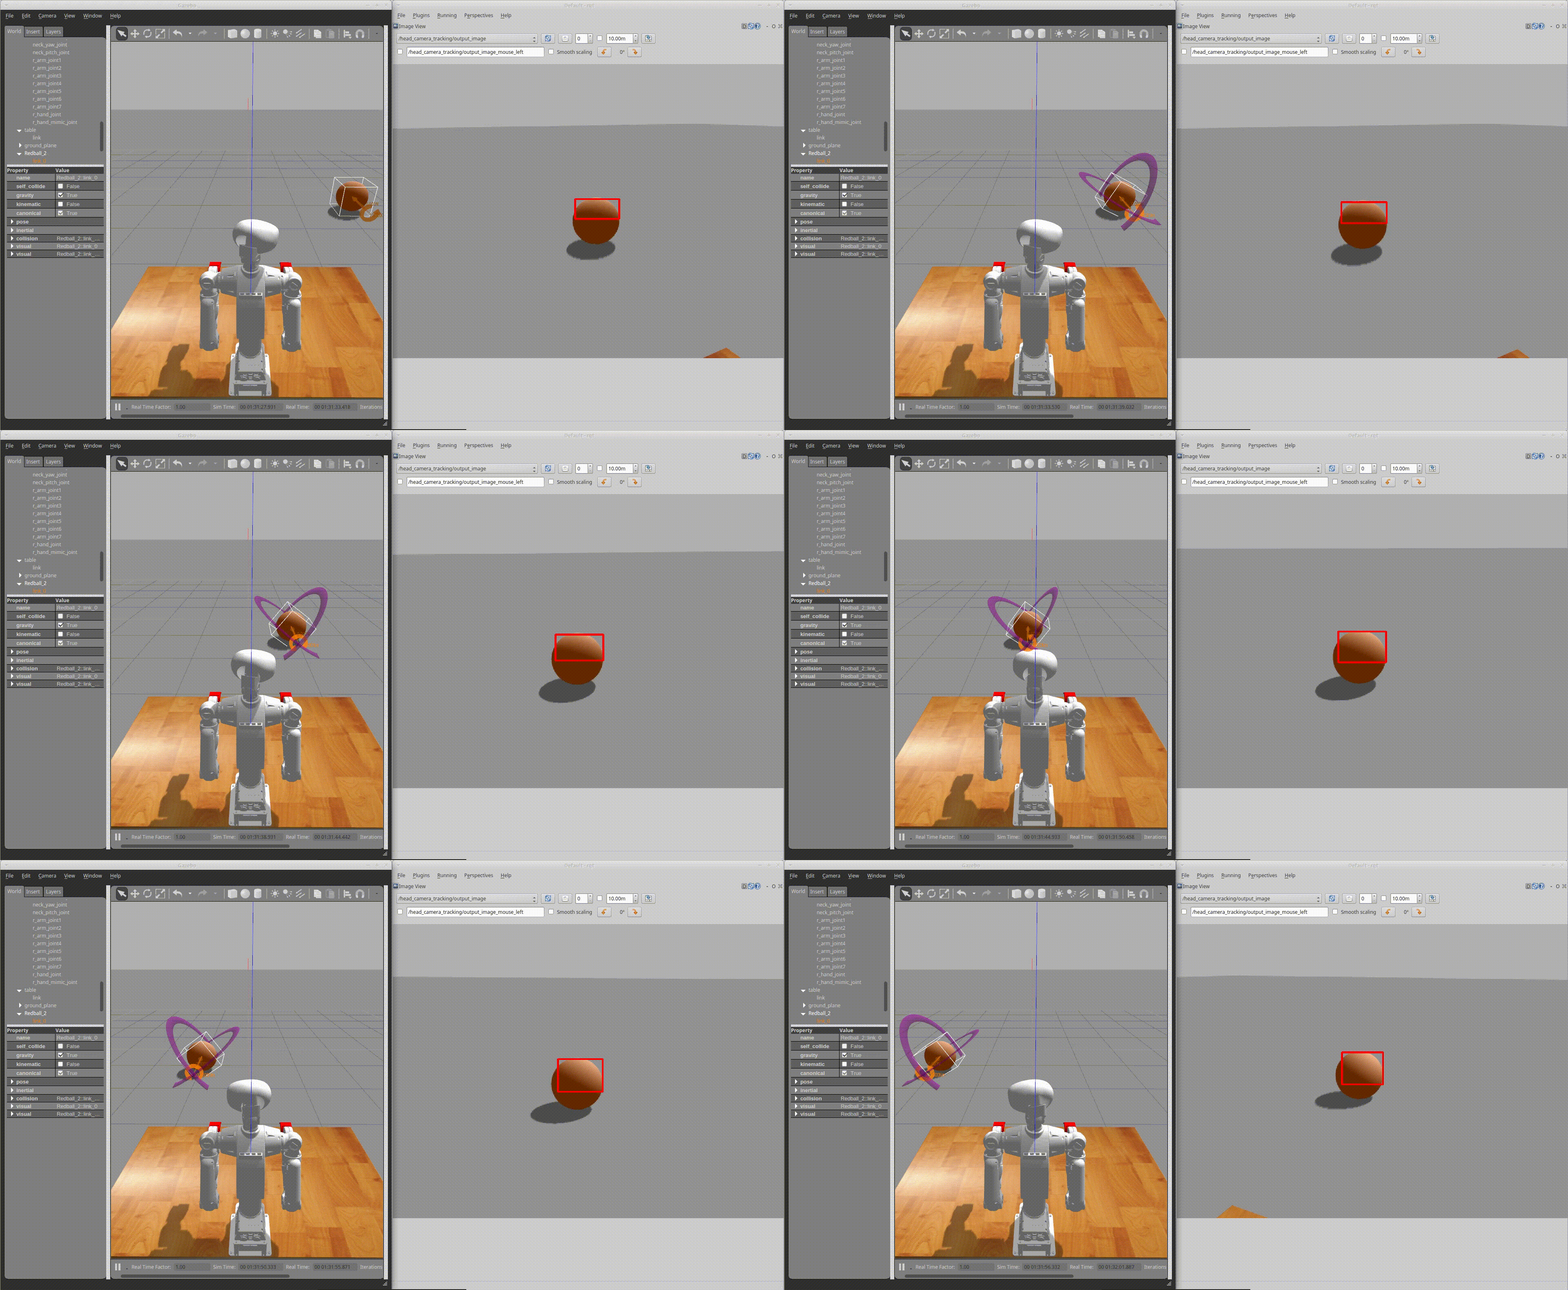
This is an example to use the head camera images and OpenCV library for ball tracking and face tracking.
Run a node with the following command:
rosrun sciurus17_examples head_camera_tracking.py
For ball tracking
Edit ./scripts/head_camera_tracking.py as follows:
def _image_callback(self, ros_image):
    # ...

        # Detect an object (specific color or face)
        output_image = self._detect_orange_object(input_image)
        # output_image = self._detect_blue_object(input_image)
        # output_image = self._detect_face(input_image)
For face tracking
Edit ./scripts/head_camera_tracking.py as follows:
This example uses Cascade Classifier for face tracking.
Please edit the directories of cascade files in the script file. USER_NAME depends on user environments.
class ObjectTracker:
    def __init__(self):
        # ...

        # Load cascade files
        # Example:
        # self._face_cascade = cv2.CascadeClassifier("/home/USER_NAME/.local/lib/python2.7/site-packages/cv2/data/haarcascade_frontalface_alt2.xml")
        # self._eyes_cascade = cv2.CascadeClassifier("/home/USER_NAME/.local/lib/python2.7/site-packages/cv2/data/haarcascade_eye.xml")
        self._face_cascade = cv2.CascadeClassifier("/home/USER_NAME/.local/lib/python2.7/site-packages/cv2/data/haarcascade_frontalface_alt2.xml")
        self._eyes_cascade = cv2.CascadeClassifier("/home/USER_NAME/.local/lib/python2.7/site-packages/cv2/data/haarcascade_eye.xml")
def _image_callback(self, ros_image):
    # ...

        # Detect an object (specific color or face)
        # output_image = self._detect_orange_object(input_image)
        # output_image = self._detect_blue_object(input_image)
        output_image = self._detect_face(input_image)
Videos
This orange ball can be purchased from this page in RT ROBOT SHOP.
chest_camera_tracking
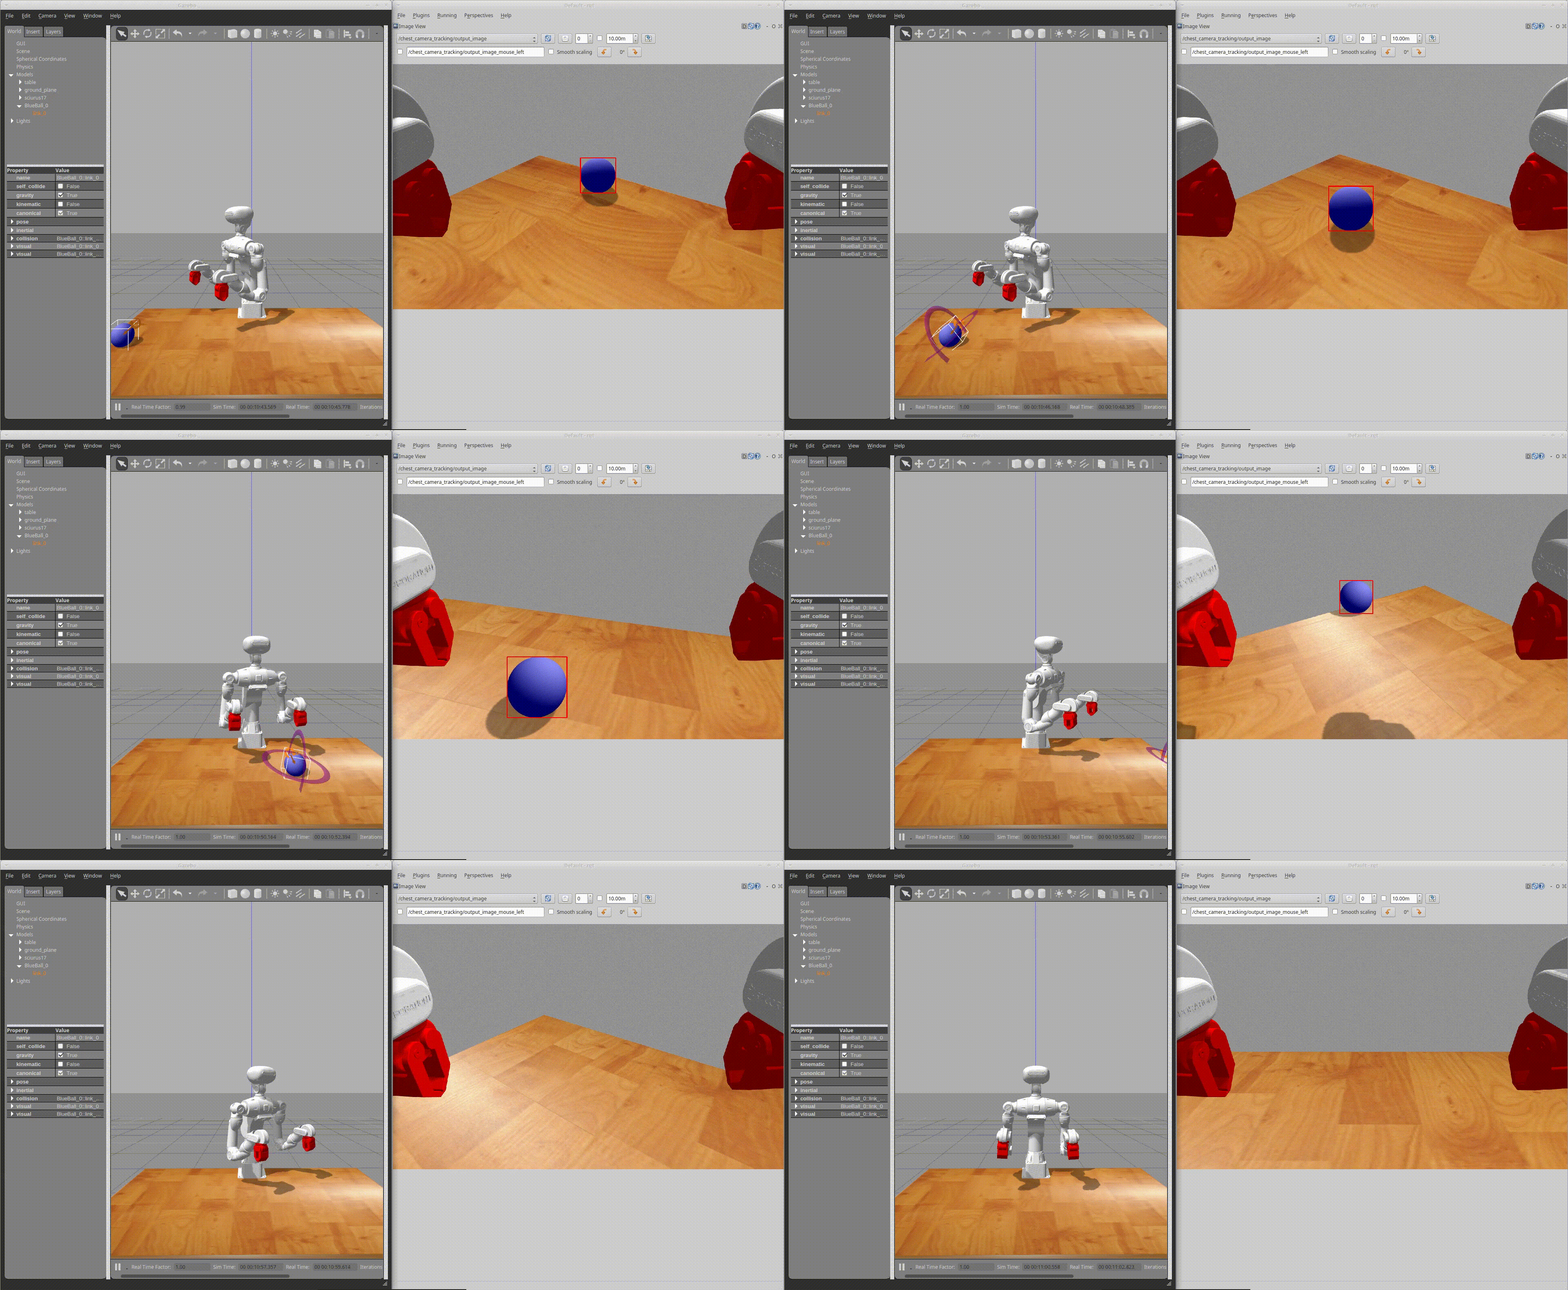
This is an example to use the chest camera images and OpenCV library for ball tracking.
Run a node with the following command:
rosrun sciurus17_examples chest_camera_tracking.py
Execute face tracking and ball tracking simultaneously
Launch nodes with the following commands for face tracking with the head camera and for ball tracking with the chest camera.
rosrun sciurus17_examples head_camera_tracking.py

# Open another terminal
rosrun sciurus17_examples chest_camera_tracking.py
Videos
depth_camera_tracking
This is an example to use the depth camera on the head for object tracking.
Run a node with the following command:
rosrun sciurus17_examples depth_camera_tracking.py
The default detection range is separated into four stages.
To change the detection range, edit ./scripts/depth_camera_tracking.py as the followings:
    def _detect_object(self, input_depth_image):
        # Limitation of object size
        MIN_OBJECT_SIZE = 10000 # px * px
        MAX_OBJECT_SIZE = 80000 # px * px

        # The detection range is separated into four stages.
        # Unit: mm
        DETECTION_DEPTH = [
                (500, 700),
                (600, 800),
                (700, 900),
                (800, 1000)]
preset_pid_gain_example
This is an example to change PID gains of the servo motors in bulk
using preset_reconfigure of sciurus17_control.
Lists of PID gain preset values can be edited in sciurus17_control/scripts/preset_reconfigure.py.
Launch nodes preset_reconfigure.py and preset_pid_gain_example.py with the following command:
roslaunch sciurus17_examples preset_pid_gain_example.launch
box_stacking_example
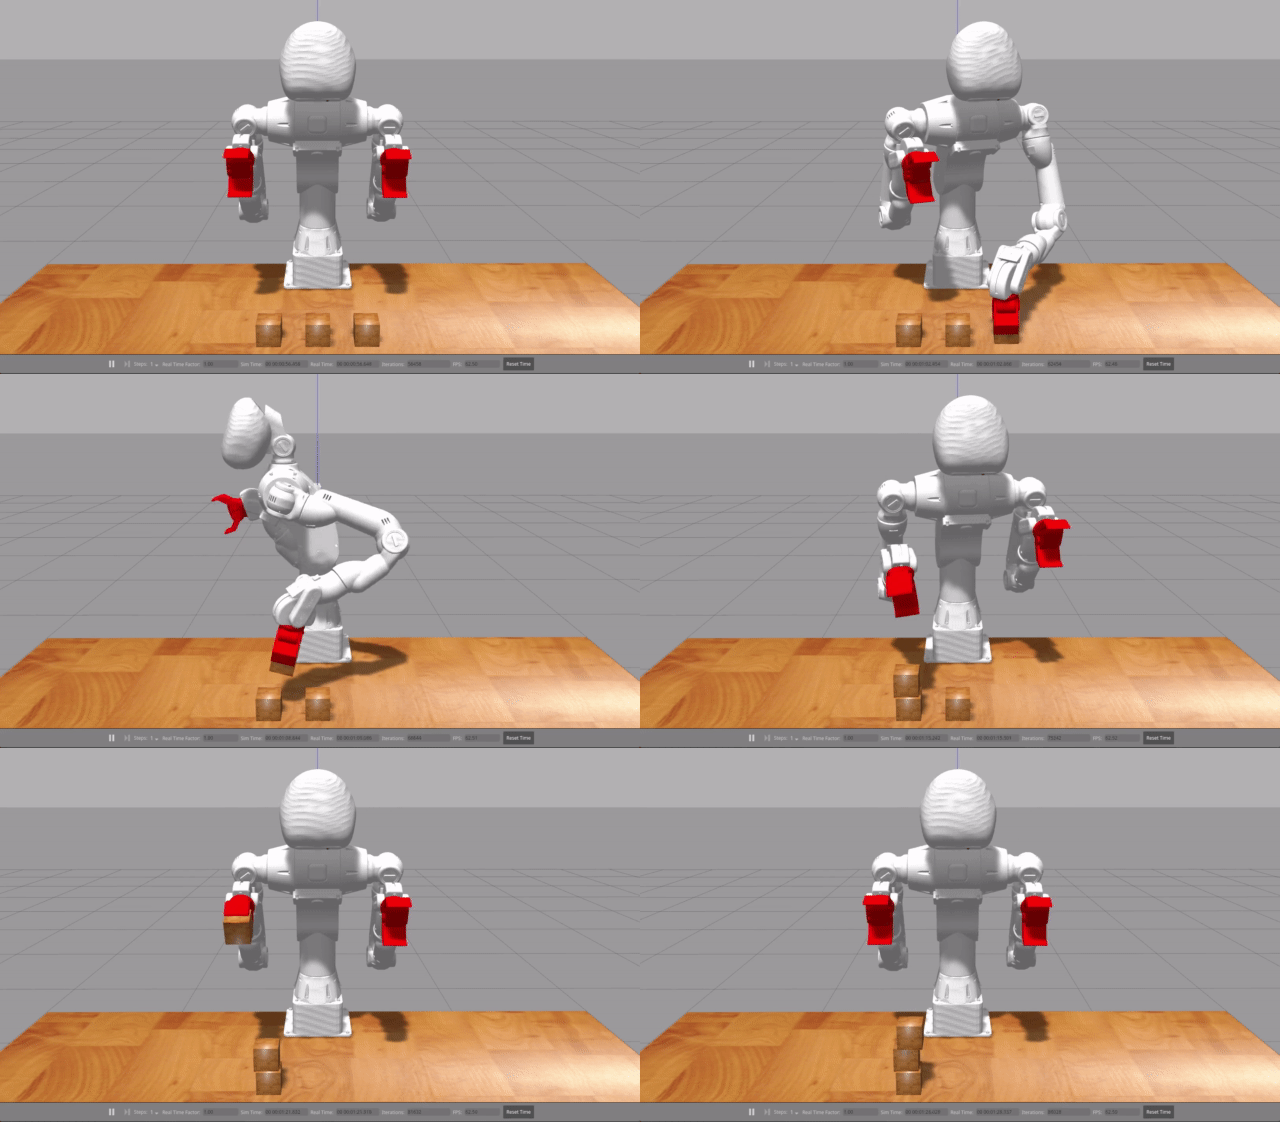
This is an example to detect boxes via PointCloudLibrary and stack the boxes.
Launch nodes with the following command:
roslaunch sciurus17_examples box_stacking_example.launch
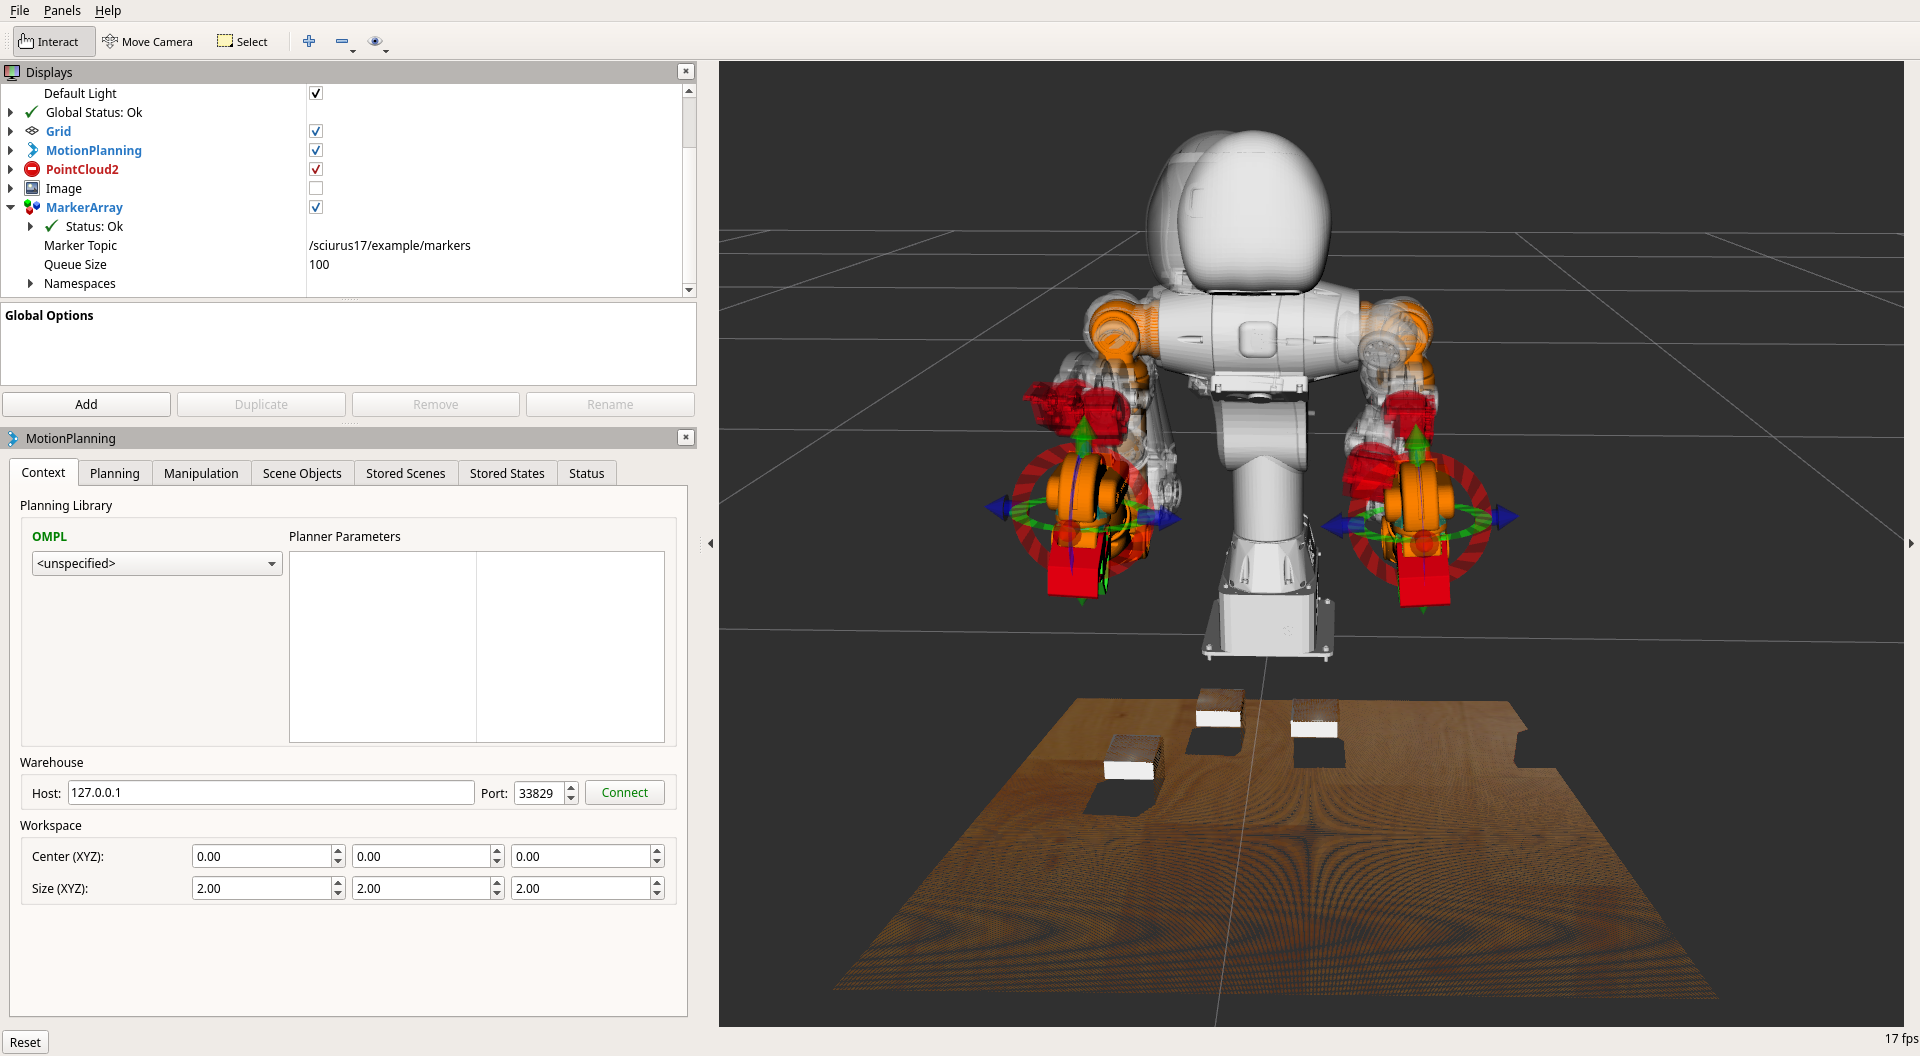
To visualize the result of box detection, please add /sciurus17/example/markers of visualization_msgs/MarkerArray in Rviz.
Videos
current_control_right_arm
This section shows how to change the right arm to current-controlled mode and move it.
Unlike the position control mode, the angle limit set on the servo becomes invalid in the current control mode.
RT Corporation assumes no responsibility for any damage that may occur during use of the product or this software.
Please hold onto the robot's right arm before exiting the sample with Ctrl+c.
When the sample ends, the right arm will deactivate and become free, which may lead to a clash.
Using Gazebo simulator for current_control_right_arm
Start Gazebo with additional options to change the hardware_interface of the right arm.
roslaunch sciurus17_gazebo sciurus17_with_table.launch use_effort_right_arm:=true
Using real Sciurus17 for current_control_right_arm
Before running the real Sciurus17,
change the Operating Mode of the servo motors (ID2 ~ ID8) of the right arm
from position control to current control using an application such as Dynamixel Wizard 2.0.
※Please also refer to the README of sciurus17_control for information on changing the control mode of the servo motor.
Then edit sciurus17_control/config/sciurus17_cotrol1.yaml as follows.
- Change the controller type to
effect_controllers/JointTrajectoryController.
right_arm_controller:
-  type: "position_controllers/JointTrajectoryController"
+  type: "effort_controllers/JointTrajectoryController"
  publish_rate: 500
- Change control mode from
3 (position control)to0 (current control).
-    r_arm_joint1: {id: 2, center: 2048, home: 2048, effort_const: 2.79, mode: 3 }
-    r_arm_joint2: {id: 3, center: 2048, home: 1024, effort_const: 2.79, mode: 3 }
-    r_arm_joint3: {id: 4, center: 2048, home: 2048, effort_const: 1.69, mode: 3 }
-    r_arm_joint4: {id: 5, center: 2048, home: 3825, effort_const: 1.79, mode: 3 }
-    r_arm_joint5: {id: 6, center: 2048, home: 2048, effort_const: 1.79, mode: 3 }
-    r_arm_joint6: {id: 7, center: 2048, home:  683, effort_const: 1.79, mode: 3 }
-    r_arm_joint7: {id: 8, center: 2048, home: 2048, effort_const: 1.79, mode: 3 }
     r_hand_joint: {id: 9, center: 2048, home: 2048, effort_const: 1.79, mode: 3 }

+    r_arm_joint1: {id: 2, center: 2048, home: 2048, effort_const: 2.79, mode: 0 }
+    r_arm_joint2: {id: 3, center: 2048, home: 1024, effort_const: 2.79, mode: 0 }
+    r_arm_joint3: {id: 4, center: 2048, home: 2048, effort_const: 1.69, mode: 0 }
+    r_arm_joint4: {id: 5, center: 2048, home: 3825, effort_const: 1.79, mode: 0 }
+    r_arm_joint5: {id: 6, center: 2048, home: 2048, effort_const: 1.79, mode: 0 }
+    r_arm_joint6: {id: 7, center: 2048, home:  683, effort_const: 1.79, mode: 0 }
+    r_arm_joint7: {id: 8, center: 2048, home: 2048, effort_const: 1.79, mode: 0 }
     r_hand_joint: {id: 9, center: 2048, home: 2048, effort_const: 1.79, mode: 3 }
After changing the file, run the following command to start the sciurus17 node.
roslaunch sciurus17_bringup sciurus17_bringup.launch
The PID gain of the controller is set in sciurus17_control/config/sciurus17_cotrol1.yaml.
Depending on the individual Sciurus17, it may not reach the target attitude or may vibrate. Change the PID gain accordingly.
  right_arm_controller:
    type: "effort_controllers/JointTrajectoryController"

    # for current control
    gains:
      r_arm_joint1: { p: 5.0,  d: 0.1, i: 0.0 }
      r_arm_joint2: { p: 5.0,  d: 0.1, i: 0.0 }
      r_arm_joint3: { p: 5.0,  d: 0.1, i: 0.0 }
      r_arm_joint4: { p: 5.0,  d: 0.1, i: 0.0 }
      r_arm_joint5: { p: 1.0,  d: 0.1, i: 0.0 }
      r_arm_joint6: { p: 1.0,  d: 0.1, i: 0.0 }
      r_arm_joint7: { p: 1.0,  d: 0.1, i: 0.0 }
Videos
current_control_left_wrist
This section shows how to change the left wrist to current-controlled mode and move it.
Using Gazebo simulator for current_control_left_wrist
Start Gazebo with additional options to change the hardware_interface of the left wrist.
roslaunch sciurus17_gazebo sciurus17_with_table.launch use_effort_left_wrist:=true
Using real Sciurus17 for current_control_left_wrist
Before running the real Sciurus17,
change the Operating Mode of the servo motor (ID16) of the left wrist
from position control to current control using an application such as Dynamixel Wizard 2.0.
Then edit sciurus17_control/config/sciurus17_cotrol2.yaml as follows.
- Add a controller for wrist joints.
      goal_time: 0.0
      stopped_velocity_tolerance: 1.0

+  left_wrist_controller:
+    type: "effort_controllers/JointEffortController"
+    joint: l_arm_joint7
+    pid: {p: 1.0, d: 0.0, i: 0.0}

  left_hand_controller:
- Change control mode from
3 (position control)to0 (current control).
    l_arm_joint6: {id: 15, center: 2048, home: 3413, effort_const: 1.79, mode: 3  }
-   l_arm_joint7: {id: 16, center: 2048, home: 2048, effort_const: 1.79, mode: 3  }
    l_hand_joint: {id: 17, center: 2048, home: 2048, effort_const: 1.79, mode: 3  }

    l_arm_joint6: {id: 15, center: 2048, home: 3413, effort_const: 1.79, mode: 3  }
+   l_arm_joint7: {id: 16, center: 2048, home: 2048, effort_const: 1.79, mode: 0  }
    l_hand_joint: {id: 17, center: 2048, home: 2048, effort_const: 1.79, mode: 3  }
Finally, edit sciurus17_control/launch/controller2.launch.
    <node name="controller_manager"
        pkg="controller_manager"
        type="spawner" respawn="false"
        output="screen"
        args="joint_state_controller
-             left_arm_controller
+             left_wrist_controller
              left_hand_controller"/>
After changing the file, run the following command to start the sciurus17 node.
roslaunch sciurus17_bringup sciurus17_bringup.launch
Run the example
Run the following command to start a example for moving the left wrist in a range of ±90 degrees.
rosrun sciurus17_examples control_effort_wrist.py
Videos
Wiki Tutorials
Source Tutorials
Package Dependencies
| Deps | Name | |
|---|---|---|
| 1 | sciurus17_moveit_config | |
| 1 | pcl_ros | |
| 1 | roscpp | |
| 2 | sensor_msgs | |
| 3 | pcl_conversions | |
| 2 | visualization_msgs | |
| 2 | geometry_msgs | |
| 1 | catkin | |
| 2 | moveit_commander | |
| 1 | cv_bridge |
System Dependencies
Dependant Packages
| Name | Repo | Deps |
|---|---|---|
| sciurus17 | github-rt-net-sciurus17_ros |
Messages
Services
Plugins
Recent questions tagged sciurus17_examples at Robotics Stack Exchange

|
sciurus17_examples package from sciurus17 reposciurus17 sciurus17_bringup sciurus17_control sciurus17_examples sciurus17_gazebo sciurus17_moveit_config sciurus17_msgs sciurus17_tools sciurus17_vision |
|
|
Package Summary
| Tags | No category tags. |
| Version | 2.0.0 |
| License | Apache License 2.0 |
| Build type | CATKIN |
| Use | RECOMMENDED |
Repository Summary
| Checkout URI | https://github.com/rt-net/sciurus17_ros.git |
| VCS Type | git |
| VCS Version | master |
| Last Updated | 2023-12-26 |
| Dev Status | MAINTAINED |
| CI status | No Continuous Integration |
| Released | UNRELEASED |
| Tags | No category tags. |
| Contributing |
Help Wanted (0)
Good First Issues (0) Pull Requests to Review (0) |
Package Description
Additional Links
Maintainers
- RT Corporation
Authors
- Daisuke Sato
- Hiroyuki Nomura
sciurus17_examples
This package includes examples to control Sciurus17 using sciurus17_ros.
How to launch Sciurus17 base packages
- Connect cables of a head camera, a chest camera and a control board to a PC.
- Power on the Sciurus17 and the camera device names are shown in the
/devdirectory. - Open terminal and launch
sciurus17_bringup.launchofsciurus17_bringuppackage.
This launch file has arguments:
- use_rviz (default: true)
- use_head_camera (default: true)
- use_chest_camera (default: true)
Using virtual Sciurus17
To launch Sciurus17 base packages without Sciurus17 hardware, unplug the control board's cable from the PC, then launch nodes with the following command:
roslaunch sciurus17_bringup sciurus17_bringup.launch
Using real Sciurus17
Launch the base packages with the following command:
roslaunch sciurus17_bringup sciurus17_bringup.launch
Using without cameras
Launch the base packages with arguments:
roslaunch sciurus17_bringup sciurus17_bringup.launch use_head_camera:=false use_chest_camera:=false
Using without RViz
To reduce the CPU load of the PC, launch the base packages with arguments:
roslaunch sciurus17_bringup sciurus17_bringup.launch use_rviz:=false
Using Gazebo simulator
Launch the packages with the following command:
roslaunch sciurus17_gazebo sciurus17_with_table.launch

# without RViz
roslaunch sciurus17_gazebo sciurus17_with_table.launch use_rviz:=false
Run Examples
Following examples will be executable after launch Sciurus17 base packages.
- gripper_action_example
- neck_joint_trajectory_example
- waist_joint_trajectory_example
- pick_and_place_demo
- hand_position_publisher
- head_camera_tracking
- chest_camera_tracking
- depth_camera_tracking
- preset_pid_gain_example
- box_stacking_example
- current_control_right_arm
- current_control_left_wrist
gripper_action_example
This is an example to open/close the grippers of the two arms.
Run a node with the following command:
rosrun sciurus17_examples gripper_action_example.py

Videos
neck_joint_trajectory_example
This is an example to change angles of the neck.
Run a node with the following command:
rosrun sciurus17_examples neck_joint_trajectory_example.py

Videos
waist_joint_trajectory_example
This is an example to change angles of the waist.
Run a node with the following command:
rosrun sciurus17_examples waist_joint_trajectory_example.py

Videos
pick_and_place_demo
This is an example to pick and place a small object with right hand while turning the waist.
Run a node with the following command:
rosrun sciurus17_examples pick_and_place_right_arm_demo.py

This is an example to pick and place a small object with left hand.
Run a node with the following command:
rosrun sciurus17_examples pick_and_place_left_arm_demo.py

This is an example to pick and place a small object with both hands.
Run a node with the following command:
rosrun sciurus17_examples pick_and_place_two_arm_demo.py

Videos
hand_position_publisher
This is an example to receive link positions from tf server.
This example receives transformed positions l_link7 and r_link7 based on base_link
from tf server, then publishes these positions as topics named
/sciurus17/hand_pos/left and /sciurus17/hand_pos/right.
Run a node with the following command:
rosrun sciurus17_examples hand_position_publisher_example.py
head_camera_tracking
This is an example to use the head camera images and OpenCV library for ball tracking and face tracking.
Run a node with the following command:
rosrun sciurus17_examples head_camera_tracking.py
For ball tracking
Edit ./scripts/head_camera_tracking.py as follows:
def _image_callback(self, ros_image):
    # ...

        # Detect an object (specific color or face)
        output_image = self._detect_orange_object(input_image)
        # output_image = self._detect_blue_object(input_image)
        # output_image = self._detect_face(input_image)

For face tracking
Edit ./scripts/head_camera_tracking.py as follows:
This example uses Cascade Classifier for face tracking.
Please edit the directories of cascade files in the script file. USER_NAME depends on user environments.
class ObjectTracker:
    def __init__(self):
        # ...

        # Load cascade files
        # Example:
        # self._face_cascade = cv2.CascadeClassifier("/home/USER_NAME/.local/lib/python2.7/site-packages/cv2/data/haarcascade_frontalface_alt2.xml")
        # self._eyes_cascade = cv2.CascadeClassifier("/home/USER_NAME/.local/lib/python2.7/site-packages/cv2/data/haarcascade_eye.xml")
        self._face_cascade = cv2.CascadeClassifier("/home/USER_NAME/.local/lib/python2.7/site-packages/cv2/data/haarcascade_frontalface_alt2.xml")
        self._eyes_cascade = cv2.CascadeClassifier("/home/USER_NAME/.local/lib/python2.7/site-packages/cv2/data/haarcascade_eye.xml")
def _image_callback(self, ros_image):
    # ...

        # Detect an object (specific color or face)
        # output_image = self._detect_orange_object(input_image)
        # output_image = self._detect_blue_object(input_image)
        output_image = self._detect_face(input_image)
Videos
This orange ball can be purchased from this page in RT ROBOT SHOP.
chest_camera_tracking
This is an example to use the chest camera images and OpenCV library for ball tracking.
Run a node with the following command:
rosrun sciurus17_examples chest_camera_tracking.py

Execute face tracking and ball tracking simultaneously
Launch nodes with the following commands for face tracking with the head camera and for ball tracking with the chest camera.
rosrun sciurus17_examples head_camera_tracking.py

# Open another terminal
rosrun sciurus17_examples chest_camera_tracking.py
Videos
depth_camera_tracking
This is an example to use the depth camera on the head for object tracking.
Run a node with the following command:
rosrun sciurus17_examples depth_camera_tracking.py
The default detection range is separated into four stages.
To change the detection range, edit ./scripts/depth_camera_tracking.py as the followings:
    def _detect_object(self, input_depth_image):
        # Limitation of object size
        MIN_OBJECT_SIZE = 10000 # px * px
        MAX_OBJECT_SIZE = 80000 # px * px

        # The detection range is separated into four stages.
        # Unit: mm
        DETECTION_DEPTH = [
                (500, 700),
                (600, 800),
                (700, 900),
                (800, 1000)]
preset_pid_gain_example
This is an example to change PID gains of the servo motors in bulk
using preset_reconfigure of sciurus17_control.
Lists of PID gain preset values can be edited in sciurus17_control/scripts/preset_reconfigure.py.
Launch nodes preset_reconfigure.py and preset_pid_gain_example.py with the following command:
roslaunch sciurus17_examples preset_pid_gain_example.launch
box_stacking_example

This is an example to detect boxes via PointCloudLibrary and stack the boxes.
Launch nodes with the following command:
roslaunch sciurus17_examples box_stacking_example.launch
To visualize the result of box detection, please add /sciurus17/example/markers of visualization_msgs/MarkerArray in Rviz.

Videos
current_control_right_arm
This section shows how to change the right arm to current-controlled mode and move it.
Unlike the position control mode, the angle limit set on the servo becomes invalid in the current control mode.
RT Corporation assumes no responsibility for any damage that may occur during use of the product or this software.
Please hold onto the robot's right arm before exiting the sample with Ctrl+c.
When the sample ends, the right arm will deactivate and become free, which may lead to a clash.
Using Gazebo simulator for current_control_right_arm
Start Gazebo with additional options to change the hardware_interface of the right arm.
roslaunch sciurus17_gazebo sciurus17_with_table.launch use_effort_right_arm:=true
Using real Sciurus17 for current_control_right_arm
Before running the real Sciurus17,
change the Operating Mode of the servo motors (ID2 ~ ID8) of the right arm
from position control to current control using an application such as Dynamixel Wizard 2.0.
※Please also refer to the README of sciurus17_control for information on changing the control mode of the servo motor.
Then edit sciurus17_control/config/sciurus17_cotrol1.yaml as follows.
- Change the controller type to
effect_controllers/JointTrajectoryController.
right_arm_controller:
-  type: "position_controllers/JointTrajectoryController"
+  type: "effort_controllers/JointTrajectoryController"
  publish_rate: 500
- Change control mode from
3 (position control)to0 (current control).
-    r_arm_joint1: {id: 2, center: 2048, home: 2048, effort_const: 2.79, mode: 3 }
-    r_arm_joint2: {id: 3, center: 2048, home: 1024, effort_const: 2.79, mode: 3 }
-    r_arm_joint3: {id: 4, center: 2048, home: 2048, effort_const: 1.69, mode: 3 }
-    r_arm_joint4: {id: 5, center: 2048, home: 3825, effort_const: 1.79, mode: 3 }
-    r_arm_joint5: {id: 6, center: 2048, home: 2048, effort_const: 1.79, mode: 3 }
-    r_arm_joint6: {id: 7, center: 2048, home:  683, effort_const: 1.79, mode: 3 }
-    r_arm_joint7: {id: 8, center: 2048, home: 2048, effort_const: 1.79, mode: 3 }
     r_hand_joint: {id: 9, center: 2048, home: 2048, effort_const: 1.79, mode: 3 }

+    r_arm_joint1: {id: 2, center: 2048, home: 2048, effort_const: 2.79, mode: 0 }
+    r_arm_joint2: {id: 3, center: 2048, home: 1024, effort_const: 2.79, mode: 0 }
+    r_arm_joint3: {id: 4, center: 2048, home: 2048, effort_const: 1.69, mode: 0 }
+    r_arm_joint4: {id: 5, center: 2048, home: 3825, effort_const: 1.79, mode: 0 }
+    r_arm_joint5: {id: 6, center: 2048, home: 2048, effort_const: 1.79, mode: 0 }
+    r_arm_joint6: {id: 7, center: 2048, home:  683, effort_const: 1.79, mode: 0 }
+    r_arm_joint7: {id: 8, center: 2048, home: 2048, effort_const: 1.79, mode: 0 }
     r_hand_joint: {id: 9, center: 2048, home: 2048, effort_const: 1.79, mode: 3 }
After changing the file, run the following command to start the sciurus17 node.
roslaunch sciurus17_bringup sciurus17_bringup.launch
The PID gain of the controller is set in sciurus17_control/config/sciurus17_cotrol1.yaml.
Depending on the individual Sciurus17, it may not reach the target attitude or may vibrate. Change the PID gain accordingly.
  right_arm_controller:
    type: "effort_controllers/JointTrajectoryController"

    # for current control
    gains:
      r_arm_joint1: { p: 5.0,  d: 0.1, i: 0.0 }
      r_arm_joint2: { p: 5.0,  d: 0.1, i: 0.0 }
      r_arm_joint3: { p: 5.0,  d: 0.1, i: 0.0 }
      r_arm_joint4: { p: 5.0,  d: 0.1, i: 0.0 }
      r_arm_joint5: { p: 1.0,  d: 0.1, i: 0.0 }
      r_arm_joint6: { p: 1.0,  d: 0.1, i: 0.0 }
      r_arm_joint7: { p: 1.0,  d: 0.1, i: 0.0 }
Videos
current_control_left_wrist
This section shows how to change the left wrist to current-controlled mode and move it.
Using Gazebo simulator for current_control_left_wrist
Start Gazebo with additional options to change the hardware_interface of the left wrist.
roslaunch sciurus17_gazebo sciurus17_with_table.launch use_effort_left_wrist:=true
Using real Sciurus17 for current_control_left_wrist
Before running the real Sciurus17,
change the Operating Mode of the servo motor (ID16) of the left wrist
from position control to current control using an application such as Dynamixel Wizard 2.0.
Then edit sciurus17_control/config/sciurus17_cotrol2.yaml as follows.
- Add a controller for wrist joints.
      goal_time: 0.0
      stopped_velocity_tolerance: 1.0

+  left_wrist_controller:
+    type: "effort_controllers/JointEffortController"
+    joint: l_arm_joint7
+    pid: {p: 1.0, d: 0.0, i: 0.0}

  left_hand_controller:
- Change control mode from
3 (position control)to0 (current control).
    l_arm_joint6: {id: 15, center: 2048, home: 3413, effort_const: 1.79, mode: 3  }
-   l_arm_joint7: {id: 16, center: 2048, home: 2048, effort_const: 1.79, mode: 3  }
    l_hand_joint: {id: 17, center: 2048, home: 2048, effort_const: 1.79, mode: 3  }

    l_arm_joint6: {id: 15, center: 2048, home: 3413, effort_const: 1.79, mode: 3  }
+   l_arm_joint7: {id: 16, center: 2048, home: 2048, effort_const: 1.79, mode: 0  }
    l_hand_joint: {id: 17, center: 2048, home: 2048, effort_const: 1.79, mode: 3  }
Finally, edit sciurus17_control/launch/controller2.launch.
    <node name="controller_manager"
        pkg="controller_manager"
        type="spawner" respawn="false"
        output="screen"
        args="joint_state_controller
-             left_arm_controller
+             left_wrist_controller
              left_hand_controller"/>
After changing the file, run the following command to start the sciurus17 node.
roslaunch sciurus17_bringup sciurus17_bringup.launch
Run the example
Run the following command to start a example for moving the left wrist in a range of ±90 degrees.
rosrun sciurus17_examples control_effort_wrist.py
Videos
Wiki Tutorials
Source Tutorials
Package Dependencies
| Deps | Name | |
|---|---|---|
| 1 | sciurus17_moveit_config | |
| 1 | pcl_ros | |
| 1 | roscpp | |
| 2 | sensor_msgs | |
| 3 | pcl_conversions | |
| 2 | visualization_msgs | |
| 2 | geometry_msgs | |
| 1 | catkin | |
| 2 | moveit_commander | |
| 1 | cv_bridge |
System Dependencies
Dependant Packages
| Name | Repo | Deps |
|---|---|---|
| sciurus17 | github-rt-net-sciurus17_ros |
Messages
Services
Plugins
Recent questions tagged sciurus17_examples at Robotics Stack Exchange

|
sciurus17_examples package from sciurus17 reposciurus17 sciurus17_bringup sciurus17_control sciurus17_examples sciurus17_gazebo sciurus17_moveit_config sciurus17_msgs sciurus17_tools sciurus17_vision |
|
|
Package Summary
| Tags | No category tags. |
| Version | 2.0.0 |
| License | Apache License 2.0 |
| Build type | CATKIN |
| Use | RECOMMENDED |
Repository Summary
| Checkout URI | https://github.com/rt-net/sciurus17_ros.git |
| VCS Type | git |
| VCS Version | master |
| Last Updated | 2023-12-26 |
| Dev Status | MAINTAINED |
| CI status | No Continuous Integration |
| Released | UNRELEASED |
| Tags | No category tags. |
| Contributing |
Help Wanted (0)
Good First Issues (0) Pull Requests to Review (0) |
Package Description
Additional Links
Maintainers
- RT Corporation
Authors
- Daisuke Sato
- Hiroyuki Nomura
sciurus17_examples
This package includes examples to control Sciurus17 using sciurus17_ros.
How to launch Sciurus17 base packages
- Connect cables of a head camera, a chest camera and a control board to a PC.
- Power on the Sciurus17 and the camera device names are shown in the
/devdirectory. - Open terminal and launch
sciurus17_bringup.launchofsciurus17_bringuppackage.
This launch file has arguments:
- use_rviz (default: true)
- use_head_camera (default: true)
- use_chest_camera (default: true)
Using virtual Sciurus17
To launch Sciurus17 base packages without Sciurus17 hardware, unplug the control board's cable from the PC, then launch nodes with the following command:
roslaunch sciurus17_bringup sciurus17_bringup.launch
Using real Sciurus17
Launch the base packages with the following command:
roslaunch sciurus17_bringup sciurus17_bringup.launch
Using without cameras
Launch the base packages with arguments:
roslaunch sciurus17_bringup sciurus17_bringup.launch use_head_camera:=false use_chest_camera:=false
Using without RViz
To reduce the CPU load of the PC, launch the base packages with arguments:
roslaunch sciurus17_bringup sciurus17_bringup.launch use_rviz:=false
Using Gazebo simulator
Launch the packages with the following command:
roslaunch sciurus17_gazebo sciurus17_with_table.launch

# without RViz
roslaunch sciurus17_gazebo sciurus17_with_table.launch use_rviz:=false
Run Examples
Following examples will be executable after launch Sciurus17 base packages.
- gripper_action_example
- neck_joint_trajectory_example
- waist_joint_trajectory_example
- pick_and_place_demo
- hand_position_publisher
- head_camera_tracking
- chest_camera_tracking
- depth_camera_tracking
- preset_pid_gain_example
- box_stacking_example
- current_control_right_arm
- current_control_left_wrist
gripper_action_example
This is an example to open/close the grippers of the two arms.
Run a node with the following command:
rosrun sciurus17_examples gripper_action_example.py

Videos
neck_joint_trajectory_example
This is an example to change angles of the neck.
Run a node with the following command:
rosrun sciurus17_examples neck_joint_trajectory_example.py

Videos
waist_joint_trajectory_example
This is an example to change angles of the waist.
Run a node with the following command:
rosrun sciurus17_examples waist_joint_trajectory_example.py

Videos
pick_and_place_demo
This is an example to pick and place a small object with right hand while turning the waist.
Run a node with the following command:
rosrun sciurus17_examples pick_and_place_right_arm_demo.py

This is an example to pick and place a small object with left hand.
Run a node with the following command:
rosrun sciurus17_examples pick_and_place_left_arm_demo.py

This is an example to pick and place a small object with both hands.
Run a node with the following command:
rosrun sciurus17_examples pick_and_place_two_arm_demo.py

Videos
hand_position_publisher
This is an example to receive link positions from tf server.
This example receives transformed positions l_link7 and r_link7 based on base_link
from tf server, then publishes these positions as topics named
/sciurus17/hand_pos/left and /sciurus17/hand_pos/right.
Run a node with the following command:
rosrun sciurus17_examples hand_position_publisher_example.py
head_camera_tracking
This is an example to use the head camera images and OpenCV library for ball tracking and face tracking.
Run a node with the following command:
rosrun sciurus17_examples head_camera_tracking.py
For ball tracking
Edit ./scripts/head_camera_tracking.py as follows:
def _image_callback(self, ros_image):
    # ...

        # Detect an object (specific color or face)
        output_image = self._detect_orange_object(input_image)
        # output_image = self._detect_blue_object(input_image)
        # output_image = self._detect_face(input_image)

For face tracking
Edit ./scripts/head_camera_tracking.py as follows:
This example uses Cascade Classifier for face tracking.
Please edit the directories of cascade files in the script file. USER_NAME depends on user environments.
class ObjectTracker:
    def __init__(self):
        # ...

        # Load cascade files
        # Example:
        # self._face_cascade = cv2.CascadeClassifier("/home/USER_NAME/.local/lib/python2.7/site-packages/cv2/data/haarcascade_frontalface_alt2.xml")
        # self._eyes_cascade = cv2.CascadeClassifier("/home/USER_NAME/.local/lib/python2.7/site-packages/cv2/data/haarcascade_eye.xml")
        self._face_cascade = cv2.CascadeClassifier("/home/USER_NAME/.local/lib/python2.7/site-packages/cv2/data/haarcascade_frontalface_alt2.xml")
        self._eyes_cascade = cv2.CascadeClassifier("/home/USER_NAME/.local/lib/python2.7/site-packages/cv2/data/haarcascade_eye.xml")
def _image_callback(self, ros_image):
    # ...

        # Detect an object (specific color or face)
        # output_image = self._detect_orange_object(input_image)
        # output_image = self._detect_blue_object(input_image)
        output_image = self._detect_face(input_image)
Videos
This orange ball can be purchased from this page in RT ROBOT SHOP.
chest_camera_tracking
This is an example to use the chest camera images and OpenCV library for ball tracking.
Run a node with the following command:
rosrun sciurus17_examples chest_camera_tracking.py

Execute face tracking and ball tracking simultaneously
Launch nodes with the following commands for face tracking with the head camera and for ball tracking with the chest camera.
rosrun sciurus17_examples head_camera_tracking.py

# Open another terminal
rosrun sciurus17_examples chest_camera_tracking.py
Videos
depth_camera_tracking
This is an example to use the depth camera on the head for object tracking.
Run a node with the following command:
rosrun sciurus17_examples depth_camera_tracking.py
The default detection range is separated into four stages.
To change the detection range, edit ./scripts/depth_camera_tracking.py as the followings:
    def _detect_object(self, input_depth_image):
        # Limitation of object size
        MIN_OBJECT_SIZE = 10000 # px * px
        MAX_OBJECT_SIZE = 80000 # px * px

        # The detection range is separated into four stages.
        # Unit: mm
        DETECTION_DEPTH = [
                (500, 700),
                (600, 800),
                (700, 900),
                (800, 1000)]
preset_pid_gain_example
This is an example to change PID gains of the servo motors in bulk
using preset_reconfigure of sciurus17_control.
Lists of PID gain preset values can be edited in sciurus17_control/scripts/preset_reconfigure.py.
Launch nodes preset_reconfigure.py and preset_pid_gain_example.py with the following command:
roslaunch sciurus17_examples preset_pid_gain_example.launch
box_stacking_example

This is an example to detect boxes via PointCloudLibrary and stack the boxes.
Launch nodes with the following command:
roslaunch sciurus17_examples box_stacking_example.launch
To visualize the result of box detection, please add /sciurus17/example/markers of visualization_msgs/MarkerArray in Rviz.

Videos
current_control_right_arm
This section shows how to change the right arm to current-controlled mode and move it.
Unlike the position control mode, the angle limit set on the servo becomes invalid in the current control mode.
RT Corporation assumes no responsibility for any damage that may occur during use of the product or this software.
Please hold onto the robot's right arm before exiting the sample with Ctrl+c.
When the sample ends, the right arm will deactivate and become free, which may lead to a clash.
Using Gazebo simulator for current_control_right_arm
Start Gazebo with additional options to change the hardware_interface of the right arm.
roslaunch sciurus17_gazebo sciurus17_with_table.launch use_effort_right_arm:=true
Using real Sciurus17 for current_control_right_arm
Before running the real Sciurus17,
change the Operating Mode of the servo motors (ID2 ~ ID8) of the right arm
from position control to current control using an application such as Dynamixel Wizard 2.0.
※Please also refer to the README of sciurus17_control for information on changing the control mode of the servo motor.
Then edit sciurus17_control/config/sciurus17_cotrol1.yaml as follows.
- Change the controller type to
effect_controllers/JointTrajectoryController.
right_arm_controller:
-  type: "position_controllers/JointTrajectoryController"
+  type: "effort_controllers/JointTrajectoryController"
  publish_rate: 500
- Change control mode from
3 (position control)to0 (current control).
-    r_arm_joint1: {id: 2, center: 2048, home: 2048, effort_const: 2.79, mode: 3 }
-    r_arm_joint2: {id: 3, center: 2048, home: 1024, effort_const: 2.79, mode: 3 }
-    r_arm_joint3: {id: 4, center: 2048, home: 2048, effort_const: 1.69, mode: 3 }
-    r_arm_joint4: {id: 5, center: 2048, home: 3825, effort_const: 1.79, mode: 3 }
-    r_arm_joint5: {id: 6, center: 2048, home: 2048, effort_const: 1.79, mode: 3 }
-    r_arm_joint6: {id: 7, center: 2048, home:  683, effort_const: 1.79, mode: 3 }
-    r_arm_joint7: {id: 8, center: 2048, home: 2048, effort_const: 1.79, mode: 3 }
     r_hand_joint: {id: 9, center: 2048, home: 2048, effort_const: 1.79, mode: 3 }

+    r_arm_joint1: {id: 2, center: 2048, home: 2048, effort_const: 2.79, mode: 0 }
+    r_arm_joint2: {id: 3, center: 2048, home: 1024, effort_const: 2.79, mode: 0 }
+    r_arm_joint3: {id: 4, center: 2048, home: 2048, effort_const: 1.69, mode: 0 }
+    r_arm_joint4: {id: 5, center: 2048, home: 3825, effort_const: 1.79, mode: 0 }
+    r_arm_joint5: {id: 6, center: 2048, home: 2048, effort_const: 1.79, mode: 0 }
+    r_arm_joint6: {id: 7, center: 2048, home:  683, effort_const: 1.79, mode: 0 }
+    r_arm_joint7: {id: 8, center: 2048, home: 2048, effort_const: 1.79, mode: 0 }
     r_hand_joint: {id: 9, center: 2048, home: 2048, effort_const: 1.79, mode: 3 }
After changing the file, run the following command to start the sciurus17 node.
roslaunch sciurus17_bringup sciurus17_bringup.launch
The PID gain of the controller is set in sciurus17_control/config/sciurus17_cotrol1.yaml.
Depending on the individual Sciurus17, it may not reach the target attitude or may vibrate. Change the PID gain accordingly.
  right_arm_controller:
    type: "effort_controllers/JointTrajectoryController"

    # for current control
    gains:
      r_arm_joint1: { p: 5.0,  d: 0.1, i: 0.0 }
      r_arm_joint2: { p: 5.0,  d: 0.1, i: 0.0 }
      r_arm_joint3: { p: 5.0,  d: 0.1, i: 0.0 }
      r_arm_joint4: { p: 5.0,  d: 0.1, i: 0.0 }
      r_arm_joint5: { p: 1.0,  d: 0.1, i: 0.0 }
      r_arm_joint6: { p: 1.0,  d: 0.1, i: 0.0 }
      r_arm_joint7: { p: 1.0,  d: 0.1, i: 0.0 }
Videos
current_control_left_wrist
This section shows how to change the left wrist to current-controlled mode and move it.
Using Gazebo simulator for current_control_left_wrist
Start Gazebo with additional options to change the hardware_interface of the left wrist.
roslaunch sciurus17_gazebo sciurus17_with_table.launch use_effort_left_wrist:=true
Using real Sciurus17 for current_control_left_wrist
Before running the real Sciurus17,
change the Operating Mode of the servo motor (ID16) of the left wrist
from position control to current control using an application such as Dynamixel Wizard 2.0.
Then edit sciurus17_control/config/sciurus17_cotrol2.yaml as follows.
- Add a controller for wrist joints.
      goal_time: 0.0
      stopped_velocity_tolerance: 1.0

+  left_wrist_controller:
+    type: "effort_controllers/JointEffortController"
+    joint: l_arm_joint7
+    pid: {p: 1.0, d: 0.0, i: 0.0}

  left_hand_controller:
- Change control mode from
3 (position control)to0 (current control).
    l_arm_joint6: {id: 15, center: 2048, home: 3413, effort_const: 1.79, mode: 3  }
-   l_arm_joint7: {id: 16, center: 2048, home: 2048, effort_const: 1.79, mode: 3  }
    l_hand_joint: {id: 17, center: 2048, home: 2048, effort_const: 1.79, mode: 3  }

    l_arm_joint6: {id: 15, center: 2048, home: 3413, effort_const: 1.79, mode: 3  }
+   l_arm_joint7: {id: 16, center: 2048, home: 2048, effort_const: 1.79, mode: 0  }
    l_hand_joint: {id: 17, center: 2048, home: 2048, effort_const: 1.79, mode: 3  }
Finally, edit sciurus17_control/launch/controller2.launch.
    <node name="controller_manager"
        pkg="controller_manager"
        type="spawner" respawn="false"
        output="screen"
        args="joint_state_controller
-             left_arm_controller
+             left_wrist_controller
              left_hand_controller"/>
After changing the file, run the following command to start the sciurus17 node.
roslaunch sciurus17_bringup sciurus17_bringup.launch
Run the example
Run the following command to start a example for moving the left wrist in a range of ±90 degrees.
rosrun sciurus17_examples control_effort_wrist.py
Videos
Wiki Tutorials
Source Tutorials
Package Dependencies
| Deps | Name | |
|---|---|---|
| 1 | sciurus17_moveit_config | |
| 1 | pcl_ros | |
| 1 | roscpp | |
| 2 | sensor_msgs | |
| 3 | pcl_conversions | |
| 2 | visualization_msgs | |
| 2 | geometry_msgs | |
| 1 | catkin | |
| 2 | moveit_commander | |
| 1 | cv_bridge |
System Dependencies
Dependant Packages
| Name | Repo | Deps |
|---|---|---|
| sciurus17 | github-rt-net-sciurus17_ros |


