 ROS Index
|
rosbot_ros repositoryrosbot rosbot_bringup rosbot_controller rosbot_description rosbot_gazebo rosbot_hardware_interfaces rosbot_joy rosbot_localization rosbot_utils |
ROS Distro
|
Repository Summary
| Checkout URI | https://github.com/husarion/rosbot_ros.git |
| VCS Type | git |
| VCS Version | humble |
| Last Updated | 2025-12-09 |
| Dev Status | DEVELOPED |
| Released | UNRELEASED |
| Contributing |
Help Wanted (-)
Good First Issues (-) Pull Requests to Review (-) |
Packages
| Name | Version |
|---|---|
| rosbot | 0.15.2 |
| rosbot_bringup | 0.15.2 |
| rosbot_controller | 0.15.2 |
| rosbot_description | 0.15.2 |
| rosbot_gazebo | 0.15.2 |
| rosbot_hardware_interfaces | 0.15.2 |
| rosbot_joy | 0.15.2 |
| rosbot_localization | 0.15.2 |
| rosbot_utils | 0.15.2 |
README
ROSbot ROS
ROS 2 packages for Husarion ROSbot Series.
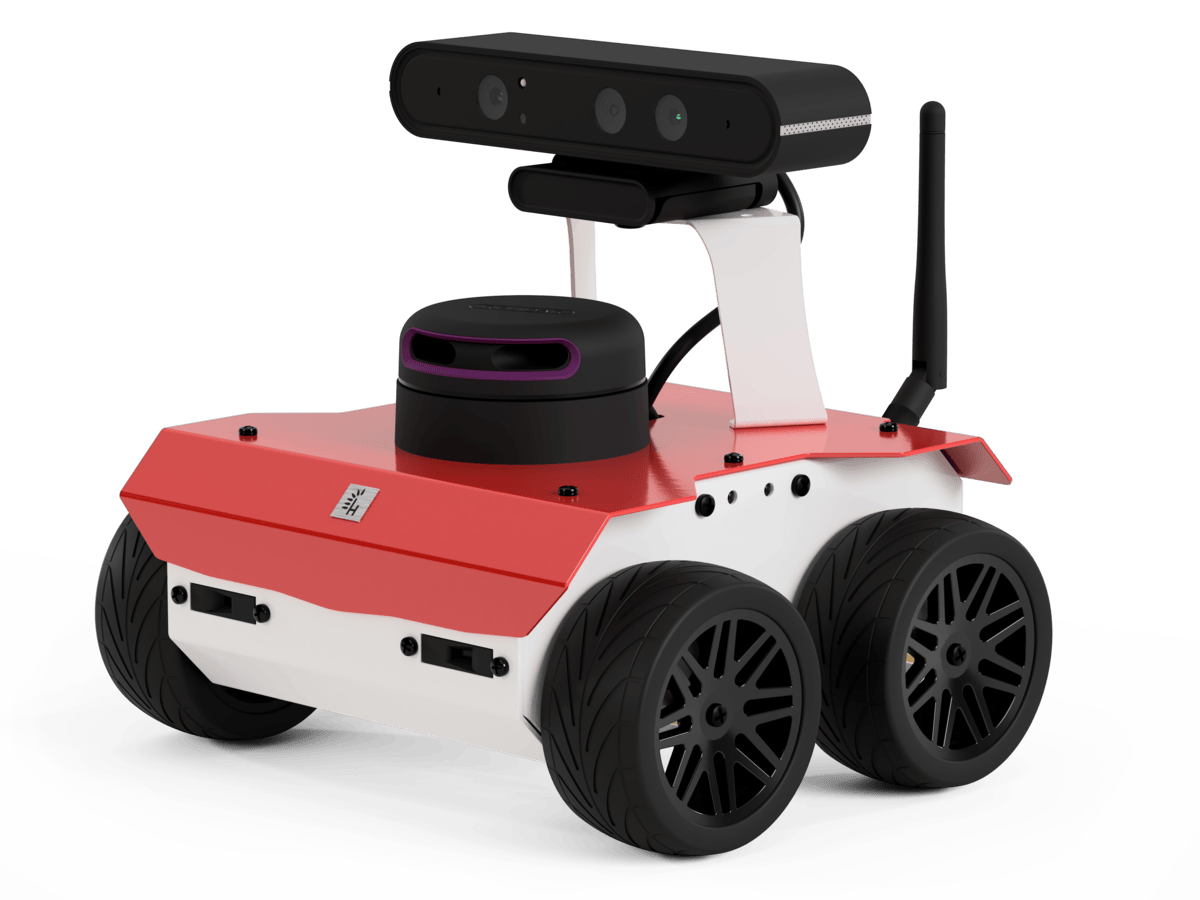
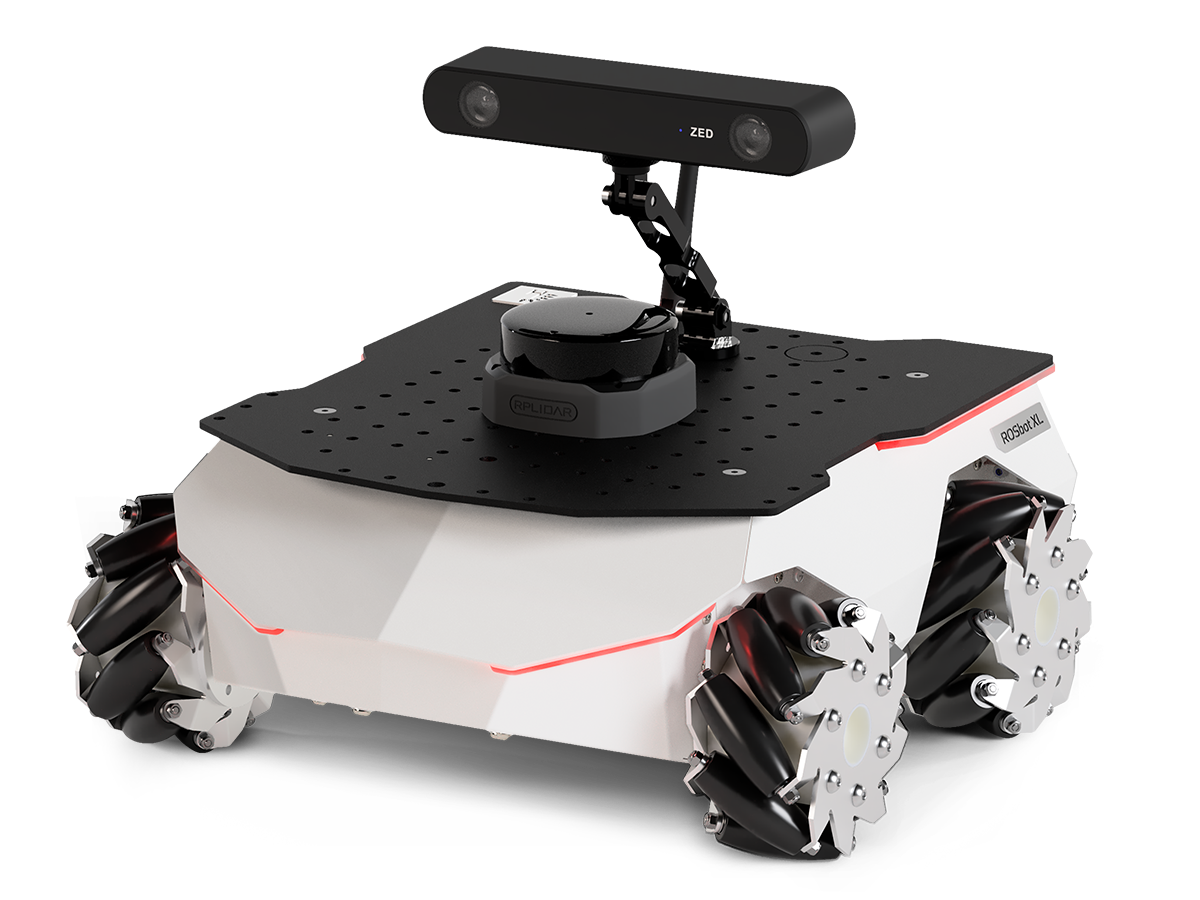
📚 ROS API
Documentation is available in ROS_API.md.
🚀 Quick Start
⚙️ Prerequisites
- Install all necessary tools:
   sudo apt-get update
   sudo apt-get install -y python3-pip ros-dev-tools
- Create a workspace folder and clone the rosbot_ros repository:
   mkdir rosbot_ws
   cd rosbot_ws
   git clone -b humble https://github.com/husarion/rosbot_ros.git src/rosbot_ros
Configure environment
The repository is used to run the code both on the real robot and in the simulation. Specify HUSARION_ROS_BUILD_TYPE the variable according to your needs.
Real robot:
export HUSARION_ROS_BUILD_TYPE=hardware
Simulation:
export HUSARION_ROS_BUILD_TYPE=simulation
Build
source /opt/ros/$ROS_DISTRO/setup.bash

vcs import src < src/rosbot_ros/rosbot/rosbot_${HUSARION_ROS_BUILD_TYPE}.repos
vcs import src < src/rosbot_ros/rosbot/manipulator.repos # For ROSbot XL manipulation package

sudo rosdep init
rosdep update --rosdistro $ROS_DISTRO
rosdep install -i --from-path src --rosdistro $ROS_DISTRO -y

colcon build --symlink-install --packages-up-to rosbot --cmake-args -DCMAKE_BUILD_TYPE=Release
Run the Robot
For ROSbot XL, you can specify a particular configuration using the launch configuration argument. If you are using the manipulation configuration, please refer to MANIPULATOR.md for detailed instructions.
Real robot:
source install/setup.bash
ros2 launch rosbot_bringup bringup.launch.py robot_model:=<rosbot/rosbot_xl>
[!NOTE] To run the software on real ROSbots, communication with the CORE2 is required. Ensure the firmware is updated before running the micro-ROS agent. For detailed instructions, refer to the rosbot_ros2_firmware repository.
sudo su
source install/setup.bash
ros2 run rosbot_utils flash_firmware --robot-model <rosbot/rosbot_xl>
exit
Simulation:
source install/setup.bash
ros2 launch rosbot_gazebo simulation.launch.py robot_model:=<rosbot/rosbot_xl>
Launch Arguments
| Symbol | Meaning |
|---|---|
| 🤖 | Available for physical robot |
| 🖥️ | Available in simulation |
| 🤖 | 🖥️ | Argument | Description
Type: Default |
| — | — | ——————- | ————————————————————————————————————————————————————————————————– |
File truncated at 100 lines see the full file
CONTRIBUTING
Developer info and tools
USB-A connection
You can connect with the ROSbot hardware on your own computer. To establish a connection, connect your computer to the robot using a USB-A cable. Then build the code locally and specify via the serial_port argument which processor should be used to establish the connection.
ros2 launch rosbot_bringup bringup.launch.py serial_port:=/dev/ttyUSB0
The hardware checks the connection via USB-A only during initialization and when btn1 or btn2 is pressed, so while executing the above command, hold down the reset button together with bnt1/bnt2 and release the reset button. After establishing a connection, you can release bnt1/bnt2.
pre-commit
pre-commit configuration prepares plenty of tests helping for developing and contributing. Usage:
# install pre-commit
pip install pre-commit

# initialize pre-commit workspace
pre-commit install

# manually run tests
pre-commit run -a
After initialization pre-commit configuration will applied on every commit.
Repository Summary
| Checkout URI | https://github.com/husarion/rosbot_ros.git |
| VCS Type | git |
| VCS Version | jazzy |
| Last Updated | 2026-09-29 |
| Dev Status | DEVELOPED |
| Released | RELEASED |
| Contributing |
Help Wanted (-)
Good First Issues (-) Pull Requests to Review (-) |
Packages
| Name | Version |
|---|---|
| husarion_asset_server | 1.3.0 |
| rosbot | 1.3.0 |
| rosbot_bringup | 1.3.0 |
| rosbot_controller | 1.3.0 |
| rosbot_description | 1.3.0 |
| rosbot_gazebo | 1.3.0 |
| rosbot_hardware_interfaces | 1.3.0 |
| rosbot_joy | 1.3.0 |
| rosbot_localization | 1.3.0 |
| rosbot_moveit | 1.3.0 |
| rosbot_utils | 1.3.0 |
README
ROSbot ROS
ROS 2 packages for Husarion ROSbot Series.
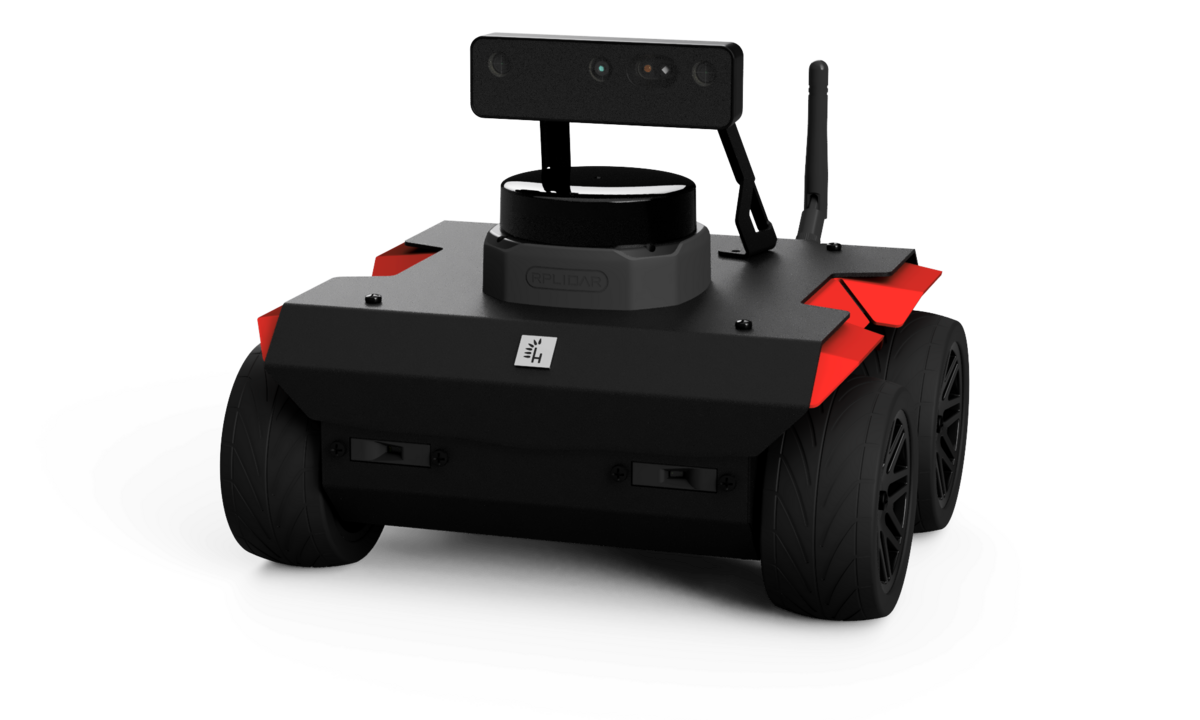
📚 ROS API
Documentation is available in ROS_API.md.
🚀 Quick Start
⚙️ Prerequisites
- Install all necessary tools:
   sudo apt-get update
   sudo apt-get install -y python3-pip ros-dev-tools
- Create a workspace folder and clone the rosbot_ros repository:
   mkdir rosbot_ws
   cd rosbot_ws
   git clone -b jazzy https://github.com/husarion/rosbot_ros.git src/rosbot_ros
Build
source /opt/ros/$ROS_DISTRO/setup.bash

vcs import src < src/rosbot_ros/rosbot/rosbot_hardware.repos
vcs import src < src/rosbot_ros/rosbot/rosbot_simulation.repos

# Optional: speed up build by removing unnecessary packages
# For hardware build only, remove simulation package:
# rm -rf src/rosbot_ros/rosbot_gazebo
# For simulation build only, remove hardware package:
# rm -rf src/rosbot_ros/rosbot_bringup

export PIP_BREAK_SYSTEM_PACKAGES=1
sudo rosdep init
rosdep update --rosdistro $ROS_DISTRO
rosdep install -i --from-path src --rosdistro $ROS_DISTRO -y

colcon build --symlink-install --cmake-args -DCMAKE_BUILD_TYPE=Release
Run the Robot
For ROSbot XL, you can specify a particular configuration using the launch configuration argument. If you are using the manipulation configuration, please refer to MANIPULATOR.md for detailed instructions — including the gamepad controls for the OpenMANIPULATOR-X.
Real robot:
source install/setup.bash
ros2 launch rosbot_bringup <rosbot/rosbot_xl>.yaml
[!NOTE] The ROSbot ROS Driver is strongly dependent on the firmware version. If you change driver version or ROS distro, ensure the firmware is compatible. Firmware can be updated with the
flash_firmwarescript.source install/setup.bash ros2 run rosbot_utils flash_firmware --robot-model <rosbot/rosbot_xl>The MCU talks MAVLink to
rosbot_mavlink_bridge. micro-ROS was supported up to firmwarev2.1.0-jazzy; firmwarev2.2.0-jazzyand this driver no longer ship it.
Simulation:
source install/setup.bash
ros2 launch rosbot_gazebo simulation.yaml robot_model:=<rosbot/rosbot_xl>
[!TIP] You can spawn multiple robots in the simulation. To do that, run the launch file multiple times with different namespaces and initial positions (x, y, z). For example:
source install/setup.bash
ros2 launch rosbot_gazebo spawn_robot.yaml robot_model:=<rosbot/rosbot_xl> namespace:=robot1 x:=0 y:=0
All topics/services/actions are namespaced under
/<namespace>/on HW and sim — see Namespace policy.
Launch Arguments
| Symbol | Meaning |
|---|---|
| 🤖 | Available for physical robot |
| 🖥️ | Available in simulation |
File truncated at 100 lines see the full file
CONTRIBUTING
Developer info and tools
USB-B connection
You can connect with the ROSbot hardware on your own computer. To establish a connection, connect your computer to the robot using a USB-B cable. Then build the code locally and specify via the serial_port argument which processor should be used to establish the connection.
ros2 launch rosbot_bringup rosbot.yaml serial_port:=/dev/rosbot
The hardware checks the connection via USB-B only during initialization and when btn1 or btn2 is pressed, so while executing the above command, hold down the reset button together with bnt1/bnt2 and release the reset button. After establishing a connection, you can release bnt1/bnt2.
pre-commit
pre-commit configuration prepares plenty of tests helping for developing and contributing. Usage:
# install pre-commit
pip install pre-commit

# initialize pre-commit workspace
pre-commit install

# manually run tests
pre-commit run -a
After initialization pre-commit configuration will applied on every commit.
Auto-fix workflow
Several hooks (black, isort, cmake-format, prettier, trailing-whitespace)
rewrite the file on the spot when they find something to fix. If they fire during
git commit, the commit aborts with Stashed changes conflicted with hook auto-fixes
and you have to git add the rewritten files and re-commit — easy to miss when
batching.
To avoid the cycle, run pre-commit on the staged files before git commit:
git add <files>
pre-commit run --files $(git diff --cached --name-only)
git add <files>   # re-stage anything the hooks rewrote
git commit -m "..."
Or, for a small change, just pre-commit run -a once before staging.
|
|
rosbot_ros repositoryrosbot rosbot_bringup rosbot_controller rosbot_description rosbot_gazebo rosbot_hardware_interfaces rosbot_joy rosbot_localization rosbot_utils |
ROS Distro
|
Repository Summary
| Checkout URI | https://github.com/husarion/rosbot_ros.git |
| VCS Type | git |
| VCS Version | humble |
| Last Updated | 2025-12-09 |
| Dev Status | DEVELOPED |
| Released | UNRELEASED |
| Contributing |
Help Wanted (-)
Good First Issues (-) Pull Requests to Review (-) |
Packages
| Name | Version |
|---|---|
| rosbot | 0.15.2 |
| rosbot_bringup | 0.15.2 |
| rosbot_controller | 0.15.2 |
| rosbot_description | 0.15.2 |
| rosbot_gazebo | 0.15.2 |
| rosbot_hardware_interfaces | 0.15.2 |
| rosbot_joy | 0.15.2 |
| rosbot_localization | 0.15.2 |
| rosbot_utils | 0.15.2 |
README
ROSbot ROS
ROS 2 packages for Husarion ROSbot Series.
📚 ROS API
Documentation is available in ROS_API.md.
🚀 Quick Start
⚙️ Prerequisites
- Install all necessary tools:
   sudo apt-get update
   sudo apt-get install -y python3-pip ros-dev-tools
- Create a workspace folder and clone the rosbot_ros repository:
   mkdir rosbot_ws
   cd rosbot_ws
   git clone -b humble https://github.com/husarion/rosbot_ros.git src/rosbot_ros
Configure environment
The repository is used to run the code both on the real robot and in the simulation. Specify HUSARION_ROS_BUILD_TYPE the variable according to your needs.
Real robot:
export HUSARION_ROS_BUILD_TYPE=hardware
Simulation:
export HUSARION_ROS_BUILD_TYPE=simulation
Build
source /opt/ros/$ROS_DISTRO/setup.bash

vcs import src < src/rosbot_ros/rosbot/rosbot_${HUSARION_ROS_BUILD_TYPE}.repos
vcs import src < src/rosbot_ros/rosbot/manipulator.repos # For ROSbot XL manipulation package

sudo rosdep init
rosdep update --rosdistro $ROS_DISTRO
rosdep install -i --from-path src --rosdistro $ROS_DISTRO -y

colcon build --symlink-install --packages-up-to rosbot --cmake-args -DCMAKE_BUILD_TYPE=Release
Run the Robot
For ROSbot XL, you can specify a particular configuration using the launch configuration argument. If you are using the manipulation configuration, please refer to MANIPULATOR.md for detailed instructions.
Real robot:
source install/setup.bash
ros2 launch rosbot_bringup bringup.launch.py robot_model:=<rosbot/rosbot_xl>
[!NOTE] To run the software on real ROSbots, communication with the CORE2 is required. Ensure the firmware is updated before running the micro-ROS agent. For detailed instructions, refer to the rosbot_ros2_firmware repository.
sudo su
source install/setup.bash
ros2 run rosbot_utils flash_firmware --robot-model <rosbot/rosbot_xl>
exit
Simulation:
source install/setup.bash
ros2 launch rosbot_gazebo simulation.launch.py robot_model:=<rosbot/rosbot_xl>
Launch Arguments
| Symbol | Meaning |
|---|---|
| 🤖 | Available for physical robot |
| 🖥️ | Available in simulation |
| 🤖 | 🖥️ | Argument | Description
Type: Default |
| — | — | ——————- | ————————————————————————————————————————————————————————————————– |
File truncated at 100 lines see the full file
CONTRIBUTING
Developer info and tools
USB-A connection
You can connect with the ROSbot hardware on your own computer. To establish a connection, connect your computer to the robot using a USB-A cable. Then build the code locally and specify via the serial_port argument which processor should be used to establish the connection.
ros2 launch rosbot_bringup bringup.launch.py serial_port:=/dev/ttyUSB0
The hardware checks the connection via USB-A only during initialization and when btn1 or btn2 is pressed, so while executing the above command, hold down the reset button together with bnt1/bnt2 and release the reset button. After establishing a connection, you can release bnt1/bnt2.
pre-commit
pre-commit configuration prepares plenty of tests helping for developing and contributing. Usage:
# install pre-commit
pip install pre-commit

# initialize pre-commit workspace
pre-commit install

# manually run tests
pre-commit run -a
After initialization pre-commit configuration will applied on every commit.
|
|
rosbot_ros repositoryrosbot rosbot_bringup rosbot_controller rosbot_description rosbot_gazebo rosbot_hardware_interfaces rosbot_joy rosbot_localization rosbot_utils |
ROS Distro
|
Repository Summary
| Checkout URI | https://github.com/husarion/rosbot_ros.git |
| VCS Type | git |
| VCS Version | humble |
| Last Updated | 2025-12-09 |
| Dev Status | DEVELOPED |
| Released | UNRELEASED |
| Contributing |
Help Wanted (-)
Good First Issues (-) Pull Requests to Review (-) |
Packages
| Name | Version |
|---|---|
| rosbot | 0.15.2 |
| rosbot_bringup | 0.15.2 |
| rosbot_controller | 0.15.2 |
| rosbot_description | 0.15.2 |
| rosbot_gazebo | 0.15.2 |
| rosbot_hardware_interfaces | 0.15.2 |
| rosbot_joy | 0.15.2 |
| rosbot_localization | 0.15.2 |
| rosbot_utils | 0.15.2 |
README
ROSbot ROS
ROS 2 packages for Husarion ROSbot Series.
📚 ROS API
Documentation is available in ROS_API.md.
🚀 Quick Start
⚙️ Prerequisites
- Install all necessary tools:
   sudo apt-get update
   sudo apt-get install -y python3-pip ros-dev-tools
- Create a workspace folder and clone the rosbot_ros repository:
   mkdir rosbot_ws
   cd rosbot_ws
   git clone -b humble https://github.com/husarion/rosbot_ros.git src/rosbot_ros
Configure environment
The repository is used to run the code both on the real robot and in the simulation. Specify HUSARION_ROS_BUILD_TYPE the variable according to your needs.
Real robot:
export HUSARION_ROS_BUILD_TYPE=hardware
Simulation:
export HUSARION_ROS_BUILD_TYPE=simulation
Build
source /opt/ros/$ROS_DISTRO/setup.bash

vcs import src < src/rosbot_ros/rosbot/rosbot_${HUSARION_ROS_BUILD_TYPE}.repos
vcs import src < src/rosbot_ros/rosbot/manipulator.repos # For ROSbot XL manipulation package

sudo rosdep init
rosdep update --rosdistro $ROS_DISTRO
rosdep install -i --from-path src --rosdistro $ROS_DISTRO -y

colcon build --symlink-install --packages-up-to rosbot --cmake-args -DCMAKE_BUILD_TYPE=Release
Run the Robot
For ROSbot XL, you can specify a particular configuration using the launch configuration argument. If you are using the manipulation configuration, please refer to MANIPULATOR.md for detailed instructions.
Real robot:
source install/setup.bash
ros2 launch rosbot_bringup bringup.launch.py robot_model:=<rosbot/rosbot_xl>
[!NOTE] To run the software on real ROSbots, communication with the CORE2 is required. Ensure the firmware is updated before running the micro-ROS agent. For detailed instructions, refer to the rosbot_ros2_firmware repository.
sudo su
source install/setup.bash
ros2 run rosbot_utils flash_firmware --robot-model <rosbot/rosbot_xl>
exit
Simulation:
source install/setup.bash
ros2 launch rosbot_gazebo simulation.launch.py robot_model:=<rosbot/rosbot_xl>
Launch Arguments
| Symbol | Meaning |
|---|---|
| 🤖 | Available for physical robot |
| 🖥️ | Available in simulation |
| 🤖 | 🖥️ | Argument | Description
Type: Default |
| — | — | ——————- | ————————————————————————————————————————————————————————————————– |
File truncated at 100 lines see the full file
CONTRIBUTING
Developer info and tools
USB-A connection
You can connect with the ROSbot hardware on your own computer. To establish a connection, connect your computer to the robot using a USB-A cable. Then build the code locally and specify via the serial_port argument which processor should be used to establish the connection.
ros2 launch rosbot_bringup bringup.launch.py serial_port:=/dev/ttyUSB0
The hardware checks the connection via USB-A only during initialization and when btn1 or btn2 is pressed, so while executing the above command, hold down the reset button together with bnt1/bnt2 and release the reset button. After establishing a connection, you can release bnt1/bnt2.
pre-commit
pre-commit configuration prepares plenty of tests helping for developing and contributing. Usage:
# install pre-commit
pip install pre-commit

# initialize pre-commit workspace
pre-commit install

# manually run tests
pre-commit run -a
After initialization pre-commit configuration will applied on every commit.
|
|
rosbot_ros repositoryrosbot rosbot_bringup rosbot_controller rosbot_description rosbot_gazebo rosbot_hardware_interfaces rosbot_joy rosbot_localization rosbot_utils |
ROS Distro
|
Repository Summary
| Checkout URI | https://github.com/husarion/rosbot_ros.git |
| VCS Type | git |
| VCS Version | humble |
| Last Updated | 2025-12-09 |
| Dev Status | DEVELOPED |
| Released | UNRELEASED |
| Contributing |
Help Wanted (-)
Good First Issues (-) Pull Requests to Review (-) |
Packages
| Name | Version |
|---|---|
| rosbot | 0.15.2 |
| rosbot_bringup | 0.15.2 |
| rosbot_controller | 0.15.2 |
| rosbot_description | 0.15.2 |
| rosbot_gazebo | 0.15.2 |
| rosbot_hardware_interfaces | 0.15.2 |
| rosbot_joy | 0.15.2 |
| rosbot_localization | 0.15.2 |
| rosbot_utils | 0.15.2 |
README
ROSbot ROS
ROS 2 packages for Husarion ROSbot Series.
📚 ROS API
Documentation is available in ROS_API.md.
🚀 Quick Start
⚙️ Prerequisites
- Install all necessary tools:
   sudo apt-get update
   sudo apt-get install -y python3-pip ros-dev-tools
- Create a workspace folder and clone the rosbot_ros repository:
   mkdir rosbot_ws
   cd rosbot_ws
   git clone -b humble https://github.com/husarion/rosbot_ros.git src/rosbot_ros
Configure environment
The repository is used to run the code both on the real robot and in the simulation. Specify HUSARION_ROS_BUILD_TYPE the variable according to your needs.
Real robot:
export HUSARION_ROS_BUILD_TYPE=hardware
Simulation:
export HUSARION_ROS_BUILD_TYPE=simulation
Build
source /opt/ros/$ROS_DISTRO/setup.bash

vcs import src < src/rosbot_ros/rosbot/rosbot_${HUSARION_ROS_BUILD_TYPE}.repos
vcs import src < src/rosbot_ros/rosbot/manipulator.repos # For ROSbot XL manipulation package

sudo rosdep init
rosdep update --rosdistro $ROS_DISTRO
rosdep install -i --from-path src --rosdistro $ROS_DISTRO -y

colcon build --symlink-install --packages-up-to rosbot --cmake-args -DCMAKE_BUILD_TYPE=Release
Run the Robot
For ROSbot XL, you can specify a particular configuration using the launch configuration argument. If you are using the manipulation configuration, please refer to MANIPULATOR.md for detailed instructions.
Real robot:
source install/setup.bash
ros2 launch rosbot_bringup bringup.launch.py robot_model:=<rosbot/rosbot_xl>
[!NOTE] To run the software on real ROSbots, communication with the CORE2 is required. Ensure the firmware is updated before running the micro-ROS agent. For detailed instructions, refer to the rosbot_ros2_firmware repository.
sudo su
source install/setup.bash
ros2 run rosbot_utils flash_firmware --robot-model <rosbot/rosbot_xl>
exit
Simulation:
source install/setup.bash
ros2 launch rosbot_gazebo simulation.launch.py robot_model:=<rosbot/rosbot_xl>
Launch Arguments
| Symbol | Meaning |
|---|---|
| 🤖 | Available for physical robot |
| 🖥️ | Available in simulation |
| 🤖 | 🖥️ | Argument | Description
Type: Default |
| — | — | ——————- | ————————————————————————————————————————————————————————————————– |
File truncated at 100 lines see the full file
CONTRIBUTING
Developer info and tools
USB-A connection
You can connect with the ROSbot hardware on your own computer. To establish a connection, connect your computer to the robot using a USB-A cable. Then build the code locally and specify via the serial_port argument which processor should be used to establish the connection.
ros2 launch rosbot_bringup bringup.launch.py serial_port:=/dev/ttyUSB0
The hardware checks the connection via USB-A only during initialization and when btn1 or btn2 is pressed, so while executing the above command, hold down the reset button together with bnt1/bnt2 and release the reset button. After establishing a connection, you can release bnt1/bnt2.
pre-commit
pre-commit configuration prepares plenty of tests helping for developing and contributing. Usage:
# install pre-commit
pip install pre-commit

# initialize pre-commit workspace
pre-commit install

# manually run tests
pre-commit run -a
After initialization pre-commit configuration will applied on every commit.
|
|
rosbot_ros repositoryrosbot rosbot_bringup rosbot_controller rosbot_description rosbot_gazebo rosbot_hardware_interfaces rosbot_joy rosbot_localization rosbot_utils |
ROS Distro
|
Repository Summary
| Checkout URI | https://github.com/husarion/rosbot_ros.git |
| VCS Type | git |
| VCS Version | humble |
| Last Updated | 2025-12-09 |
| Dev Status | DEVELOPED |
| Released | UNRELEASED |
| Contributing |
Help Wanted (-)
Good First Issues (-) Pull Requests to Review (-) |
Packages
| Name | Version |
|---|---|
| rosbot | 0.15.2 |
| rosbot_bringup | 0.15.2 |
| rosbot_controller | 0.15.2 |
| rosbot_description | 0.15.2 |
| rosbot_gazebo | 0.15.2 |
| rosbot_hardware_interfaces | 0.15.2 |
| rosbot_joy | 0.15.2 |
| rosbot_localization | 0.15.2 |
| rosbot_utils | 0.15.2 |
README
ROSbot ROS
ROS 2 packages for Husarion ROSbot Series.
📚 ROS API
Documentation is available in ROS_API.md.
🚀 Quick Start
⚙️ Prerequisites
- Install all necessary tools:
   sudo apt-get update
   sudo apt-get install -y python3-pip ros-dev-tools
- Create a workspace folder and clone the rosbot_ros repository:
   mkdir rosbot_ws
   cd rosbot_ws
   git clone -b humble https://github.com/husarion/rosbot_ros.git src/rosbot_ros
Configure environment
The repository is used to run the code both on the real robot and in the simulation. Specify HUSARION_ROS_BUILD_TYPE the variable according to your needs.
Real robot:
export HUSARION_ROS_BUILD_TYPE=hardware
Simulation:
export HUSARION_ROS_BUILD_TYPE=simulation
Build
source /opt/ros/$ROS_DISTRO/setup.bash

vcs import src < src/rosbot_ros/rosbot/rosbot_${HUSARION_ROS_BUILD_TYPE}.repos
vcs import src < src/rosbot_ros/rosbot/manipulator.repos # For ROSbot XL manipulation package

sudo rosdep init
rosdep update --rosdistro $ROS_DISTRO
rosdep install -i --from-path src --rosdistro $ROS_DISTRO -y

colcon build --symlink-install --packages-up-to rosbot --cmake-args -DCMAKE_BUILD_TYPE=Release
Run the Robot
For ROSbot XL, you can specify a particular configuration using the launch configuration argument. If you are using the manipulation configuration, please refer to MANIPULATOR.md for detailed instructions.
Real robot:
source install/setup.bash
ros2 launch rosbot_bringup bringup.launch.py robot_model:=<rosbot/rosbot_xl>
[!NOTE] To run the software on real ROSbots, communication with the CORE2 is required. Ensure the firmware is updated before running the micro-ROS agent. For detailed instructions, refer to the rosbot_ros2_firmware repository.
sudo su
source install/setup.bash
ros2 run rosbot_utils flash_firmware --robot-model <rosbot/rosbot_xl>
exit
Simulation:
source install/setup.bash
ros2 launch rosbot_gazebo simulation.launch.py robot_model:=<rosbot/rosbot_xl>
Launch Arguments
| Symbol | Meaning |
|---|---|
| 🤖 | Available for physical robot |
| 🖥️ | Available in simulation |
| 🤖 | 🖥️ | Argument | Description
Type: Default |
| — | — | ——————- | ————————————————————————————————————————————————————————————————– |
File truncated at 100 lines see the full file
CONTRIBUTING
Developer info and tools
USB-A connection
You can connect with the ROSbot hardware on your own computer. To establish a connection, connect your computer to the robot using a USB-A cable. Then build the code locally and specify via the serial_port argument which processor should be used to establish the connection.
ros2 launch rosbot_bringup bringup.launch.py serial_port:=/dev/ttyUSB0
The hardware checks the connection via USB-A only during initialization and when btn1 or btn2 is pressed, so while executing the above command, hold down the reset button together with bnt1/bnt2 and release the reset button. After establishing a connection, you can release bnt1/bnt2.
pre-commit
pre-commit configuration prepares plenty of tests helping for developing and contributing. Usage:
# install pre-commit
pip install pre-commit

# initialize pre-commit workspace
pre-commit install

# manually run tests
pre-commit run -a
After initialization pre-commit configuration will applied on every commit.
|
|
rosbot_ros repositoryrosbot rosbot_bringup rosbot_controller rosbot_description rosbot_gazebo rosbot_hardware_interfaces rosbot_joy rosbot_localization rosbot_utils |
ROS Distro
|
Repository Summary
| Checkout URI | https://github.com/husarion/rosbot_ros.git |
| VCS Type | git |
| VCS Version | humble |
| Last Updated | 2025-12-09 |
| Dev Status | DEVELOPED |
| Released | UNRELEASED |
| Contributing |
Help Wanted (-)
Good First Issues (-) Pull Requests to Review (-) |
Packages
| Name | Version |
|---|---|
| rosbot | 0.15.2 |
| rosbot_bringup | 0.15.2 |
| rosbot_controller | 0.15.2 |
| rosbot_description | 0.15.2 |
| rosbot_gazebo | 0.15.2 |
| rosbot_hardware_interfaces | 0.15.2 |
| rosbot_joy | 0.15.2 |
| rosbot_localization | 0.15.2 |
| rosbot_utils | 0.15.2 |
README
ROSbot ROS
ROS 2 packages for Husarion ROSbot Series.
📚 ROS API
Documentation is available in ROS_API.md.
🚀 Quick Start
⚙️ Prerequisites
- Install all necessary tools:
   sudo apt-get update
   sudo apt-get install -y python3-pip ros-dev-tools
- Create a workspace folder and clone the rosbot_ros repository:
   mkdir rosbot_ws
   cd rosbot_ws
   git clone -b humble https://github.com/husarion/rosbot_ros.git src/rosbot_ros
Configure environment
The repository is used to run the code both on the real robot and in the simulation. Specify HUSARION_ROS_BUILD_TYPE the variable according to your needs.
Real robot:
export HUSARION_ROS_BUILD_TYPE=hardware
Simulation:
export HUSARION_ROS_BUILD_TYPE=simulation
Build
source /opt/ros/$ROS_DISTRO/setup.bash

vcs import src < src/rosbot_ros/rosbot/rosbot_${HUSARION_ROS_BUILD_TYPE}.repos
vcs import src < src/rosbot_ros/rosbot/manipulator.repos # For ROSbot XL manipulation package

sudo rosdep init
rosdep update --rosdistro $ROS_DISTRO
rosdep install -i --from-path src --rosdistro $ROS_DISTRO -y

colcon build --symlink-install --packages-up-to rosbot --cmake-args -DCMAKE_BUILD_TYPE=Release
Run the Robot
For ROSbot XL, you can specify a particular configuration using the launch configuration argument. If you are using the manipulation configuration, please refer to MANIPULATOR.md for detailed instructions.
Real robot:
source install/setup.bash
ros2 launch rosbot_bringup bringup.launch.py robot_model:=<rosbot/rosbot_xl>
[!NOTE] To run the software on real ROSbots, communication with the CORE2 is required. Ensure the firmware is updated before running the micro-ROS agent. For detailed instructions, refer to the rosbot_ros2_firmware repository.
sudo su
source install/setup.bash
ros2 run rosbot_utils flash_firmware --robot-model <rosbot/rosbot_xl>
exit
Simulation:
source install/setup.bash
ros2 launch rosbot_gazebo simulation.launch.py robot_model:=<rosbot/rosbot_xl>
Launch Arguments
| Symbol | Meaning |
|---|---|
| 🤖 | Available for physical robot |
| 🖥️ | Available in simulation |
| 🤖 | 🖥️ | Argument | Description
Type: Default |
| — | — | ——————- | ————————————————————————————————————————————————————————————————– |
File truncated at 100 lines see the full file
CONTRIBUTING
Developer info and tools
USB-A connection
You can connect with the ROSbot hardware on your own computer. To establish a connection, connect your computer to the robot using a USB-A cable. Then build the code locally and specify via the serial_port argument which processor should be used to establish the connection.
ros2 launch rosbot_bringup bringup.launch.py serial_port:=/dev/ttyUSB0
The hardware checks the connection via USB-A only during initialization and when btn1 or btn2 is pressed, so while executing the above command, hold down the reset button together with bnt1/bnt2 and release the reset button. After establishing a connection, you can release bnt1/bnt2.
pre-commit
pre-commit configuration prepares plenty of tests helping for developing and contributing. Usage:
# install pre-commit
pip install pre-commit

# initialize pre-commit workspace
pre-commit install

# manually run tests
pre-commit run -a
After initialization pre-commit configuration will applied on every commit.
|
|
rosbot_ros repositoryrosbot rosbot_bringup rosbot_controller rosbot_description rosbot_gazebo rosbot_hardware_interfaces rosbot_joy rosbot_localization rosbot_utils |
ROS Distro
|
Repository Summary
| Checkout URI | https://github.com/husarion/rosbot_ros.git |
| VCS Type | git |
| VCS Version | humble |
| Last Updated | 2025-12-09 |
| Dev Status | DEVELOPED |
| Released | UNRELEASED |
| Contributing |
Help Wanted (-)
Good First Issues (-) Pull Requests to Review (-) |
Packages
| Name | Version |
|---|---|
| rosbot | 0.15.2 |
| rosbot_bringup | 0.15.2 |
| rosbot_controller | 0.15.2 |
| rosbot_description | 0.15.2 |
| rosbot_gazebo | 0.15.2 |
| rosbot_hardware_interfaces | 0.15.2 |
| rosbot_joy | 0.15.2 |
| rosbot_localization | 0.15.2 |
| rosbot_utils | 0.15.2 |
README
ROSbot ROS
ROS 2 packages for Husarion ROSbot Series.
📚 ROS API
Documentation is available in ROS_API.md.
🚀 Quick Start
⚙️ Prerequisites
- Install all necessary tools:
   sudo apt-get update
   sudo apt-get install -y python3-pip ros-dev-tools
- Create a workspace folder and clone the rosbot_ros repository:
   mkdir rosbot_ws
   cd rosbot_ws
   git clone -b humble https://github.com/husarion/rosbot_ros.git src/rosbot_ros
Configure environment
The repository is used to run the code both on the real robot and in the simulation. Specify HUSARION_ROS_BUILD_TYPE the variable according to your needs.
Real robot:
export HUSARION_ROS_BUILD_TYPE=hardware
Simulation:
export HUSARION_ROS_BUILD_TYPE=simulation
Build
source /opt/ros/$ROS_DISTRO/setup.bash

vcs import src < src/rosbot_ros/rosbot/rosbot_${HUSARION_ROS_BUILD_TYPE}.repos
vcs import src < src/rosbot_ros/rosbot/manipulator.repos # For ROSbot XL manipulation package

sudo rosdep init
rosdep update --rosdistro $ROS_DISTRO
rosdep install -i --from-path src --rosdistro $ROS_DISTRO -y

colcon build --symlink-install --packages-up-to rosbot --cmake-args -DCMAKE_BUILD_TYPE=Release
Run the Robot
For ROSbot XL, you can specify a particular configuration using the launch configuration argument. If you are using the manipulation configuration, please refer to MANIPULATOR.md for detailed instructions.
Real robot:
source install/setup.bash
ros2 launch rosbot_bringup bringup.launch.py robot_model:=<rosbot/rosbot_xl>
[!NOTE] To run the software on real ROSbots, communication with the CORE2 is required. Ensure the firmware is updated before running the micro-ROS agent. For detailed instructions, refer to the rosbot_ros2_firmware repository.
sudo su
source install/setup.bash
ros2 run rosbot_utils flash_firmware --robot-model <rosbot/rosbot_xl>
exit
Simulation:
source install/setup.bash
ros2 launch rosbot_gazebo simulation.launch.py robot_model:=<rosbot/rosbot_xl>
Launch Arguments
| Symbol | Meaning |
|---|---|
| 🤖 | Available for physical robot |
| 🖥️ | Available in simulation |
| 🤖 | 🖥️ | Argument | Description
Type: Default |
| — | — | ——————- | ————————————————————————————————————————————————————————————————– |
File truncated at 100 lines see the full file
CONTRIBUTING
Developer info and tools
USB-A connection
You can connect with the ROSbot hardware on your own computer. To establish a connection, connect your computer to the robot using a USB-A cable. Then build the code locally and specify via the serial_port argument which processor should be used to establish the connection.
ros2 launch rosbot_bringup bringup.launch.py serial_port:=/dev/ttyUSB0
The hardware checks the connection via USB-A only during initialization and when btn1 or btn2 is pressed, so while executing the above command, hold down the reset button together with bnt1/bnt2 and release the reset button. After establishing a connection, you can release bnt1/bnt2.
pre-commit
pre-commit configuration prepares plenty of tests helping for developing and contributing. Usage:
# install pre-commit
pip install pre-commit

# initialize pre-commit workspace
pre-commit install

# manually run tests
pre-commit run -a
After initialization pre-commit configuration will applied on every commit.
|
|
rosbot_ros repositoryrosbot rosbot_bringup rosbot_controller rosbot_description rosbot_gazebo rosbot_hardware_interfaces rosbot_joy rosbot_localization rosbot_utils |
ROS Distro
|
Repository Summary
| Checkout URI | https://github.com/husarion/rosbot_ros.git |
| VCS Type | git |
| VCS Version | humble |
| Last Updated | 2025-12-09 |
| Dev Status | DEVELOPED |
| Released | UNRELEASED |
| Contributing |
Help Wanted (-)
Good First Issues (-) Pull Requests to Review (-) |
Packages
| Name | Version |
|---|---|
| rosbot | 0.15.2 |
| rosbot_bringup | 0.15.2 |
| rosbot_controller | 0.15.2 |
| rosbot_description | 0.15.2 |
| rosbot_gazebo | 0.15.2 |
| rosbot_hardware_interfaces | 0.15.2 |
| rosbot_joy | 0.15.2 |
| rosbot_localization | 0.15.2 |
| rosbot_utils | 0.15.2 |
README
ROSbot ROS
ROS 2 packages for Husarion ROSbot Series.
📚 ROS API
Documentation is available in ROS_API.md.
🚀 Quick Start
⚙️ Prerequisites
- Install all necessary tools:
   sudo apt-get update
   sudo apt-get install -y python3-pip ros-dev-tools
- Create a workspace folder and clone the rosbot_ros repository:
   mkdir rosbot_ws
   cd rosbot_ws
   git clone -b humble https://github.com/husarion/rosbot_ros.git src/rosbot_ros
Configure environment
The repository is used to run the code both on the real robot and in the simulation. Specify HUSARION_ROS_BUILD_TYPE the variable according to your needs.
Real robot:
export HUSARION_ROS_BUILD_TYPE=hardware
Simulation:
export HUSARION_ROS_BUILD_TYPE=simulation
Build
source /opt/ros/$ROS_DISTRO/setup.bash

vcs import src < src/rosbot_ros/rosbot/rosbot_${HUSARION_ROS_BUILD_TYPE}.repos
vcs import src < src/rosbot_ros/rosbot/manipulator.repos # For ROSbot XL manipulation package

sudo rosdep init
rosdep update --rosdistro $ROS_DISTRO
rosdep install -i --from-path src --rosdistro $ROS_DISTRO -y

colcon build --symlink-install --packages-up-to rosbot --cmake-args -DCMAKE_BUILD_TYPE=Release
Run the Robot
For ROSbot XL, you can specify a particular configuration using the launch configuration argument. If you are using the manipulation configuration, please refer to MANIPULATOR.md for detailed instructions.
Real robot:
source install/setup.bash
ros2 launch rosbot_bringup bringup.launch.py robot_model:=<rosbot/rosbot_xl>
[!NOTE] To run the software on real ROSbots, communication with the CORE2 is required. Ensure the firmware is updated before running the micro-ROS agent. For detailed instructions, refer to the rosbot_ros2_firmware repository.
sudo su
source install/setup.bash
ros2 run rosbot_utils flash_firmware --robot-model <rosbot/rosbot_xl>
exit
Simulation:
source install/setup.bash
ros2 launch rosbot_gazebo simulation.launch.py robot_model:=<rosbot/rosbot_xl>
Launch Arguments
| Symbol | Meaning |
|---|---|
| 🤖 | Available for physical robot |
| 🖥️ | Available in simulation |
| 🤖 | 🖥️ | Argument | Description
Type: Default |
| — | — | ——————- | ————————————————————————————————————————————————————————————————– |
File truncated at 100 lines see the full file
CONTRIBUTING
Developer info and tools
USB-A connection
You can connect with the ROSbot hardware on your own computer. To establish a connection, connect your computer to the robot using a USB-A cable. Then build the code locally and specify via the serial_port argument which processor should be used to establish the connection.
ros2 launch rosbot_bringup bringup.launch.py serial_port:=/dev/ttyUSB0
The hardware checks the connection via USB-A only during initialization and when btn1 or btn2 is pressed, so while executing the above command, hold down the reset button together with bnt1/bnt2 and release the reset button. After establishing a connection, you can release bnt1/bnt2.
pre-commit
pre-commit configuration prepares plenty of tests helping for developing and contributing. Usage:
# install pre-commit
pip install pre-commit

# initialize pre-commit workspace
pre-commit install

# manually run tests
pre-commit run -a
After initialization pre-commit configuration will applied on every commit.
|
|
rosbot_ros repositoryrosbot rosbot_bringup rosbot_controller rosbot_description rosbot_gazebo rosbot_hardware_interfaces rosbot_joy rosbot_localization rosbot_utils |
ROS Distro
|
Repository Summary
| Checkout URI | https://github.com/husarion/rosbot_ros.git |
| VCS Type | git |
| VCS Version | humble |
| Last Updated | 2025-12-09 |
| Dev Status | DEVELOPED |
| Released | UNRELEASED |
| Contributing |
Help Wanted (-)
Good First Issues (-) Pull Requests to Review (-) |
Packages
| Name | Version |
|---|---|
| rosbot | 0.15.2 |
| rosbot_bringup | 0.15.2 |
| rosbot_controller | 0.15.2 |
| rosbot_description | 0.15.2 |
| rosbot_gazebo | 0.15.2 |
| rosbot_hardware_interfaces | 0.15.2 |
| rosbot_joy | 0.15.2 |
| rosbot_localization | 0.15.2 |
| rosbot_utils | 0.15.2 |
README
ROSbot ROS
ROS 2 packages for Husarion ROSbot Series.
📚 ROS API
Documentation is available in ROS_API.md.
🚀 Quick Start
⚙️ Prerequisites
- Install all necessary tools:
   sudo apt-get update
   sudo apt-get install -y python3-pip ros-dev-tools
- Create a workspace folder and clone the rosbot_ros repository:
   mkdir rosbot_ws
   cd rosbot_ws
   git clone -b humble https://github.com/husarion/rosbot_ros.git src/rosbot_ros
Configure environment
The repository is used to run the code both on the real robot and in the simulation. Specify HUSARION_ROS_BUILD_TYPE the variable according to your needs.
Real robot:
export HUSARION_ROS_BUILD_TYPE=hardware
Simulation:
export HUSARION_ROS_BUILD_TYPE=simulation
Build
source /opt/ros/$ROS_DISTRO/setup.bash

vcs import src < src/rosbot_ros/rosbot/rosbot_${HUSARION_ROS_BUILD_TYPE}.repos
vcs import src < src/rosbot_ros/rosbot/manipulator.repos # For ROSbot XL manipulation package

sudo rosdep init
rosdep update --rosdistro $ROS_DISTRO
rosdep install -i --from-path src --rosdistro $ROS_DISTRO -y

colcon build --symlink-install --packages-up-to rosbot --cmake-args -DCMAKE_BUILD_TYPE=Release
Run the Robot
For ROSbot XL, you can specify a particular configuration using the launch configuration argument. If you are using the manipulation configuration, please refer to MANIPULATOR.md for detailed instructions.
Real robot:
source install/setup.bash
ros2 launch rosbot_bringup bringup.launch.py robot_model:=<rosbot/rosbot_xl>
[!NOTE] To run the software on real ROSbots, communication with the CORE2 is required. Ensure the firmware is updated before running the micro-ROS agent. For detailed instructions, refer to the rosbot_ros2_firmware repository.
sudo su
source install/setup.bash
ros2 run rosbot_utils flash_firmware --robot-model <rosbot/rosbot_xl>
exit
Simulation:
source install/setup.bash
ros2 launch rosbot_gazebo simulation.launch.py robot_model:=<rosbot/rosbot_xl>
Launch Arguments
| Symbol | Meaning |
|---|---|
| 🤖 | Available for physical robot |
| 🖥️ | Available in simulation |
| 🤖 | 🖥️ | Argument | Description
Type: Default |
| — | — | ——————- | ————————————————————————————————————————————————————————————————– |
File truncated at 100 lines see the full file
CONTRIBUTING
Developer info and tools
USB-A connection
You can connect with the ROSbot hardware on your own computer. To establish a connection, connect your computer to the robot using a USB-A cable. Then build the code locally and specify via the serial_port argument which processor should be used to establish the connection.
ros2 launch rosbot_bringup bringup.launch.py serial_port:=/dev/ttyUSB0
The hardware checks the connection via USB-A only during initialization and when btn1 or btn2 is pressed, so while executing the above command, hold down the reset button together with bnt1/bnt2 and release the reset button. After establishing a connection, you can release bnt1/bnt2.
pre-commit
pre-commit configuration prepares plenty of tests helping for developing and contributing. Usage:
# install pre-commit
pip install pre-commit

# initialize pre-commit workspace
pre-commit install

# manually run tests
pre-commit run -a
After initialization pre-commit configuration will applied on every commit.
|
|
rosbot_ros repositoryrosbot rosbot_bringup rosbot_controller rosbot_description rosbot_gazebo rosbot_hardware_interfaces rosbot_joy rosbot_localization rosbot_utils |
ROS Distro
|
Repository Summary
| Checkout URI | https://github.com/husarion/rosbot_ros.git |
| VCS Type | git |
| VCS Version | humble |
| Last Updated | 2025-12-09 |
| Dev Status | DEVELOPED |
| Released | UNRELEASED |
| Contributing |
Help Wanted (-)
Good First Issues (-) Pull Requests to Review (-) |
Packages
| Name | Version |
|---|---|
| rosbot | 0.15.2 |
| rosbot_bringup | 0.15.2 |
| rosbot_controller | 0.15.2 |
| rosbot_description | 0.15.2 |
| rosbot_gazebo | 0.15.2 |
| rosbot_hardware_interfaces | 0.15.2 |
| rosbot_joy | 0.15.2 |
| rosbot_localization | 0.15.2 |
| rosbot_utils | 0.15.2 |
README
ROSbot ROS
ROS 2 packages for Husarion ROSbot Series.
📚 ROS API
Documentation is available in ROS_API.md.
🚀 Quick Start
⚙️ Prerequisites
- Install all necessary tools:
   sudo apt-get update
   sudo apt-get install -y python3-pip ros-dev-tools
- Create a workspace folder and clone the rosbot_ros repository:
   mkdir rosbot_ws
   cd rosbot_ws
   git clone -b humble https://github.com/husarion/rosbot_ros.git src/rosbot_ros
Configure environment
The repository is used to run the code both on the real robot and in the simulation. Specify HUSARION_ROS_BUILD_TYPE the variable according to your needs.
Real robot:
export HUSARION_ROS_BUILD_TYPE=hardware
Simulation:
export HUSARION_ROS_BUILD_TYPE=simulation
Build
source /opt/ros/$ROS_DISTRO/setup.bash

vcs import src < src/rosbot_ros/rosbot/rosbot_${HUSARION_ROS_BUILD_TYPE}.repos
vcs import src < src/rosbot_ros/rosbot/manipulator.repos # For ROSbot XL manipulation package

sudo rosdep init
rosdep update --rosdistro $ROS_DISTRO
rosdep install -i --from-path src --rosdistro $ROS_DISTRO -y

colcon build --symlink-install --packages-up-to rosbot --cmake-args -DCMAKE_BUILD_TYPE=Release
Run the Robot
For ROSbot XL, you can specify a particular configuration using the launch configuration argument. If you are using the manipulation configuration, please refer to MANIPULATOR.md for detailed instructions.
Real robot:
source install/setup.bash
ros2 launch rosbot_bringup bringup.launch.py robot_model:=<rosbot/rosbot_xl>
[!NOTE] To run the software on real ROSbots, communication with the CORE2 is required. Ensure the firmware is updated before running the micro-ROS agent. For detailed instructions, refer to the rosbot_ros2_firmware repository.
sudo su
source install/setup.bash
ros2 run rosbot_utils flash_firmware --robot-model <rosbot/rosbot_xl>
exit
Simulation:
source install/setup.bash
ros2 launch rosbot_gazebo simulation.launch.py robot_model:=<rosbot/rosbot_xl>
Launch Arguments
| Symbol | Meaning |
|---|---|
| 🤖 | Available for physical robot |
| 🖥️ | Available in simulation |
| 🤖 | 🖥️ | Argument | Description
Type: Default |
| — | — | ——————- | ————————————————————————————————————————————————————————————————– |
File truncated at 100 lines see the full file
CONTRIBUTING
Developer info and tools
USB-A connection
You can connect with the ROSbot hardware on your own computer. To establish a connection, connect your computer to the robot using a USB-A cable. Then build the code locally and specify via the serial_port argument which processor should be used to establish the connection.
ros2 launch rosbot_bringup bringup.launch.py serial_port:=/dev/ttyUSB0
The hardware checks the connection via USB-A only during initialization and when btn1 or btn2 is pressed, so while executing the above command, hold down the reset button together with bnt1/bnt2 and release the reset button. After establishing a connection, you can release bnt1/bnt2.
pre-commit
pre-commit configuration prepares plenty of tests helping for developing and contributing. Usage:
# install pre-commit
pip install pre-commit

# initialize pre-commit workspace
pre-commit install

# manually run tests
pre-commit run -a
After initialization pre-commit configuration will applied on every commit.
|
|
rosbot_ros repositoryrosbot rosbot_bringup rosbot_controller rosbot_description rosbot_gazebo rosbot_hardware_interfaces rosbot_joy rosbot_localization rosbot_utils |
ROS Distro
|
Repository Summary
| Checkout URI | https://github.com/husarion/rosbot_ros.git |
| VCS Type | git |
| VCS Version | humble |
| Last Updated | 2025-12-09 |
| Dev Status | DEVELOPED |
| Released | UNRELEASED |
| Contributing |
Help Wanted (-)
Good First Issues (-) Pull Requests to Review (-) |
Packages
| Name | Version |
|---|---|
| rosbot | 0.15.2 |
| rosbot_bringup | 0.15.2 |
| rosbot_controller | 0.15.2 |
| rosbot_description | 0.15.2 |
| rosbot_gazebo | 0.15.2 |
| rosbot_hardware_interfaces | 0.15.2 |
| rosbot_joy | 0.15.2 |
| rosbot_localization | 0.15.2 |
| rosbot_utils | 0.15.2 |
README
ROSbot ROS
ROS 2 packages for Husarion ROSbot Series.
📚 ROS API
Documentation is available in ROS_API.md.
🚀 Quick Start
⚙️ Prerequisites
- Install all necessary tools:
   sudo apt-get update
   sudo apt-get install -y python3-pip ros-dev-tools
- Create a workspace folder and clone the rosbot_ros repository:
   mkdir rosbot_ws
   cd rosbot_ws
   git clone -b humble https://github.com/husarion/rosbot_ros.git src/rosbot_ros
Configure environment
The repository is used to run the code both on the real robot and in the simulation. Specify HUSARION_ROS_BUILD_TYPE the variable according to your needs.
Real robot:
export HUSARION_ROS_BUILD_TYPE=hardware
Simulation:
export HUSARION_ROS_BUILD_TYPE=simulation
Build
source /opt/ros/$ROS_DISTRO/setup.bash

vcs import src < src/rosbot_ros/rosbot/rosbot_${HUSARION_ROS_BUILD_TYPE}.repos
vcs import src < src/rosbot_ros/rosbot/manipulator.repos # For ROSbot XL manipulation package

sudo rosdep init
rosdep update --rosdistro $ROS_DISTRO
rosdep install -i --from-path src --rosdistro $ROS_DISTRO -y

colcon build --symlink-install --packages-up-to rosbot --cmake-args -DCMAKE_BUILD_TYPE=Release
Run the Robot
For ROSbot XL, you can specify a particular configuration using the launch configuration argument. If you are using the manipulation configuration, please refer to MANIPULATOR.md for detailed instructions.
Real robot:
source install/setup.bash
ros2 launch rosbot_bringup bringup.launch.py robot_model:=<rosbot/rosbot_xl>
[!NOTE] To run the software on real ROSbots, communication with the CORE2 is required. Ensure the firmware is updated before running the micro-ROS agent. For detailed instructions, refer to the rosbot_ros2_firmware repository.
sudo su
source install/setup.bash
ros2 run rosbot_utils flash_firmware --robot-model <rosbot/rosbot_xl>
exit
Simulation:
source install/setup.bash
ros2 launch rosbot_gazebo simulation.launch.py robot_model:=<rosbot/rosbot_xl>
Launch Arguments
| Symbol | Meaning |
|---|---|
| 🤖 | Available for physical robot |
| 🖥️ | Available in simulation |
| 🤖 | 🖥️ | Argument | Description
Type: Default |
| — | — | ——————- | ————————————————————————————————————————————————————————————————– |
File truncated at 100 lines see the full file
CONTRIBUTING
Developer info and tools
USB-A connection
You can connect with the ROSbot hardware on your own computer. To establish a connection, connect your computer to the robot using a USB-A cable. Then build the code locally and specify via the serial_port argument which processor should be used to establish the connection.
ros2 launch rosbot_bringup bringup.launch.py serial_port:=/dev/ttyUSB0
The hardware checks the connection via USB-A only during initialization and when btn1 or btn2 is pressed, so while executing the above command, hold down the reset button together with bnt1/bnt2 and release the reset button. After establishing a connection, you can release bnt1/bnt2.
pre-commit
pre-commit configuration prepares plenty of tests helping for developing and contributing. Usage:
# install pre-commit
pip install pre-commit

# initialize pre-commit workspace
pre-commit install

# manually run tests
pre-commit run -a
After initialization pre-commit configuration will applied on every commit.
|
|
rosbot_ros repositoryrosbot rosbot_bringup rosbot_controller rosbot_description rosbot_gazebo rosbot_hardware_interfaces rosbot_joy rosbot_localization rosbot_utils |
ROS Distro
|
Repository Summary
| Checkout URI | https://github.com/husarion/rosbot_ros.git |
| VCS Type | git |
| VCS Version | humble |
| Last Updated | 2025-12-09 |
| Dev Status | DEVELOPED |
| Released | UNRELEASED |
| Contributing |
Help Wanted (-)
Good First Issues (-) Pull Requests to Review (-) |
Packages
| Name | Version |
|---|---|
| rosbot | 0.15.2 |
| rosbot_bringup | 0.15.2 |
| rosbot_controller | 0.15.2 |
| rosbot_description | 0.15.2 |
| rosbot_gazebo | 0.15.2 |
| rosbot_hardware_interfaces | 0.15.2 |
| rosbot_joy | 0.15.2 |
| rosbot_localization | 0.15.2 |
| rosbot_utils | 0.15.2 |
README
ROSbot ROS
ROS 2 packages for Husarion ROSbot Series.
📚 ROS API
Documentation is available in ROS_API.md.
🚀 Quick Start
⚙️ Prerequisites
- Install all necessary tools:
   sudo apt-get update
   sudo apt-get install -y python3-pip ros-dev-tools
- Create a workspace folder and clone the rosbot_ros repository:
   mkdir rosbot_ws
   cd rosbot_ws
   git clone -b humble https://github.com/husarion/rosbot_ros.git src/rosbot_ros
Configure environment
The repository is used to run the code both on the real robot and in the simulation. Specify HUSARION_ROS_BUILD_TYPE the variable according to your needs.
Real robot:
export HUSARION_ROS_BUILD_TYPE=hardware
Simulation:
export HUSARION_ROS_BUILD_TYPE=simulation
Build
source /opt/ros/$ROS_DISTRO/setup.bash

vcs import src < src/rosbot_ros/rosbot/rosbot_${HUSARION_ROS_BUILD_TYPE}.repos
vcs import src < src/rosbot_ros/rosbot/manipulator.repos # For ROSbot XL manipulation package

sudo rosdep init
rosdep update --rosdistro $ROS_DISTRO
rosdep install -i --from-path src --rosdistro $ROS_DISTRO -y

colcon build --symlink-install --packages-up-to rosbot --cmake-args -DCMAKE_BUILD_TYPE=Release
Run the Robot
For ROSbot XL, you can specify a particular configuration using the launch configuration argument. If you are using the manipulation configuration, please refer to MANIPULATOR.md for detailed instructions.
Real robot:
source install/setup.bash
ros2 launch rosbot_bringup bringup.launch.py robot_model:=<rosbot/rosbot_xl>
[!NOTE] To run the software on real ROSbots, communication with the CORE2 is required. Ensure the firmware is updated before running the micro-ROS agent. For detailed instructions, refer to the rosbot_ros2_firmware repository.
sudo su
source install/setup.bash
ros2 run rosbot_utils flash_firmware --robot-model <rosbot/rosbot_xl>
exit
Simulation:
source install/setup.bash
ros2 launch rosbot_gazebo simulation.launch.py robot_model:=<rosbot/rosbot_xl>
Launch Arguments
| Symbol | Meaning |
|---|---|
| 🤖 | Available for physical robot |
| 🖥️ | Available in simulation |
| 🤖 | 🖥️ | Argument | Description
Type: Default |
| — | — | ——————- | ————————————————————————————————————————————————————————————————– |
File truncated at 100 lines see the full file
CONTRIBUTING
Developer info and tools
USB-A connection
You can connect with the ROSbot hardware on your own computer. To establish a connection, connect your computer to the robot using a USB-A cable. Then build the code locally and specify via the serial_port argument which processor should be used to establish the connection.
ros2 launch rosbot_bringup bringup.launch.py serial_port:=/dev/ttyUSB0
The hardware checks the connection via USB-A only during initialization and when btn1 or btn2 is pressed, so while executing the above command, hold down the reset button together with bnt1/bnt2 and release the reset button. After establishing a connection, you can release bnt1/bnt2.
pre-commit
pre-commit configuration prepares plenty of tests helping for developing and contributing. Usage:
# install pre-commit
pip install pre-commit

# initialize pre-commit workspace
pre-commit install

# manually run tests
pre-commit run -a
After initialization pre-commit configuration will applied on every commit.
|
|
rosbot_ros repositoryrosbot rosbot_bringup rosbot_controller rosbot_description rosbot_gazebo rosbot_hardware_interfaces rosbot_joy rosbot_localization rosbot_utils |
ROS Distro
|
Repository Summary
| Checkout URI | https://github.com/husarion/rosbot_ros.git |
| VCS Type | git |
| VCS Version | humble |
| Last Updated | 2025-12-09 |
| Dev Status | DEVELOPED |
| Released | UNRELEASED |
| Contributing |
Help Wanted (-)
Good First Issues (-) Pull Requests to Review (-) |
Packages
| Name | Version |
|---|---|
| rosbot | 0.15.2 |
| rosbot_bringup | 0.15.2 |
| rosbot_controller | 0.15.2 |
| rosbot_description | 0.15.2 |
| rosbot_gazebo | 0.15.2 |
| rosbot_hardware_interfaces | 0.15.2 |
| rosbot_joy | 0.15.2 |
| rosbot_localization | 0.15.2 |
| rosbot_utils | 0.15.2 |
README
ROSbot ROS
ROS 2 packages for Husarion ROSbot Series.
📚 ROS API
Documentation is available in ROS_API.md.
🚀 Quick Start
⚙️ Prerequisites
- Install all necessary tools:
   sudo apt-get update
   sudo apt-get install -y python3-pip ros-dev-tools
- Create a workspace folder and clone the rosbot_ros repository:
   mkdir rosbot_ws
   cd rosbot_ws
   git clone -b humble https://github.com/husarion/rosbot_ros.git src/rosbot_ros
Configure environment
The repository is used to run the code both on the real robot and in the simulation. Specify HUSARION_ROS_BUILD_TYPE the variable according to your needs.
Real robot:
export HUSARION_ROS_BUILD_TYPE=hardware
Simulation:
export HUSARION_ROS_BUILD_TYPE=simulation
Build
source /opt/ros/$ROS_DISTRO/setup.bash

vcs import src < src/rosbot_ros/rosbot/rosbot_${HUSARION_ROS_BUILD_TYPE}.repos
vcs import src < src/rosbot_ros/rosbot/manipulator.repos # For ROSbot XL manipulation package

sudo rosdep init
rosdep update --rosdistro $ROS_DISTRO
rosdep install -i --from-path src --rosdistro $ROS_DISTRO -y

colcon build --symlink-install --packages-up-to rosbot --cmake-args -DCMAKE_BUILD_TYPE=Release
Run the Robot
For ROSbot XL, you can specify a particular configuration using the launch configuration argument. If you are using the manipulation configuration, please refer to MANIPULATOR.md for detailed instructions.
Real robot:
source install/setup.bash
ros2 launch rosbot_bringup bringup.launch.py robot_model:=<rosbot/rosbot_xl>
[!NOTE] To run the software on real ROSbots, communication with the CORE2 is required. Ensure the firmware is updated before running the micro-ROS agent. For detailed instructions, refer to the rosbot_ros2_firmware repository.
sudo su
source install/setup.bash
ros2 run rosbot_utils flash_firmware --robot-model <rosbot/rosbot_xl>
exit
Simulation:
source install/setup.bash
ros2 launch rosbot_gazebo simulation.launch.py robot_model:=<rosbot/rosbot_xl>
Launch Arguments
| Symbol | Meaning |
|---|---|
| 🤖 | Available for physical robot |
| 🖥️ | Available in simulation |
| 🤖 | 🖥️ | Argument | Description
Type: Default |
| — | — | ——————- | ————————————————————————————————————————————————————————————————– |
File truncated at 100 lines see the full file
CONTRIBUTING
Developer info and tools
USB-A connection
You can connect with the ROSbot hardware on your own computer. To establish a connection, connect your computer to the robot using a USB-A cable. Then build the code locally and specify via the serial_port argument which processor should be used to establish the connection.
ros2 launch rosbot_bringup bringup.launch.py serial_port:=/dev/ttyUSB0
The hardware checks the connection via USB-A only during initialization and when btn1 or btn2 is pressed, so while executing the above command, hold down the reset button together with bnt1/bnt2 and release the reset button. After establishing a connection, you can release bnt1/bnt2.
pre-commit
pre-commit configuration prepares plenty of tests helping for developing and contributing. Usage:
# install pre-commit
pip install pre-commit

# initialize pre-commit workspace
pre-commit install

# manually run tests
pre-commit run -a
After initialization pre-commit configuration will applied on every commit.
|
|
rosbot_ros repositoryrosbot rosbot_bringup rosbot_controller rosbot_description rosbot_gazebo rosbot_hardware_interfaces rosbot_joy rosbot_localization rosbot_utils |
ROS Distro
|
Repository Summary
| Checkout URI | https://github.com/husarion/rosbot_ros.git |
| VCS Type | git |
| VCS Version | humble |
| Last Updated | 2025-12-09 |
| Dev Status | DEVELOPED |
| Released | UNRELEASED |
| Contributing |
Help Wanted (-)
Good First Issues (-) Pull Requests to Review (-) |
Packages
| Name | Version |
|---|---|
| rosbot | 0.15.2 |
| rosbot_bringup | 0.15.2 |
| rosbot_controller | 0.15.2 |
| rosbot_description | 0.15.2 |
| rosbot_gazebo | 0.15.2 |
| rosbot_hardware_interfaces | 0.15.2 |
| rosbot_joy | 0.15.2 |
| rosbot_localization | 0.15.2 |
| rosbot_utils | 0.15.2 |
README
ROSbot ROS
ROS 2 packages for Husarion ROSbot Series.
📚 ROS API
Documentation is available in ROS_API.md.
🚀 Quick Start
⚙️ Prerequisites
- Install all necessary tools:
   sudo apt-get update
   sudo apt-get install -y python3-pip ros-dev-tools
- Create a workspace folder and clone the rosbot_ros repository:
   mkdir rosbot_ws
   cd rosbot_ws
   git clone -b humble https://github.com/husarion/rosbot_ros.git src/rosbot_ros
Configure environment
The repository is used to run the code both on the real robot and in the simulation. Specify HUSARION_ROS_BUILD_TYPE the variable according to your needs.
Real robot:
export HUSARION_ROS_BUILD_TYPE=hardware
Simulation:
export HUSARION_ROS_BUILD_TYPE=simulation
Build
source /opt/ros/$ROS_DISTRO/setup.bash

vcs import src < src/rosbot_ros/rosbot/rosbot_${HUSARION_ROS_BUILD_TYPE}.repos
vcs import src < src/rosbot_ros/rosbot/manipulator.repos # For ROSbot XL manipulation package

sudo rosdep init
rosdep update --rosdistro $ROS_DISTRO
rosdep install -i --from-path src --rosdistro $ROS_DISTRO -y

colcon build --symlink-install --packages-up-to rosbot --cmake-args -DCMAKE_BUILD_TYPE=Release
Run the Robot
For ROSbot XL, you can specify a particular configuration using the launch configuration argument. If you are using the manipulation configuration, please refer to MANIPULATOR.md for detailed instructions.
Real robot:
source install/setup.bash
ros2 launch rosbot_bringup bringup.launch.py robot_model:=<rosbot/rosbot_xl>
[!NOTE] To run the software on real ROSbots, communication with the CORE2 is required. Ensure the firmware is updated before running the micro-ROS agent. For detailed instructions, refer to the rosbot_ros2_firmware repository.
sudo su
source install/setup.bash
ros2 run rosbot_utils flash_firmware --robot-model <rosbot/rosbot_xl>
exit
Simulation:
source install/setup.bash
ros2 launch rosbot_gazebo simulation.launch.py robot_model:=<rosbot/rosbot_xl>
Launch Arguments
| Symbol | Meaning |
|---|---|
| 🤖 | Available for physical robot |
| 🖥️ | Available in simulation |
| 🤖 | 🖥️ | Argument | Description
Type: Default |
| — | — | ——————- | ————————————————————————————————————————————————————————————————– |
File truncated at 100 lines see the full file
CONTRIBUTING
Developer info and tools
USB-A connection
You can connect with the ROSbot hardware on your own computer. To establish a connection, connect your computer to the robot using a USB-A cable. Then build the code locally and specify via the serial_port argument which processor should be used to establish the connection.
ros2 launch rosbot_bringup bringup.launch.py serial_port:=/dev/ttyUSB0
The hardware checks the connection via USB-A only during initialization and when btn1 or btn2 is pressed, so while executing the above command, hold down the reset button together with bnt1/bnt2 and release the reset button. After establishing a connection, you can release bnt1/bnt2.
pre-commit
pre-commit configuration prepares plenty of tests helping for developing and contributing. Usage:
# install pre-commit
pip install pre-commit

# initialize pre-commit workspace
pre-commit install

# manually run tests
pre-commit run -a
After initialization pre-commit configuration will applied on every commit.
|
|
rosbot_ros repositoryrosbot rosbot_bringup rosbot_controller rosbot_description rosbot_gazebo rosbot_hardware_interfaces rosbot_joy rosbot_localization rosbot_utils |
ROS Distro
|
Repository Summary
| Checkout URI | https://github.com/husarion/rosbot_ros.git |
| VCS Type | git |
| VCS Version | humble |
| Last Updated | 2025-12-09 |
| Dev Status | DEVELOPED |
| Released | UNRELEASED |
| Contributing |
Help Wanted (-)
Good First Issues (-) Pull Requests to Review (-) |
Packages
| Name | Version |
|---|---|
| rosbot | 0.15.2 |
| rosbot_bringup | 0.15.2 |
| rosbot_controller | 0.15.2 |
| rosbot_description | 0.15.2 |
| rosbot_gazebo | 0.15.2 |
| rosbot_hardware_interfaces | 0.15.2 |
| rosbot_joy | 0.15.2 |
| rosbot_localization | 0.15.2 |
| rosbot_utils | 0.15.2 |
README
ROSbot ROS
ROS 2 packages for Husarion ROSbot Series.
📚 ROS API
Documentation is available in ROS_API.md.
🚀 Quick Start
⚙️ Prerequisites
- Install all necessary tools:
   sudo apt-get update
   sudo apt-get install -y python3-pip ros-dev-tools
- Create a workspace folder and clone the rosbot_ros repository:
   mkdir rosbot_ws
   cd rosbot_ws
   git clone -b humble https://github.com/husarion/rosbot_ros.git src/rosbot_ros
Configure environment
The repository is used to run the code both on the real robot and in the simulation. Specify HUSARION_ROS_BUILD_TYPE the variable according to your needs.
Real robot:
export HUSARION_ROS_BUILD_TYPE=hardware
Simulation:
export HUSARION_ROS_BUILD_TYPE=simulation
Build
source /opt/ros/$ROS_DISTRO/setup.bash

vcs import src < src/rosbot_ros/rosbot/rosbot_${HUSARION_ROS_BUILD_TYPE}.repos
vcs import src < src/rosbot_ros/rosbot/manipulator.repos # For ROSbot XL manipulation package

sudo rosdep init
rosdep update --rosdistro $ROS_DISTRO
rosdep install -i --from-path src --rosdistro $ROS_DISTRO -y

colcon build --symlink-install --packages-up-to rosbot --cmake-args -DCMAKE_BUILD_TYPE=Release
Run the Robot
For ROSbot XL, you can specify a particular configuration using the launch configuration argument. If you are using the manipulation configuration, please refer to MANIPULATOR.md for detailed instructions.
Real robot:
source install/setup.bash
ros2 launch rosbot_bringup bringup.launch.py robot_model:=<rosbot/rosbot_xl>
[!NOTE] To run the software on real ROSbots, communication with the CORE2 is required. Ensure the firmware is updated before running the micro-ROS agent. For detailed instructions, refer to the rosbot_ros2_firmware repository.
sudo su
source install/setup.bash
ros2 run rosbot_utils flash_firmware --robot-model <rosbot/rosbot_xl>
exit
Simulation:
source install/setup.bash
ros2 launch rosbot_gazebo simulation.launch.py robot_model:=<rosbot/rosbot_xl>
Launch Arguments
| Symbol | Meaning |
|---|---|
| 🤖 | Available for physical robot |
| 🖥️ | Available in simulation |
| 🤖 | 🖥️ | Argument | Description
Type: Default |
| — | — | ——————- | ————————————————————————————————————————————————————————————————– |
File truncated at 100 lines see the full file
CONTRIBUTING
Developer info and tools
USB-A connection
You can connect with the ROSbot hardware on your own computer. To establish a connection, connect your computer to the robot using a USB-A cable. Then build the code locally and specify via the serial_port argument which processor should be used to establish the connection.
ros2 launch rosbot_bringup bringup.launch.py serial_port:=/dev/ttyUSB0
The hardware checks the connection via USB-A only during initialization and when btn1 or btn2 is pressed, so while executing the above command, hold down the reset button together with bnt1/bnt2 and release the reset button. After establishing a connection, you can release bnt1/bnt2.
pre-commit
pre-commit configuration prepares plenty of tests helping for developing and contributing. Usage:
# install pre-commit
pip install pre-commit

# initialize pre-commit workspace
pre-commit install

# manually run tests
pre-commit run -a
After initialization pre-commit configuration will applied on every commit.
|
|
rosbot_ros repositoryrosbot rosbot_bringup rosbot_controller rosbot_description rosbot_gazebo rosbot_hardware_interfaces rosbot_joy rosbot_localization rosbot_utils |
ROS Distro
|
Repository Summary
| Checkout URI | https://github.com/husarion/rosbot_ros.git |
| VCS Type | git |
| VCS Version | humble |
| Last Updated | 2025-12-09 |
| Dev Status | DEVELOPED |
| Released | UNRELEASED |
| Contributing |
Help Wanted (-)
Good First Issues (-) Pull Requests to Review (-) |
Packages
| Name | Version |
|---|---|
| rosbot | 0.15.2 |
| rosbot_bringup | 0.15.2 |
| rosbot_controller | 0.15.2 |
| rosbot_description | 0.15.2 |
| rosbot_gazebo | 0.15.2 |
| rosbot_hardware_interfaces | 0.15.2 |
| rosbot_joy | 0.15.2 |
| rosbot_localization | 0.15.2 |
| rosbot_utils | 0.15.2 |
README
ROSbot ROS
ROS 2 packages for Husarion ROSbot Series.
📚 ROS API
Documentation is available in ROS_API.md.
🚀 Quick Start
⚙️ Prerequisites
- Install all necessary tools:
   sudo apt-get update
   sudo apt-get install -y python3-pip ros-dev-tools
- Create a workspace folder and clone the rosbot_ros repository:
   mkdir rosbot_ws
   cd rosbot_ws
   git clone -b humble https://github.com/husarion/rosbot_ros.git src/rosbot_ros
Configure environment
The repository is used to run the code both on the real robot and in the simulation. Specify HUSARION_ROS_BUILD_TYPE the variable according to your needs.
Real robot:
export HUSARION_ROS_BUILD_TYPE=hardware
Simulation:
export HUSARION_ROS_BUILD_TYPE=simulation
Build
source /opt/ros/$ROS_DISTRO/setup.bash

vcs import src < src/rosbot_ros/rosbot/rosbot_${HUSARION_ROS_BUILD_TYPE}.repos
vcs import src < src/rosbot_ros/rosbot/manipulator.repos # For ROSbot XL manipulation package

sudo rosdep init
rosdep update --rosdistro $ROS_DISTRO
rosdep install -i --from-path src --rosdistro $ROS_DISTRO -y

colcon build --symlink-install --packages-up-to rosbot --cmake-args -DCMAKE_BUILD_TYPE=Release
Run the Robot
For ROSbot XL, you can specify a particular configuration using the launch configuration argument. If you are using the manipulation configuration, please refer to MANIPULATOR.md for detailed instructions.
Real robot:
source install/setup.bash
ros2 launch rosbot_bringup bringup.launch.py robot_model:=<rosbot/rosbot_xl>
[!NOTE] To run the software on real ROSbots, communication with the CORE2 is required. Ensure the firmware is updated before running the micro-ROS agent. For detailed instructions, refer to the rosbot_ros2_firmware repository.
sudo su
source install/setup.bash
ros2 run rosbot_utils flash_firmware --robot-model <rosbot/rosbot_xl>
exit
Simulation:
source install/setup.bash
ros2 launch rosbot_gazebo simulation.launch.py robot_model:=<rosbot/rosbot_xl>
Launch Arguments
| Symbol | Meaning |
|---|---|
| 🤖 | Available for physical robot |
| 🖥️ | Available in simulation |
| 🤖 | 🖥️ | Argument | Description
Type: Default |
| — | — | ——————- | ————————————————————————————————————————————————————————————————– |
File truncated at 100 lines see the full file
CONTRIBUTING
Developer info and tools
USB-A connection
You can connect with the ROSbot hardware on your own computer. To establish a connection, connect your computer to the robot using a USB-A cable. Then build the code locally and specify via the serial_port argument which processor should be used to establish the connection.
ros2 launch rosbot_bringup bringup.launch.py serial_port:=/dev/ttyUSB0
The hardware checks the connection via USB-A only during initialization and when btn1 or btn2 is pressed, so while executing the above command, hold down the reset button together with bnt1/bnt2 and release the reset button. After establishing a connection, you can release bnt1/bnt2.
pre-commit
pre-commit configuration prepares plenty of tests helping for developing and contributing. Usage:
# install pre-commit
pip install pre-commit

# initialize pre-commit workspace
pre-commit install

# manually run tests
pre-commit run -a
After initialization pre-commit configuration will applied on every commit.
|
|
rosbot_ros repositoryrosbot rosbot_bringup rosbot_controller rosbot_description rosbot_gazebo rosbot_hardware_interfaces rosbot_joy rosbot_localization rosbot_utils |
ROS Distro
|
Repository Summary
| Checkout URI | https://github.com/husarion/rosbot_ros.git |
| VCS Type | git |
| VCS Version | humble |
| Last Updated | 2025-12-09 |
| Dev Status | DEVELOPED |
| Released | UNRELEASED |
| Contributing |
Help Wanted (-)
Good First Issues (-) Pull Requests to Review (-) |
Packages
| Name | Version |
|---|---|
| rosbot | 0.15.2 |
| rosbot_bringup | 0.15.2 |
| rosbot_controller | 0.15.2 |
| rosbot_description | 0.15.2 |
| rosbot_gazebo | 0.15.2 |
| rosbot_hardware_interfaces | 0.15.2 |
| rosbot_joy | 0.15.2 |
| rosbot_localization | 0.15.2 |
| rosbot_utils | 0.15.2 |
README
ROSbot ROS
ROS 2 packages for Husarion ROSbot Series.
📚 ROS API
Documentation is available in ROS_API.md.
🚀 Quick Start
⚙️ Prerequisites
- Install all necessary tools:
   sudo apt-get update
   sudo apt-get install -y python3-pip ros-dev-tools
- Create a workspace folder and clone the rosbot_ros repository:
   mkdir rosbot_ws
   cd rosbot_ws
   git clone -b humble https://github.com/husarion/rosbot_ros.git src/rosbot_ros
Configure environment
The repository is used to run the code both on the real robot and in the simulation. Specify HUSARION_ROS_BUILD_TYPE the variable according to your needs.
Real robot:
export HUSARION_ROS_BUILD_TYPE=hardware
Simulation:
export HUSARION_ROS_BUILD_TYPE=simulation
Build
source /opt/ros/$ROS_DISTRO/setup.bash

vcs import src < src/rosbot_ros/rosbot/rosbot_${HUSARION_ROS_BUILD_TYPE}.repos
vcs import src < src/rosbot_ros/rosbot/manipulator.repos # For ROSbot XL manipulation package

sudo rosdep init
rosdep update --rosdistro $ROS_DISTRO
rosdep install -i --from-path src --rosdistro $ROS_DISTRO -y

colcon build --symlink-install --packages-up-to rosbot --cmake-args -DCMAKE_BUILD_TYPE=Release
Run the Robot
For ROSbot XL, you can specify a particular configuration using the launch configuration argument. If you are using the manipulation configuration, please refer to MANIPULATOR.md for detailed instructions.
Real robot:
source install/setup.bash
ros2 launch rosbot_bringup bringup.launch.py robot_model:=<rosbot/rosbot_xl>
[!NOTE] To run the software on real ROSbots, communication with the CORE2 is required. Ensure the firmware is updated before running the micro-ROS agent. For detailed instructions, refer to the rosbot_ros2_firmware repository.
sudo su
source install/setup.bash
ros2 run rosbot_utils flash_firmware --robot-model <rosbot/rosbot_xl>
exit
Simulation:
source install/setup.bash
ros2 launch rosbot_gazebo simulation.launch.py robot_model:=<rosbot/rosbot_xl>
Launch Arguments
| Symbol | Meaning |
|---|---|
| 🤖 | Available for physical robot |
| 🖥️ | Available in simulation |
| 🤖 | 🖥️ | Argument | Description
Type: Default |
| — | — | ——————- | ————————————————————————————————————————————————————————————————– |
File truncated at 100 lines see the full file
CONTRIBUTING
Developer info and tools
USB-A connection
You can connect with the ROSbot hardware on your own computer. To establish a connection, connect your computer to the robot using a USB-A cable. Then build the code locally and specify via the serial_port argument which processor should be used to establish the connection.
ros2 launch rosbot_bringup bringup.launch.py serial_port:=/dev/ttyUSB0
The hardware checks the connection via USB-A only during initialization and when btn1 or btn2 is pressed, so while executing the above command, hold down the reset button together with bnt1/bnt2 and release the reset button. After establishing a connection, you can release bnt1/bnt2.
pre-commit
pre-commit configuration prepares plenty of tests helping for developing and contributing. Usage:
# install pre-commit
pip install pre-commit

# initialize pre-commit workspace
pre-commit install

# manually run tests
pre-commit run -a
After initialization pre-commit configuration will applied on every commit.
|
|
rosbot_ros repositoryrosbot rosbot_bringup rosbot_controller rosbot_description rosbot_gazebo rosbot_hardware_interfaces rosbot_joy rosbot_localization rosbot_utils |
ROS Distro
|
Repository Summary
| Checkout URI | https://github.com/husarion/rosbot_ros.git |
| VCS Type | git |
| VCS Version | humble |
| Last Updated | 2025-12-09 |
| Dev Status | DEVELOPED |
| Released | UNRELEASED |
| Contributing |
Help Wanted (-)
Good First Issues (-) Pull Requests to Review (-) |
Packages
| Name | Version |
|---|---|
| rosbot | 0.15.2 |
| rosbot_bringup | 0.15.2 |
| rosbot_controller | 0.15.2 |
| rosbot_description | 0.15.2 |
| rosbot_gazebo | 0.15.2 |
| rosbot_hardware_interfaces | 0.15.2 |
| rosbot_joy | 0.15.2 |
| rosbot_localization | 0.15.2 |
| rosbot_utils | 0.15.2 |
README
ROSbot ROS
ROS 2 packages for Husarion ROSbot Series.
📚 ROS API
Documentation is available in ROS_API.md.
🚀 Quick Start
⚙️ Prerequisites
- Install all necessary tools:
   sudo apt-get update
   sudo apt-get install -y python3-pip ros-dev-tools
- Create a workspace folder and clone the rosbot_ros repository:
   mkdir rosbot_ws
   cd rosbot_ws
   git clone -b humble https://github.com/husarion/rosbot_ros.git src/rosbot_ros
Configure environment
The repository is used to run the code both on the real robot and in the simulation. Specify HUSARION_ROS_BUILD_TYPE the variable according to your needs.
Real robot:
export HUSARION_ROS_BUILD_TYPE=hardware
Simulation:
export HUSARION_ROS_BUILD_TYPE=simulation
Build
source /opt/ros/$ROS_DISTRO/setup.bash

vcs import src < src/rosbot_ros/rosbot/rosbot_${HUSARION_ROS_BUILD_TYPE}.repos
vcs import src < src/rosbot_ros/rosbot/manipulator.repos # For ROSbot XL manipulation package

sudo rosdep init
rosdep update --rosdistro $ROS_DISTRO
rosdep install -i --from-path src --rosdistro $ROS_DISTRO -y

colcon build --symlink-install --packages-up-to rosbot --cmake-args -DCMAKE_BUILD_TYPE=Release
Run the Robot
For ROSbot XL, you can specify a particular configuration using the launch configuration argument. If you are using the manipulation configuration, please refer to MANIPULATOR.md for detailed instructions.
Real robot:
source install/setup.bash
ros2 launch rosbot_bringup bringup.launch.py robot_model:=<rosbot/rosbot_xl>
[!NOTE] To run the software on real ROSbots, communication with the CORE2 is required. Ensure the firmware is updated before running the micro-ROS agent. For detailed instructions, refer to the rosbot_ros2_firmware repository.
sudo su
source install/setup.bash
ros2 run rosbot_utils flash_firmware --robot-model <rosbot/rosbot_xl>
exit
Simulation:
source install/setup.bash
ros2 launch rosbot_gazebo simulation.launch.py robot_model:=<rosbot/rosbot_xl>
Launch Arguments
| Symbol | Meaning |
|---|---|
| 🤖 | Available for physical robot |
| 🖥️ | Available in simulation |
| 🤖 | 🖥️ | Argument | Description
Type: Default |
| — | — | ——————- | ————————————————————————————————————————————————————————————————– |
File truncated at 100 lines see the full file
CONTRIBUTING
Developer info and tools
USB-A connection
You can connect with the ROSbot hardware on your own computer. To establish a connection, connect your computer to the robot using a USB-A cable. Then build the code locally and specify via the serial_port argument which processor should be used to establish the connection.
ros2 launch rosbot_bringup bringup.launch.py serial_port:=/dev/ttyUSB0
The hardware checks the connection via USB-A only during initialization and when btn1 or btn2 is pressed, so while executing the above command, hold down the reset button together with bnt1/bnt2 and release the reset button. After establishing a connection, you can release bnt1/bnt2.
pre-commit
pre-commit configuration prepares plenty of tests helping for developing and contributing. Usage:
# install pre-commit
pip install pre-commit

# initialize pre-commit workspace
pre-commit install

# manually run tests
pre-commit run -a
After initialization pre-commit configuration will applied on every commit.
|
|
rosbot_ros repositoryrosbot rosbot_bringup rosbot_controller rosbot_description rosbot_gazebo rosbot_hardware_interfaces rosbot_joy rosbot_localization rosbot_utils |
ROS Distro
|
Repository Summary
| Checkout URI | https://github.com/husarion/rosbot_ros.git |
| VCS Type | git |
| VCS Version | humble |
| Last Updated | 2025-12-09 |
| Dev Status | DEVELOPED |
| Released | UNRELEASED |
| Contributing |
Help Wanted (-)
Good First Issues (-) Pull Requests to Review (-) |
Packages
| Name | Version |
|---|---|
| rosbot | 0.15.2 |
| rosbot_bringup | 0.15.2 |
| rosbot_controller | 0.15.2 |
| rosbot_description | 0.15.2 |
| rosbot_gazebo | 0.15.2 |
| rosbot_hardware_interfaces | 0.15.2 |
| rosbot_joy | 0.15.2 |
| rosbot_localization | 0.15.2 |
| rosbot_utils | 0.15.2 |
README
ROSbot ROS
ROS 2 packages for Husarion ROSbot Series.
📚 ROS API
Documentation is available in ROS_API.md.
🚀 Quick Start
⚙️ Prerequisites
- Install all necessary tools:
   sudo apt-get update
   sudo apt-get install -y python3-pip ros-dev-tools
- Create a workspace folder and clone the rosbot_ros repository:
   mkdir rosbot_ws
   cd rosbot_ws
   git clone -b humble https://github.com/husarion/rosbot_ros.git src/rosbot_ros
Configure environment
The repository is used to run the code both on the real robot and in the simulation. Specify HUSARION_ROS_BUILD_TYPE the variable according to your needs.
Real robot:
export HUSARION_ROS_BUILD_TYPE=hardware
Simulation:
export HUSARION_ROS_BUILD_TYPE=simulation
Build
source /opt/ros/$ROS_DISTRO/setup.bash

vcs import src < src/rosbot_ros/rosbot/rosbot_${HUSARION_ROS_BUILD_TYPE}.repos
vcs import src < src/rosbot_ros/rosbot/manipulator.repos # For ROSbot XL manipulation package

sudo rosdep init
rosdep update --rosdistro $ROS_DISTRO
rosdep install -i --from-path src --rosdistro $ROS_DISTRO -y

colcon build --symlink-install --packages-up-to rosbot --cmake-args -DCMAKE_BUILD_TYPE=Release
Run the Robot
For ROSbot XL, you can specify a particular configuration using the launch configuration argument. If you are using the manipulation configuration, please refer to MANIPULATOR.md for detailed instructions.
Real robot:
source install/setup.bash
ros2 launch rosbot_bringup bringup.launch.py robot_model:=<rosbot/rosbot_xl>
[!NOTE] To run the software on real ROSbots, communication with the CORE2 is required. Ensure the firmware is updated before running the micro-ROS agent. For detailed instructions, refer to the rosbot_ros2_firmware repository.
sudo su
source install/setup.bash
ros2 run rosbot_utils flash_firmware --robot-model <rosbot/rosbot_xl>
exit
Simulation:
source install/setup.bash
ros2 launch rosbot_gazebo simulation.launch.py robot_model:=<rosbot/rosbot_xl>
Launch Arguments
| Symbol | Meaning |
|---|---|
| 🤖 | Available for physical robot |
| 🖥️ | Available in simulation |
| 🤖 | 🖥️ | Argument | Description
Type: Default |
| — | — | ——————- | ————————————————————————————————————————————————————————————————– |
File truncated at 100 lines see the full file
CONTRIBUTING
Developer info and tools
USB-A connection
You can connect with the ROSbot hardware on your own computer. To establish a connection, connect your computer to the robot using a USB-A cable. Then build the code locally and specify via the serial_port argument which processor should be used to establish the connection.
ros2 launch rosbot_bringup bringup.launch.py serial_port:=/dev/ttyUSB0
The hardware checks the connection via USB-A only during initialization and when btn1 or btn2 is pressed, so while executing the above command, hold down the reset button together with bnt1/bnt2 and release the reset button. After establishing a connection, you can release bnt1/bnt2.
pre-commit
pre-commit configuration prepares plenty of tests helping for developing and contributing. Usage:
# install pre-commit
pip install pre-commit

# initialize pre-commit workspace
pre-commit install

# manually run tests
pre-commit run -a
After initialization pre-commit configuration will applied on every commit.