
Repository Summary
| Checkout URI | https://github.com/CIR-KIT/remote_monitor.git |
| VCS Type | git |
| VCS Version | indigo-devel |
| Last Updated | 2016-12-23 |
| Dev Status | MAINTAINED |
| Released | UNRELEASED |
| Contributing |
Help Wanted (-)
Good First Issues (-) Pull Requests to Review (-) |
Packages
| Name | Version |
|---|---|
| remote_monitor | 0.1.0 |
README
remote_monitor 

Remote monitoring package for navigation
Demo Video
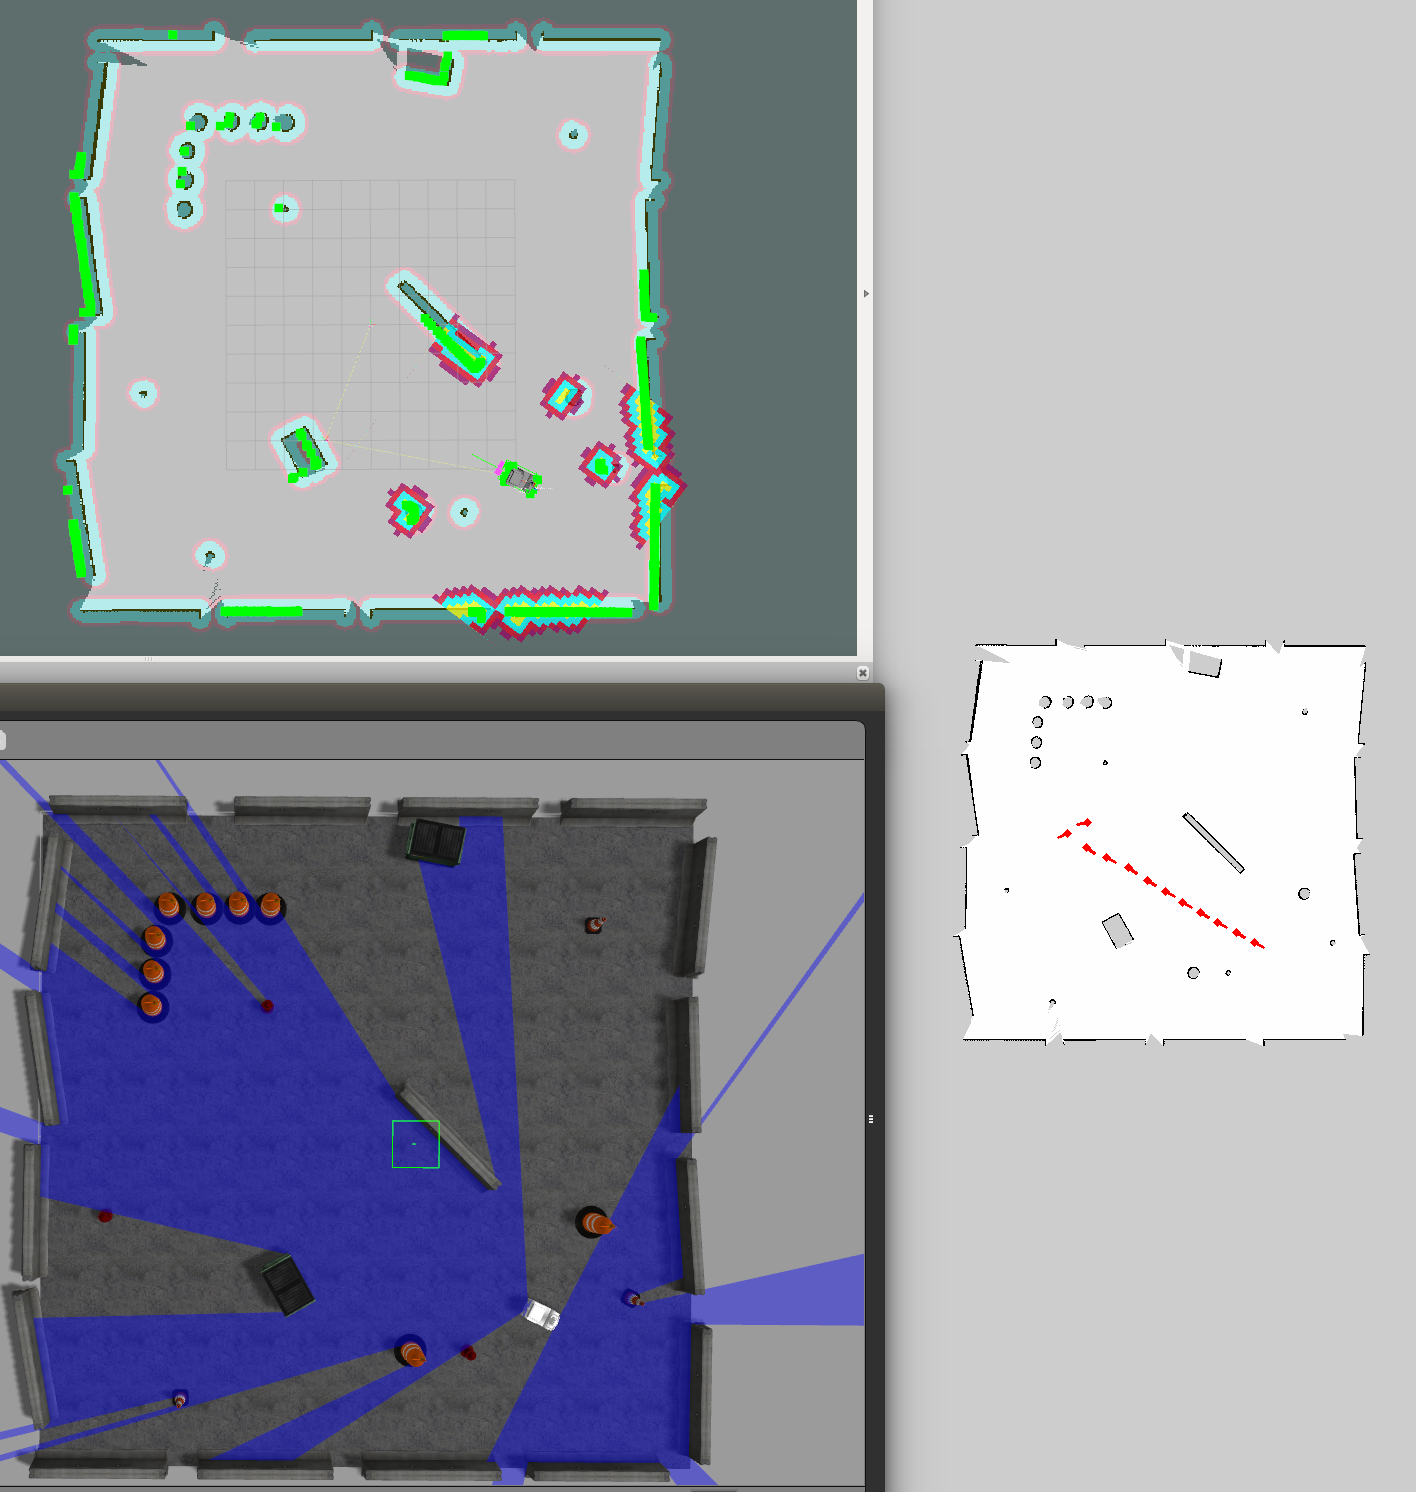
下記のコマンドで上記動画のように遊べるはずです
$ roslaunch cirkit_unit03_navigation_gazebo autorun.launch
$ roslaunch remote_monitor remote_monitor_server.launch gazebo:=true map_yaml:=playpen_map.yaml
$ roslaunch remote_monitor remote_monitor_client.launch
Nodes
monitor_server
- 遠隔監視PC側
node.serviceで受信した位置と姿勢を地図上に表示させる
monitor_client
- 移動ロボット側
node.一定距離毎に現在位置と姿勢をserviceで送信する. - デフォルトでは
/amcl_poseをsubscribeする.
Installation
以下のコマンドにしたがってインストールしてください.
なお<catkin_ws>は,任意のcatkinizeされたワークスペースへのパスを表します.
$ cd <catkin_ws>/src
$ git clone https://github.com/CIR-KIT/remote_monitor.git
$ cd <catkin_ws>
$ wstool init src
$ wstool merge -t src src/remote_monitor/remote_monitor.rosinstall
$ wstool update -t src
$ rosdep update && rosdep install -r -y --from-paths src --ignore-src
$ catkin_make
$ source devel/setup.bash
How to launch
service server
- 地図の在処として,下記のパッケージ配下のフォルダを見に行きます.
- $(find cirkit_unit03_maps)/map/`
-
地図名は引数で指定して下さい.
- 実機の場合のコマンド
$ roslaunch remote_monitor remote_monitor_server.launch map_yaml:=hogehoge.yaml
-
Gazeboの場合のコマンド
$ roslaunch remote_monitor remote_monitor_server_gazebo.launch map_yaml:=hogehoge.yaml
service client
1. サーバー側のグローバルIPを設定する.
-
まずサーバ側の人にグローバルIPを聞く
-
以下の容量で設定ファイルに反映させる.
$ cd /etc/openvpn
$ emacs client.conf
# 省略

# グローバルIPアドレスを指定する.
remote 101.102.103.xxx 1194

# 省略
2. OpenVPNを再起動する.
$ service openvpn restart
3. ネットワークを確認する.
$ ifconfig
- 下記のような
tunデバイスが表示される.少し時間がかかる場合がある.
tun0      Link encap:不明なネット  ハードウェアアドレス 00-00-00-00-00-00-00-00-00-00-00-00-00-00-00-00
          inetアドレス:10.8.0.6  P-t-P:10.8.0.5  マスク:255.255.255.255
          UP POINTOPOINT RUNNING NOARP MULTICAST  MTU:1500  メトリック:1
          RXパケット:0 エラー:0 損失:0 オーバラン:0 フレーム:0
          TXパケット:12 エラー:0 損失:0 オーバラン:0 キャリア:0
          衝突(Collisions):0 TXキュー長:100
          RXバイト:2892 (2.8 KB)  TXバイト:504 (504.0 KB)
- そしてサーバにping
File truncated at 100 lines see the full file
CONTRIBUTING
Repository Summary
| Checkout URI | https://github.com/CIR-KIT/remote_monitor.git |
| VCS Type | git |
| VCS Version | indigo-devel |
| Last Updated | 2016-12-23 |
| Dev Status | MAINTAINED |
| Released | UNRELEASED |
| Contributing |
Help Wanted (-)
Good First Issues (-) Pull Requests to Review (-) |
Packages
| Name | Version |
|---|---|
| remote_monitor | 0.1.0 |
README
remote_monitor
Remote monitoring package for navigation
Demo Video
下記のコマンドで上記動画のように遊べるはずです
$ roslaunch cirkit_unit03_navigation_gazebo autorun.launch
$ roslaunch remote_monitor remote_monitor_server.launch gazebo:=true map_yaml:=playpen_map.yaml
$ roslaunch remote_monitor remote_monitor_client.launch
Nodes
monitor_server
- 遠隔監視PC側
node.serviceで受信した位置と姿勢を地図上に表示させる
monitor_client
- 移動ロボット側
node.一定距離毎に現在位置と姿勢をserviceで送信する. - デフォルトでは
/amcl_poseをsubscribeする.
Installation
以下のコマンドにしたがってインストールしてください.
なお<catkin_ws>は,任意のcatkinizeされたワークスペースへのパスを表します.
$ cd <catkin_ws>/src
$ git clone https://github.com/CIR-KIT/remote_monitor.git
$ cd <catkin_ws>
$ wstool init src
$ wstool merge -t src src/remote_monitor/remote_monitor.rosinstall
$ wstool update -t src
$ rosdep update && rosdep install -r -y --from-paths src --ignore-src
$ catkin_make
$ source devel/setup.bash
How to launch
service server
- 地図の在処として,下記のパッケージ配下のフォルダを見に行きます.
- $(find cirkit_unit03_maps)/map/`
-
地図名は引数で指定して下さい.
- 実機の場合のコマンド
$ roslaunch remote_monitor remote_monitor_server.launch map_yaml:=hogehoge.yaml
-
Gazeboの場合のコマンド
$ roslaunch remote_monitor remote_monitor_server_gazebo.launch map_yaml:=hogehoge.yaml
service client
1. サーバー側のグローバルIPを設定する.
-
まずサーバ側の人にグローバルIPを聞く
-
以下の容量で設定ファイルに反映させる.
$ cd /etc/openvpn
$ emacs client.conf
# 省略

# グローバルIPアドレスを指定する.
remote 101.102.103.xxx 1194

# 省略
2. OpenVPNを再起動する.
$ service openvpn restart
3. ネットワークを確認する.
$ ifconfig
- 下記のような
tunデバイスが表示される.少し時間がかかる場合がある.
tun0      Link encap:不明なネット  ハードウェアアドレス 00-00-00-00-00-00-00-00-00-00-00-00-00-00-00-00
          inetアドレス:10.8.0.6  P-t-P:10.8.0.5  マスク:255.255.255.255
          UP POINTOPOINT RUNNING NOARP MULTICAST  MTU:1500  メトリック:1
          RXパケット:0 エラー:0 損失:0 オーバラン:0 フレーム:0
          TXパケット:12 エラー:0 損失:0 オーバラン:0 キャリア:0
          衝突(Collisions):0 TXキュー長:100
          RXバイト:2892 (2.8 KB)  TXバイト:504 (504.0 KB)
- そしてサーバにping
File truncated at 100 lines see the full file