
|
melfa_robot repositorymelfa_description melfa_driver melfa_robot rv4fl_moveit_config rv7fl_moveit_config |
|
|
Repository Summary
| Checkout URI | https://github.com/tork-a/melfa_robot.git |
| VCS Type | git |
| VCS Version | master |
| Last Updated | 2019-02-26 |
| Dev Status | DEVELOPED |
| Released | RELEASED |
| Tags | No category tags. |
| Contributing |
Help Wanted (-)
Good First Issues (-) Pull Requests to Review (-) |
Packages
| Name | Version |
|---|---|
| melfa_description | 0.0.4 |
| melfa_driver | 0.0.4 |
| melfa_robot | 0.0.4 |
| rv4fl_moveit_config | 0.0.4 |
| rv7fl_moveit_config | 0.0.4 |
README
melfa_robot 
This package is to control the MELFA’s robot arms using ROS.
Supported hardware
Robot controllers
Currently melfa_driver is checked with the following MELFA robot
controller.
 CR750-Q
Robot arms
Currently melfa_description contains the models of following MELFA robots.
 RV4FL
RV4FL
 RV7FL
RV7FL
How to Install
Use apt to install the packages.
apt install ros-kinetic-melfa-robot
Quick start with the loop back node
melfa_driver/melfa_driver_node is the controller node, providing
hardware_interface::RobotHW. This controller communicates with the
actual robot controller, or the simulator named RT Toolbox3 on
Windows via Ethernet(TCP/IP).
In case that you don’t have both of the controller and simulator, the
package contains the loop-back(dummy) node mimicking the robot
controller. It is melfa_driver/melfa_loopback_node. This node set
the current joint angle identical to commanded value, and return them
as current state.
When you want to use the loopback node, launch the system as:
$ roslaunch melfa_driver melfa_driver.launch loopback:=true
Go to the section to check it works.
Quick start with the RT ToolBox3
If you have RT ToolBox 3, the optional software of MELFA robot, you
can use this package with it in the simulation mode.
You have to place your ROS PC and RT ToolBox3 (Windows) PC in the same network.
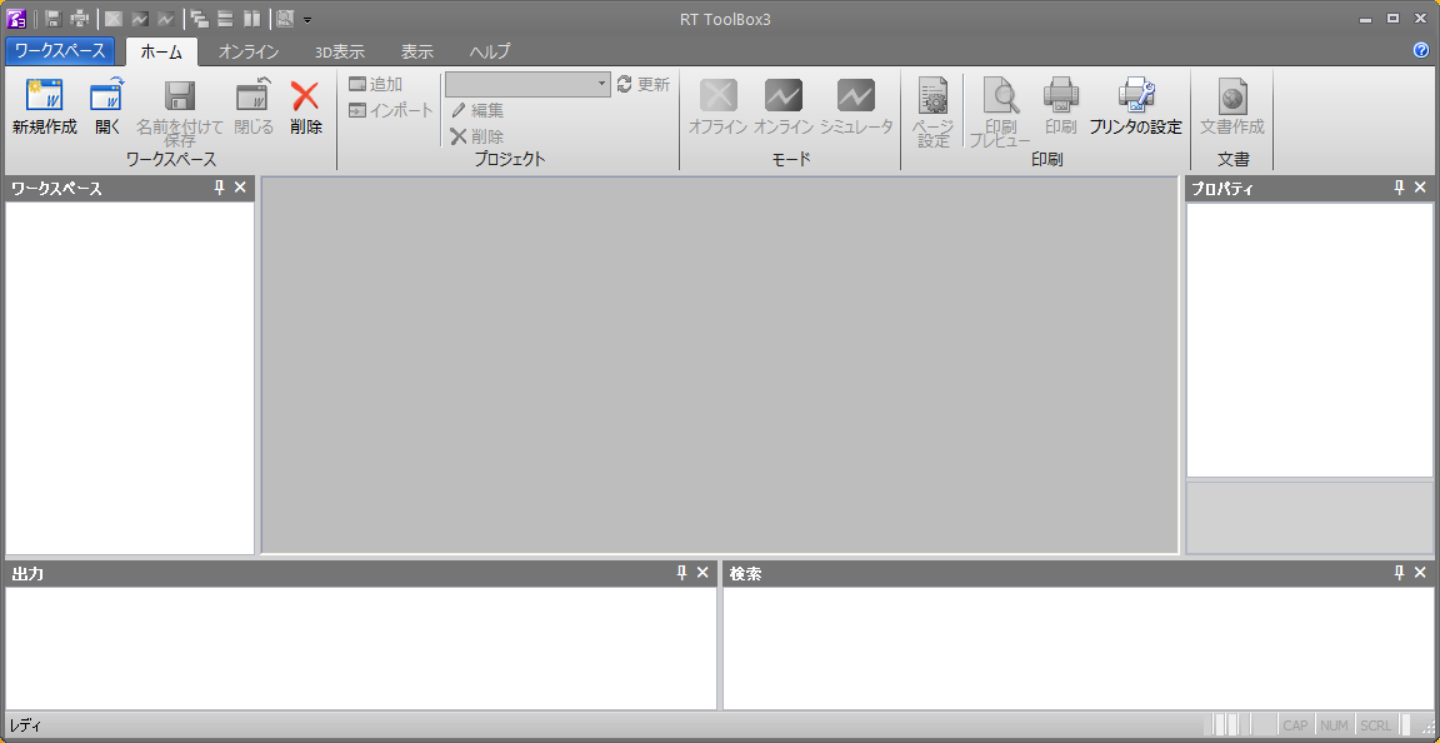
Run RT ToolBox3
Bring up the RT Toolbox3 by double clicking. You would see the screen like this:
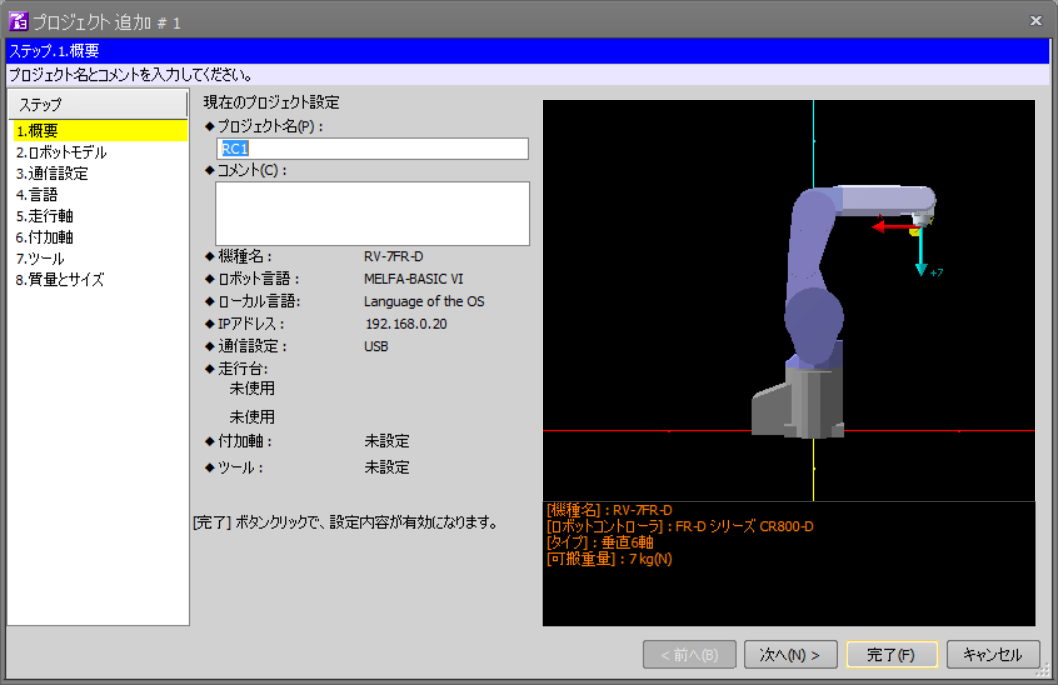
Create a new project file (need only once)
By pressing New button to create a new project file. In the
following wizard screen, push Next.
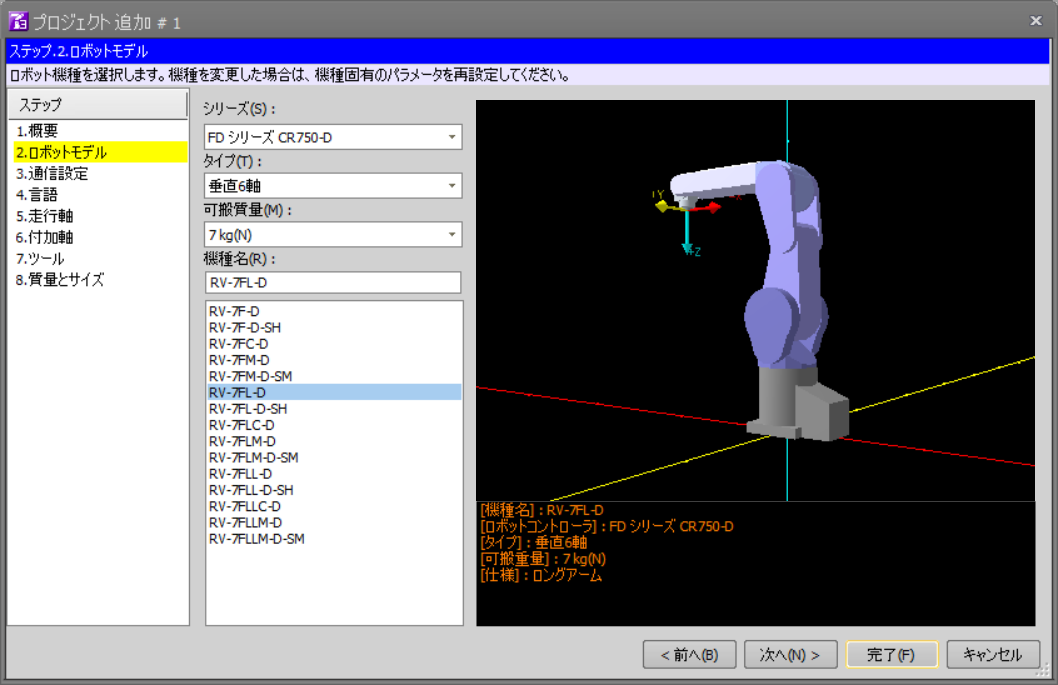
In 2. Robot Model, choose your robot. In this case, we choose FD
Series CR750-D and RV-7FL-D. Push Next button.
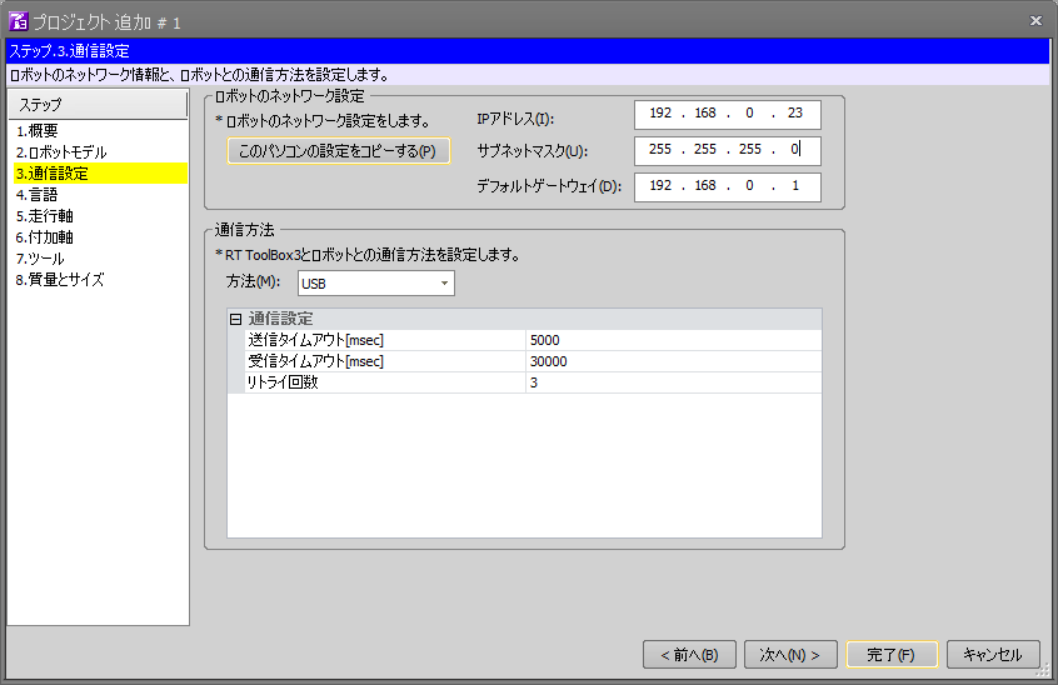
In 3. Communication, enter the IP address and gateway address of the
Windows PC. Just using Copy the setting of this machine will
work. In this example, 192.168.0.23 is the address of the Windows
PC.
Program for real-time external control
The ROS package expects the controller is running in Real time
external control mode, which receive the continuous TCP/IP packet
from external machine. You have to create a program file in the
Program folder in the Workspace.
Open "ENET:192.168.0.12" As #1
Mxt 1,1
End
In this example, 192.168.0.12 is the IP address of ROS PC. Make sure
File truncated at 100 lines see the full file